
What are app alerts?
App alerts are a great way of getting users to do you need them to do within the app. In this article, we will take a closer look at how you do this and ways that you can use it.
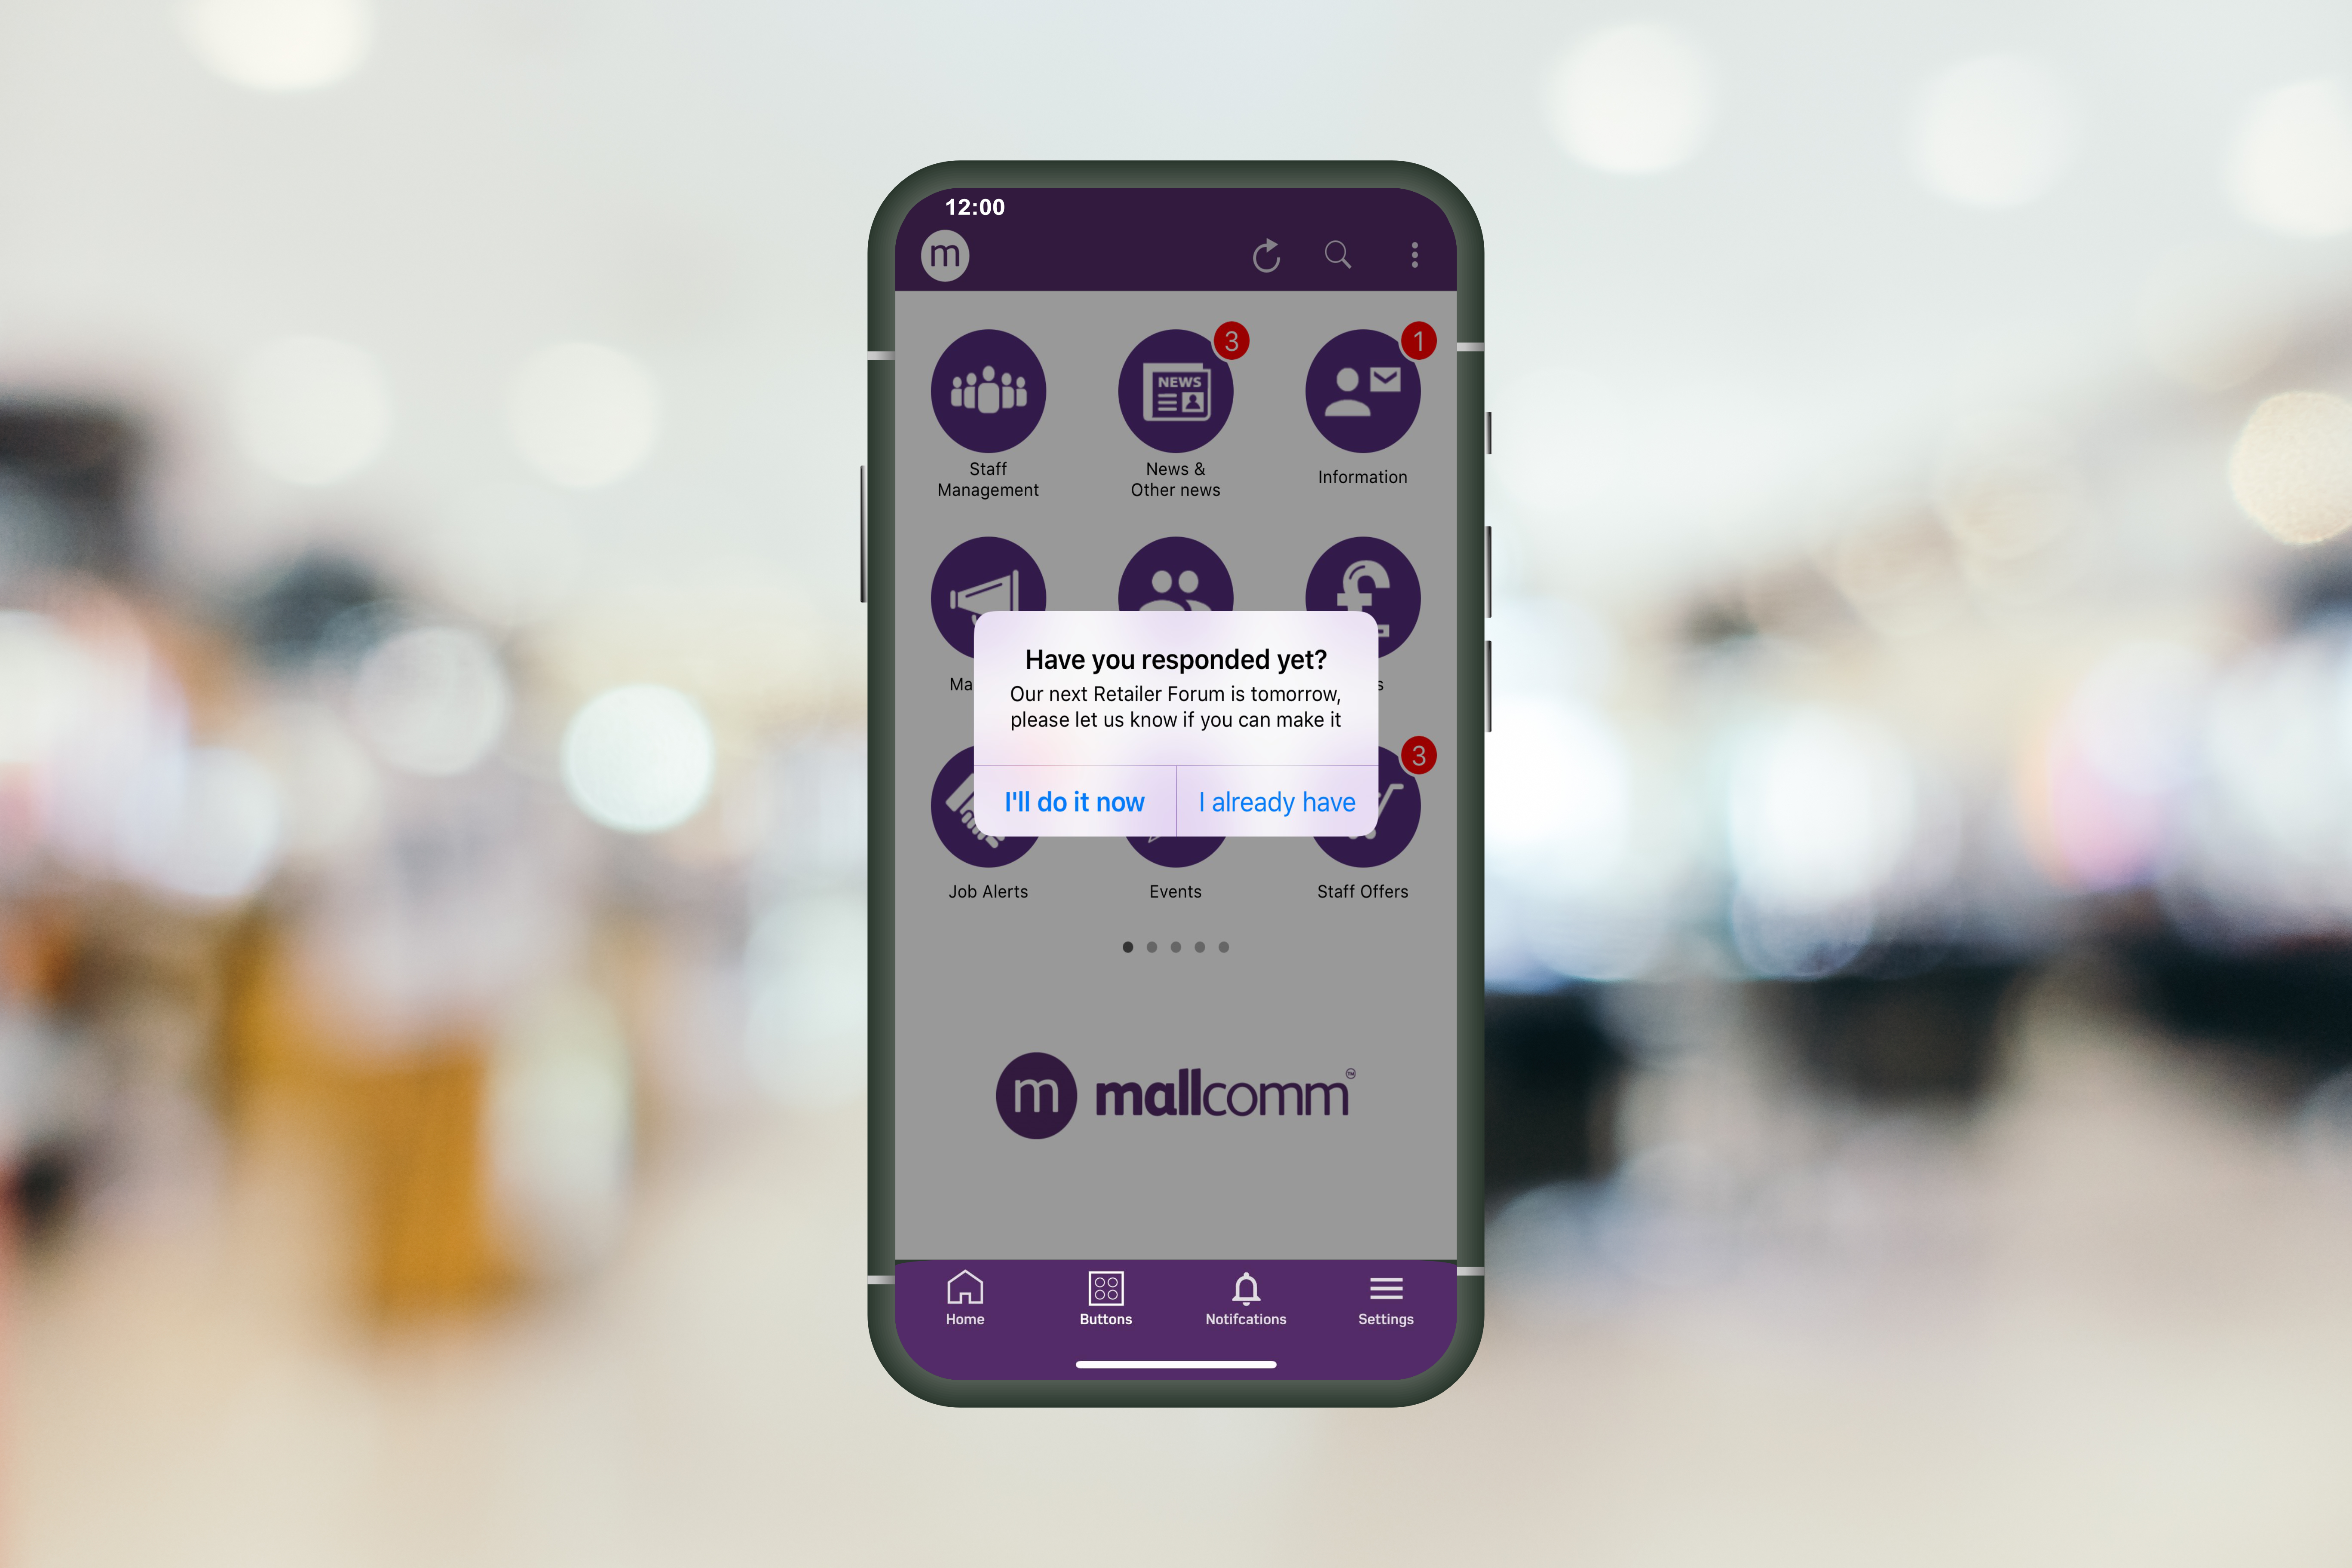
By adding an app alert you are creating a pop up in the user's app that will take them to read a specific item or go to a button that you set. The alert will be live in the app during the dates you set in the scheduling and will appear to all users once if they are part of the selected access level.
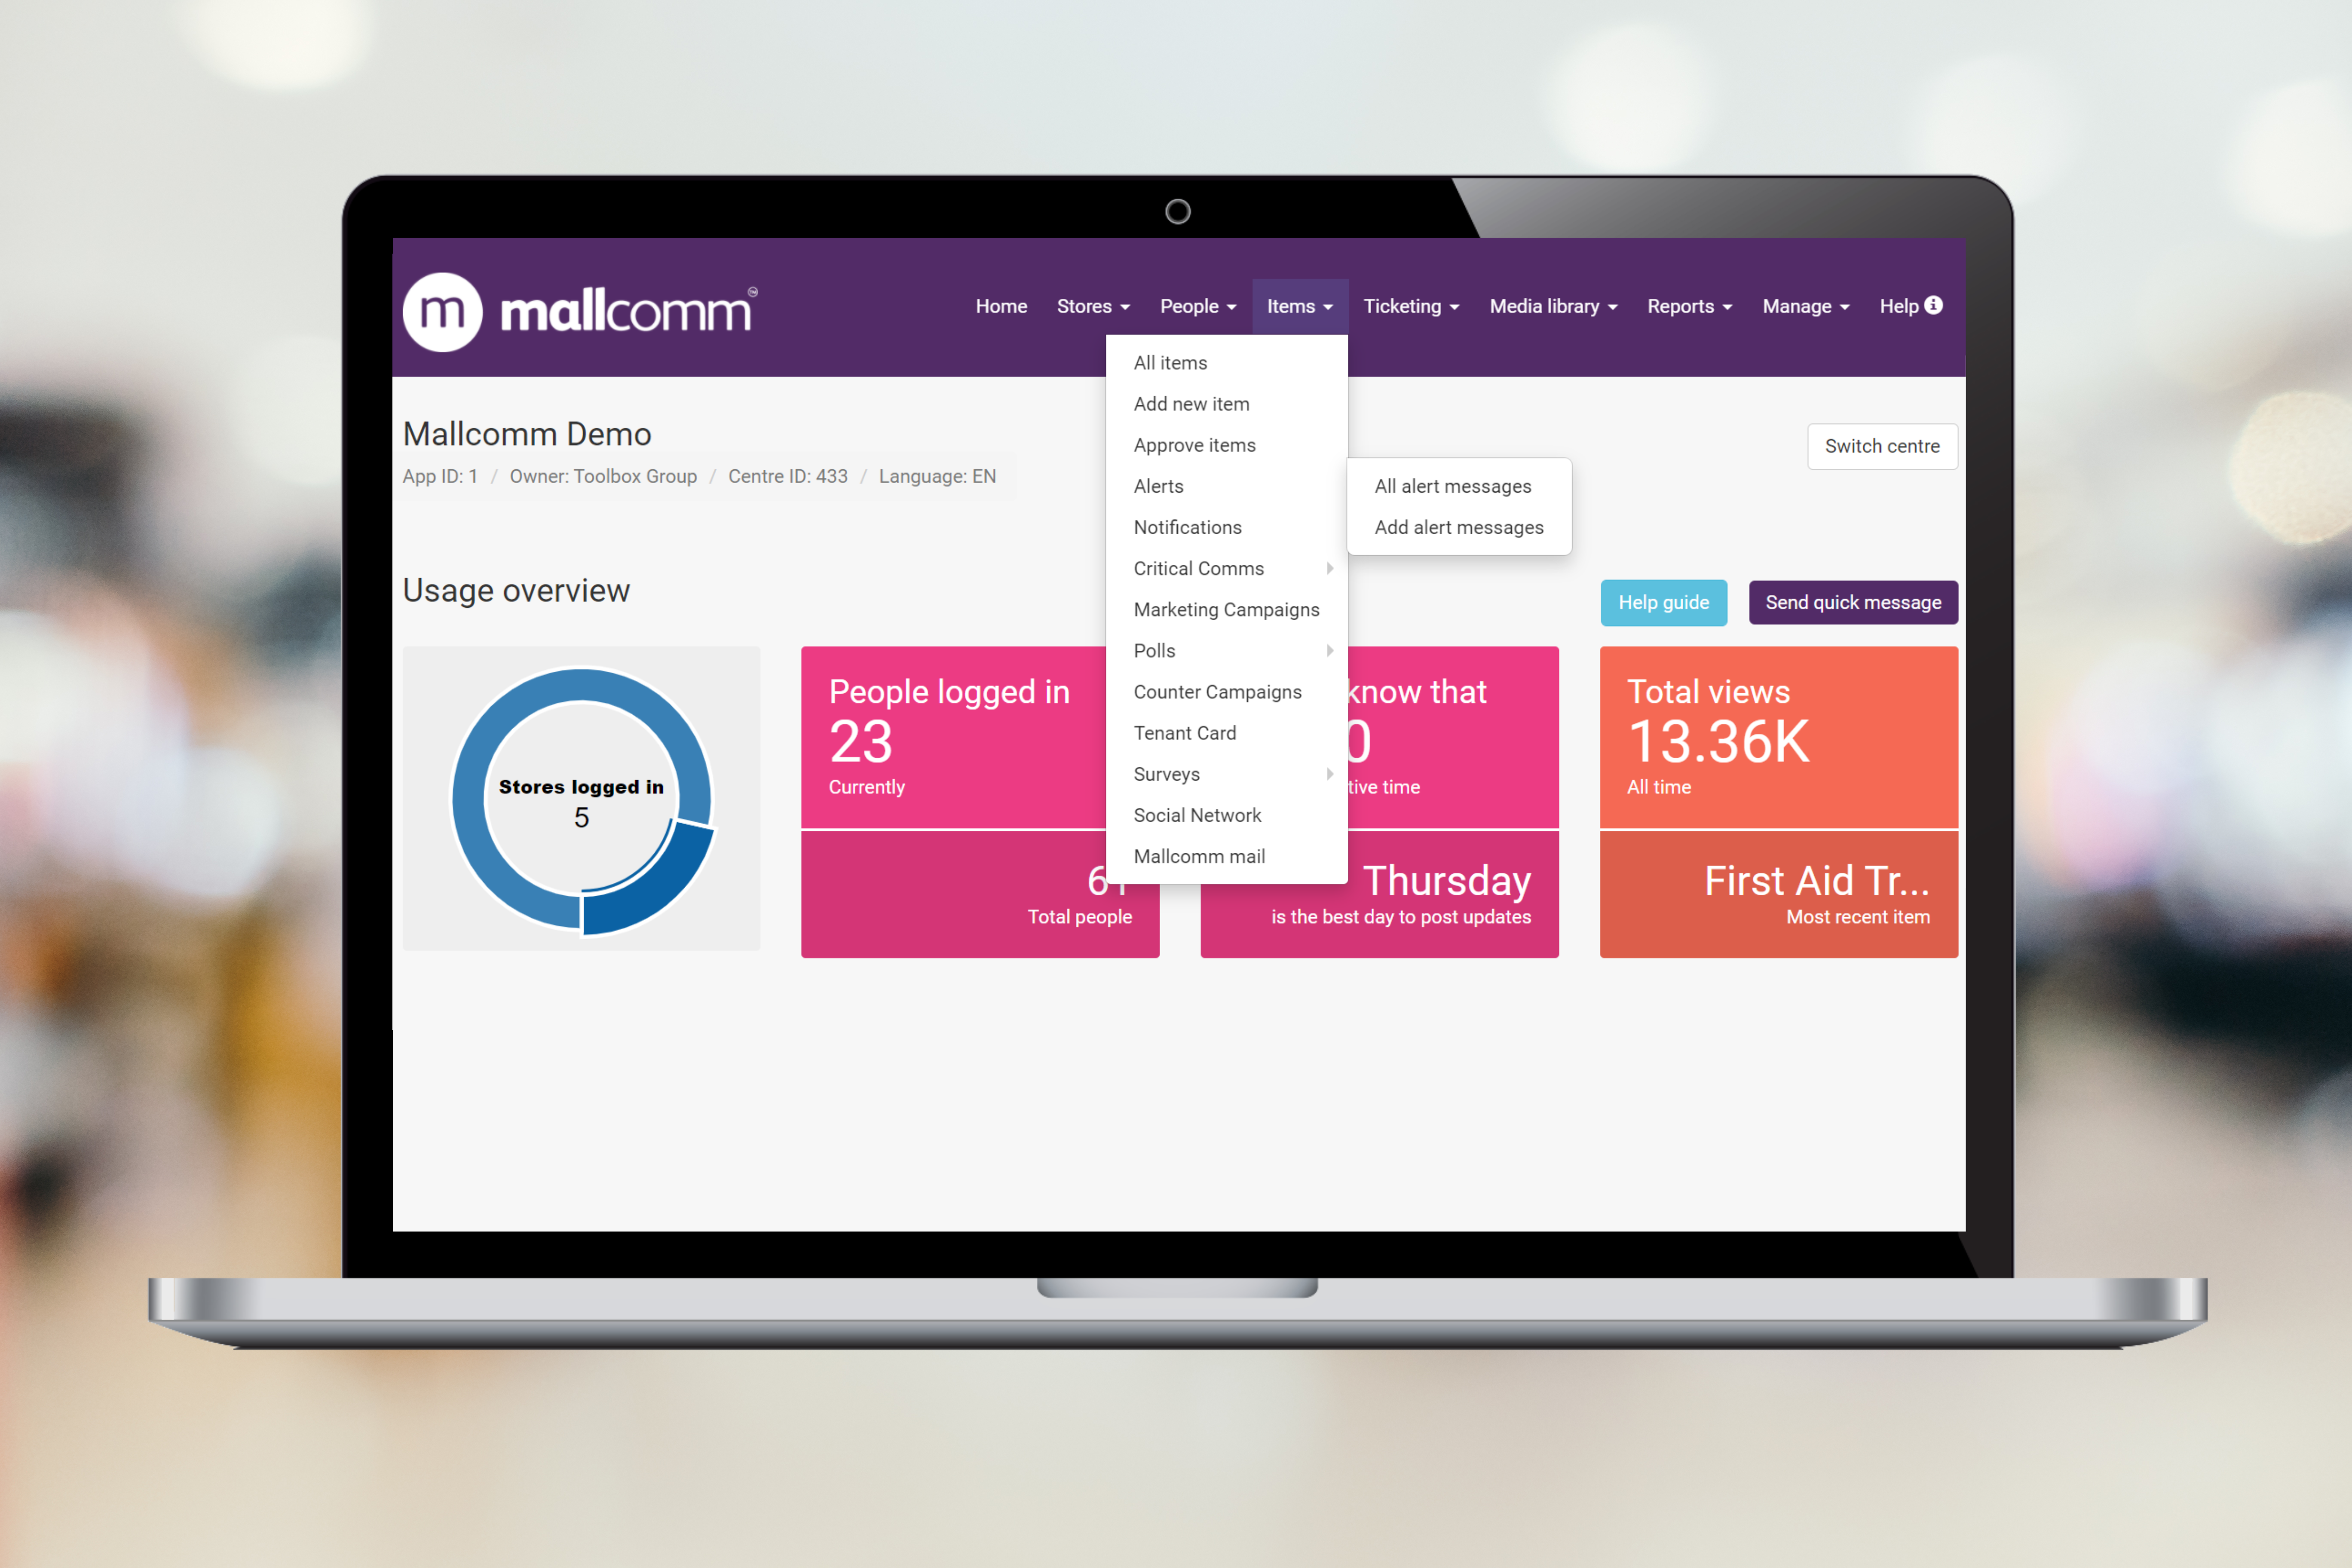
To send an alert you will need to select Add Alert Message from the items dropdown in the top navigations bar.
Creating your app alert
- Start off by deciding which type of notification you want to send, while 'text' is more common, sending an image that when you click on it takes you to a certain part of the app can also be a fun way of introducing marketing content.
- If you have selected text, you can then write your message, this will appear as the pop-up message on the user's phone.

- Select your action. There are a few to choose from, but the most common would be to view an item, which goes to a specific item, or View Category, which will take the user to a specific button.
Once you have selected your actions, a new field will appear underneath if applicable, such as go-to category or view an item, this is where you will be able to select exactly where it will go. Remember you can use the search box to filter and make what you need easier to find.
- Select your access level. By default, this will be based on the access level of the item or button you have chosen, but you can drill down further within that if you like.

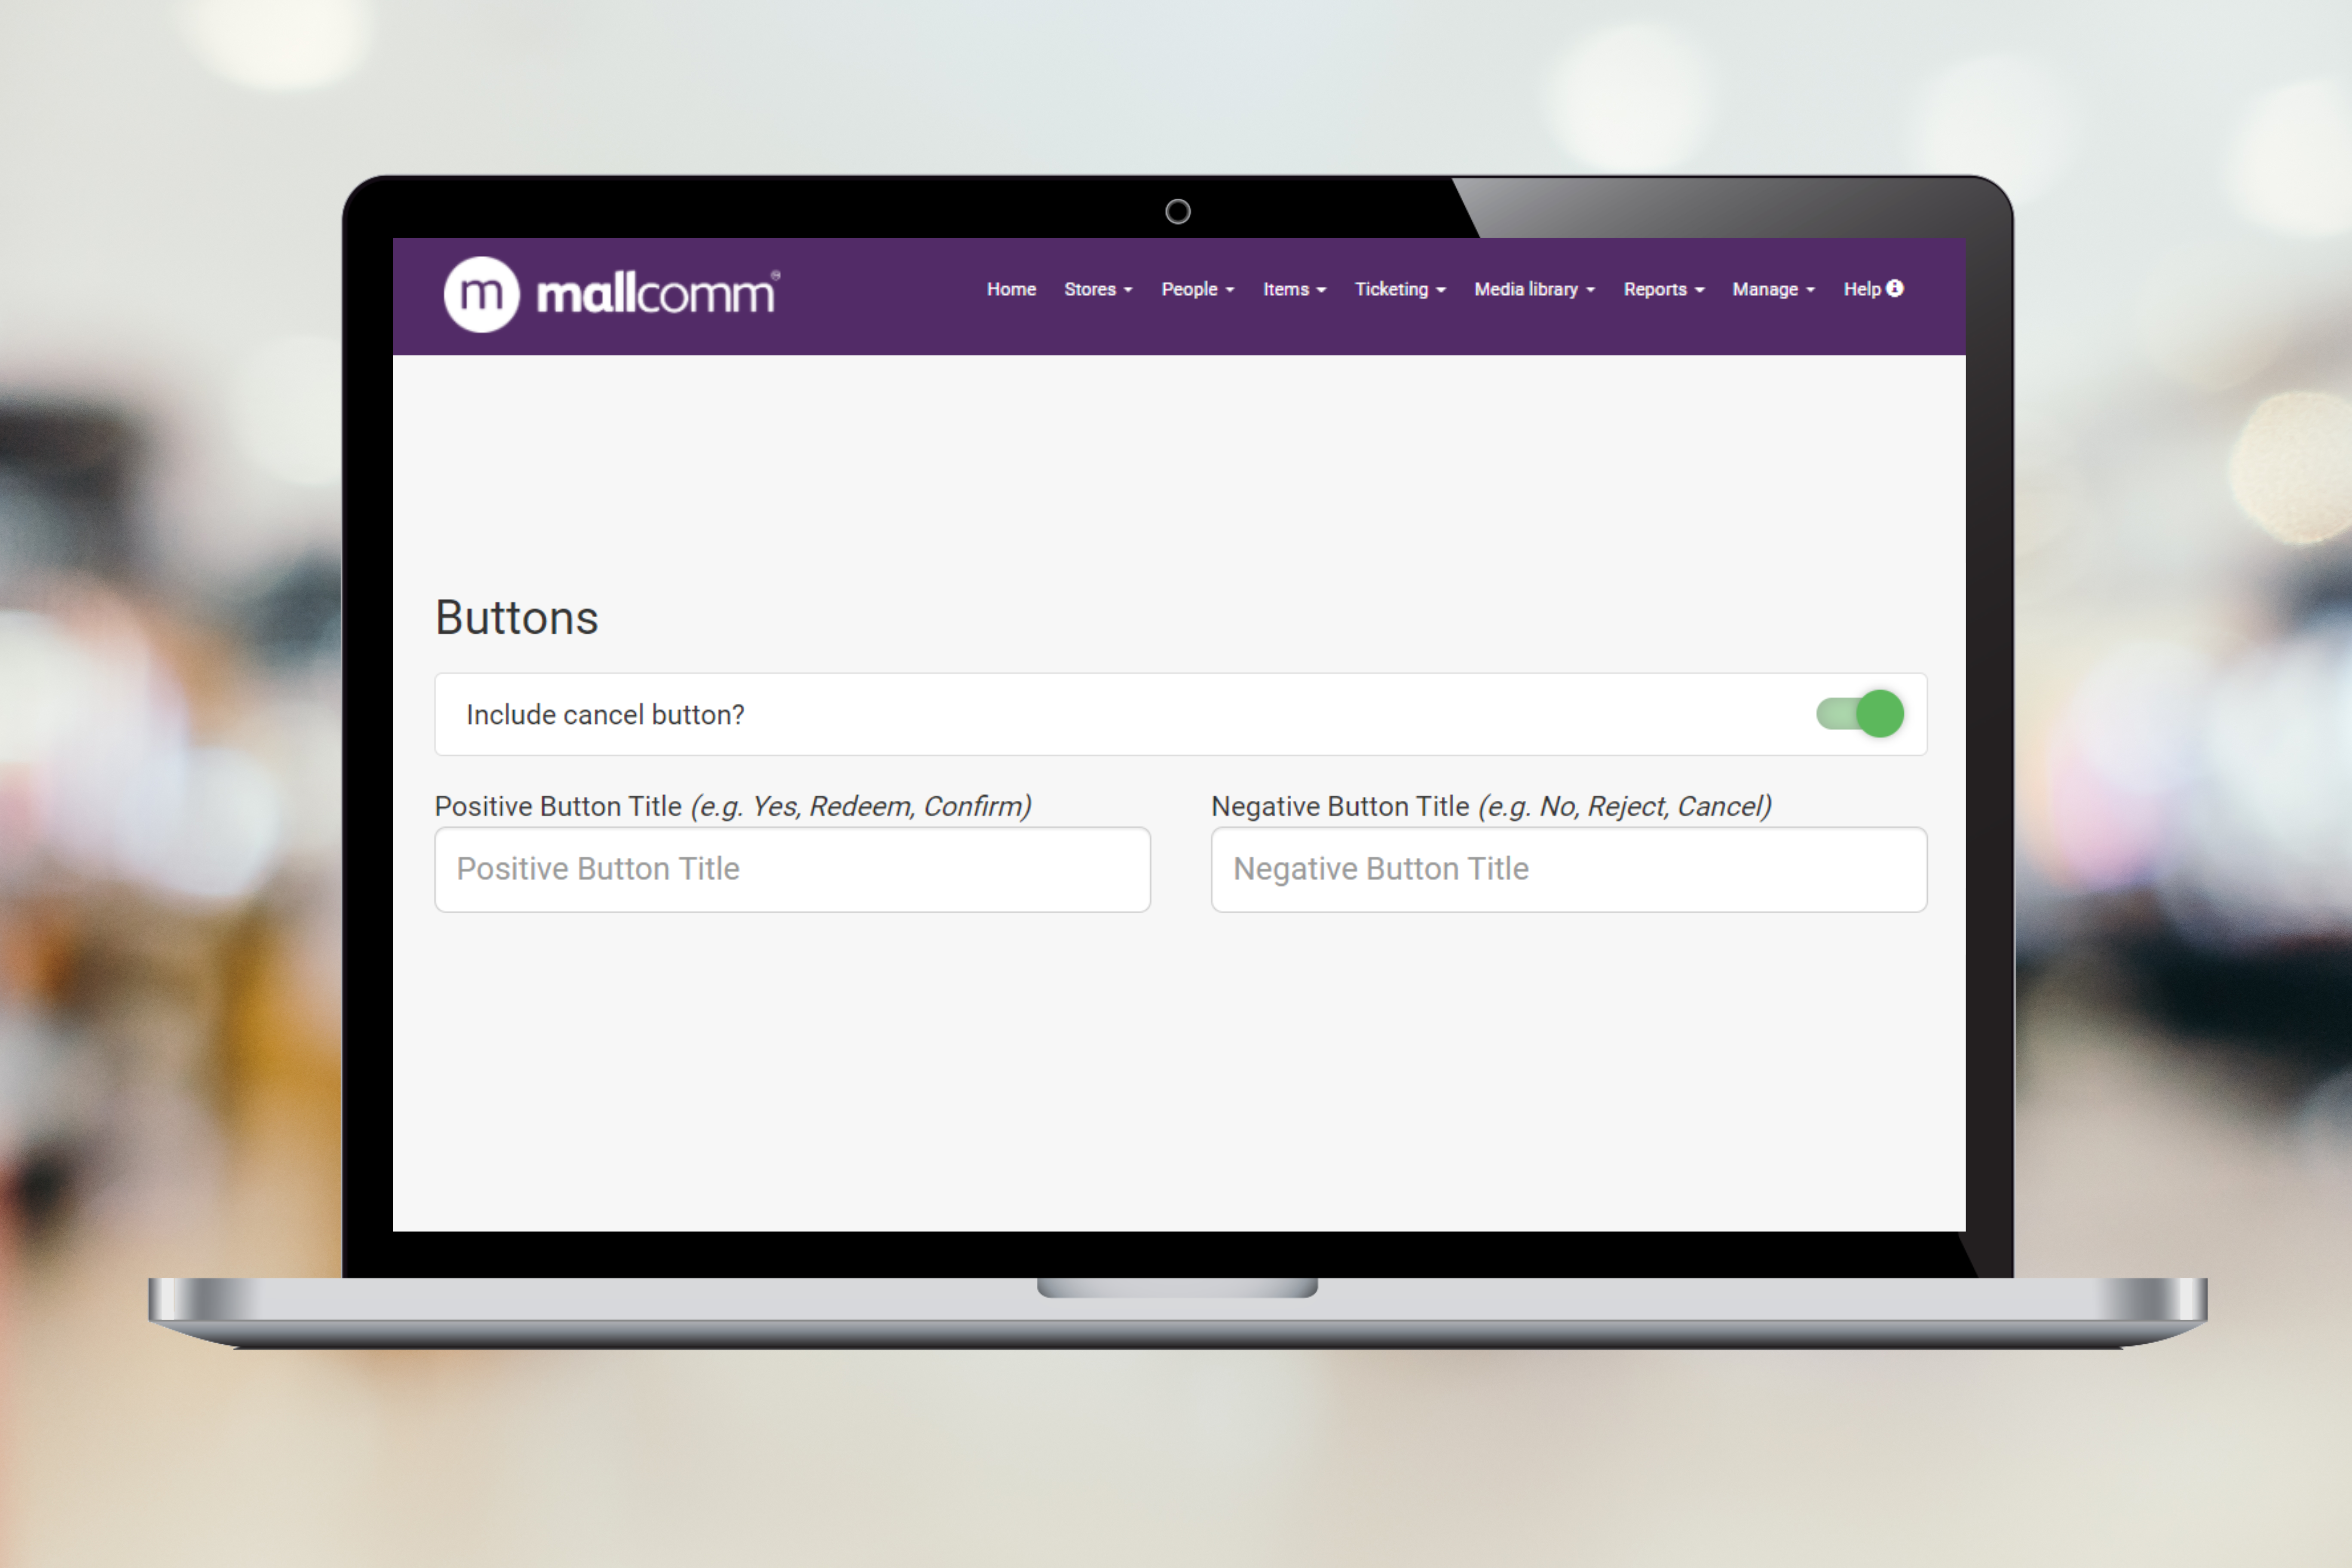
- Add your buttons. You must have a positive button to be able to add your app alert, this is what will make the action happen. You can name it what you like such as OK or tell me more. If you like, you can also add a cancel button, toggled by the slider. If you have this turned on then you have to add a name before you can send your app alert. This button will dismiss the notification with no action being performed.
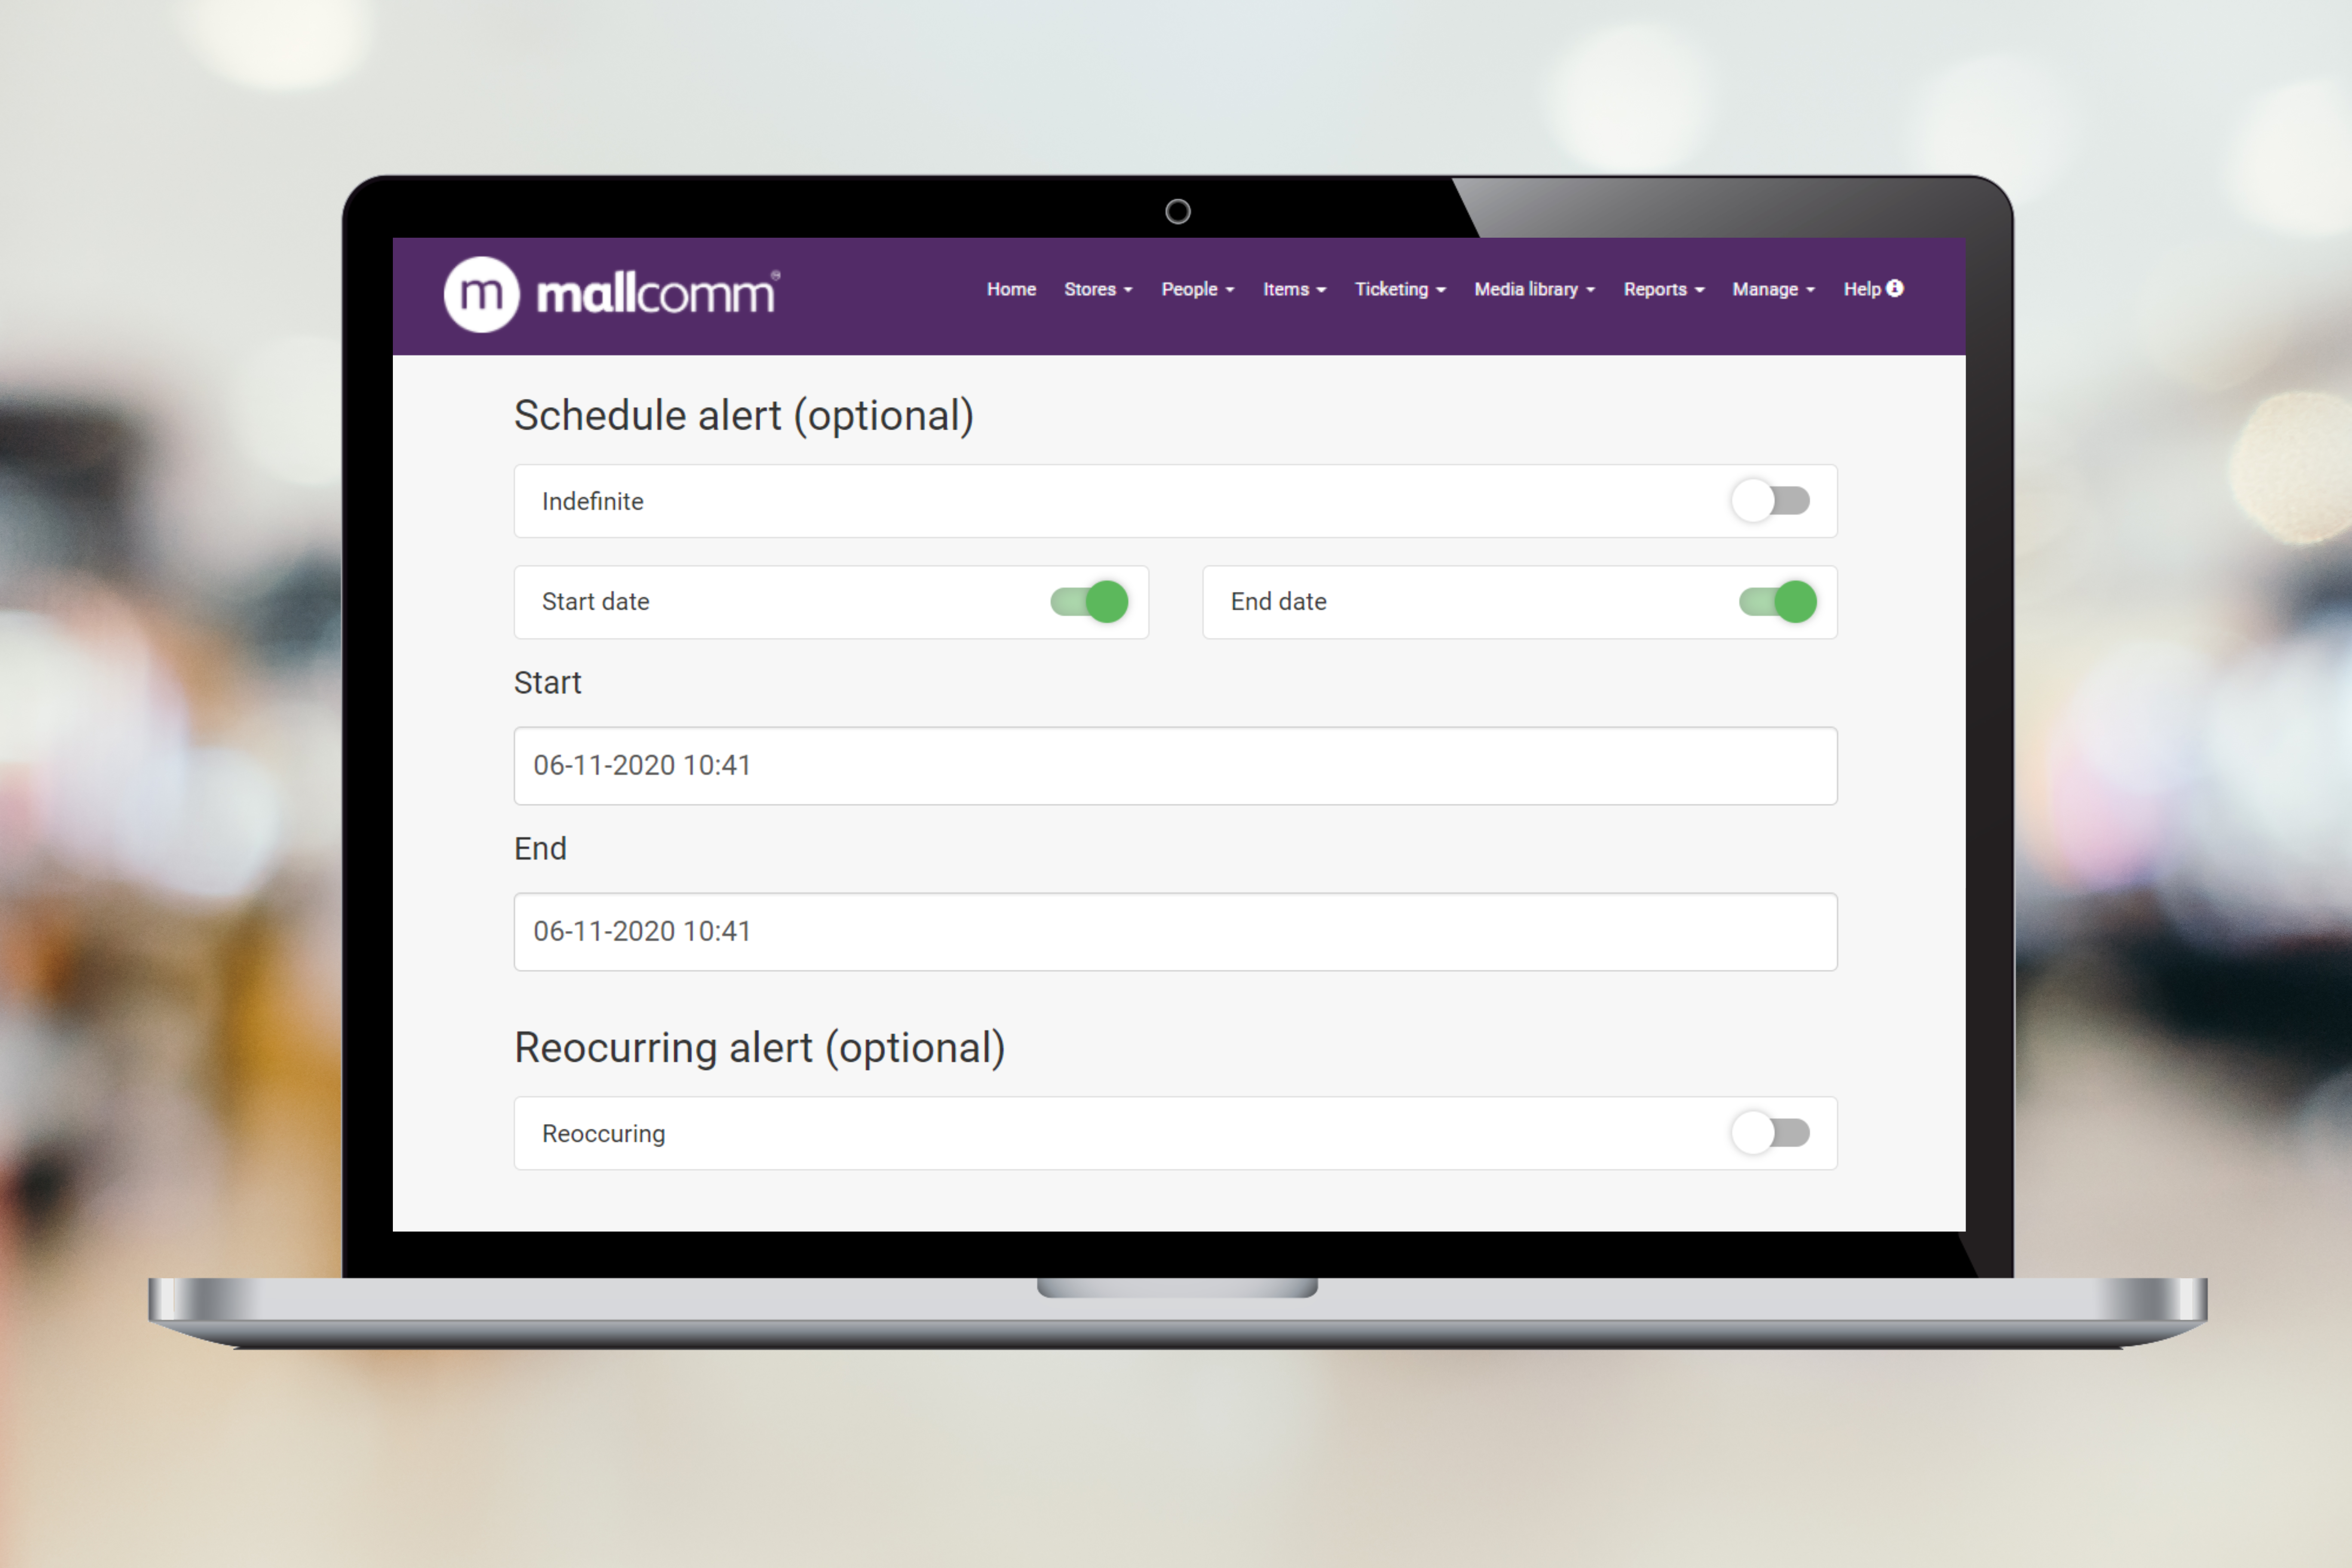
- Scheduling. If you do not include a start date, your alert will be live right away, but we always recommend adding an end date. An app alert will be active for all users until it either expires or you manually remove it. This will also affect new users, so if you add an app alert about Christmas with no end date, when a new user registers in January, they will still receive the alert.
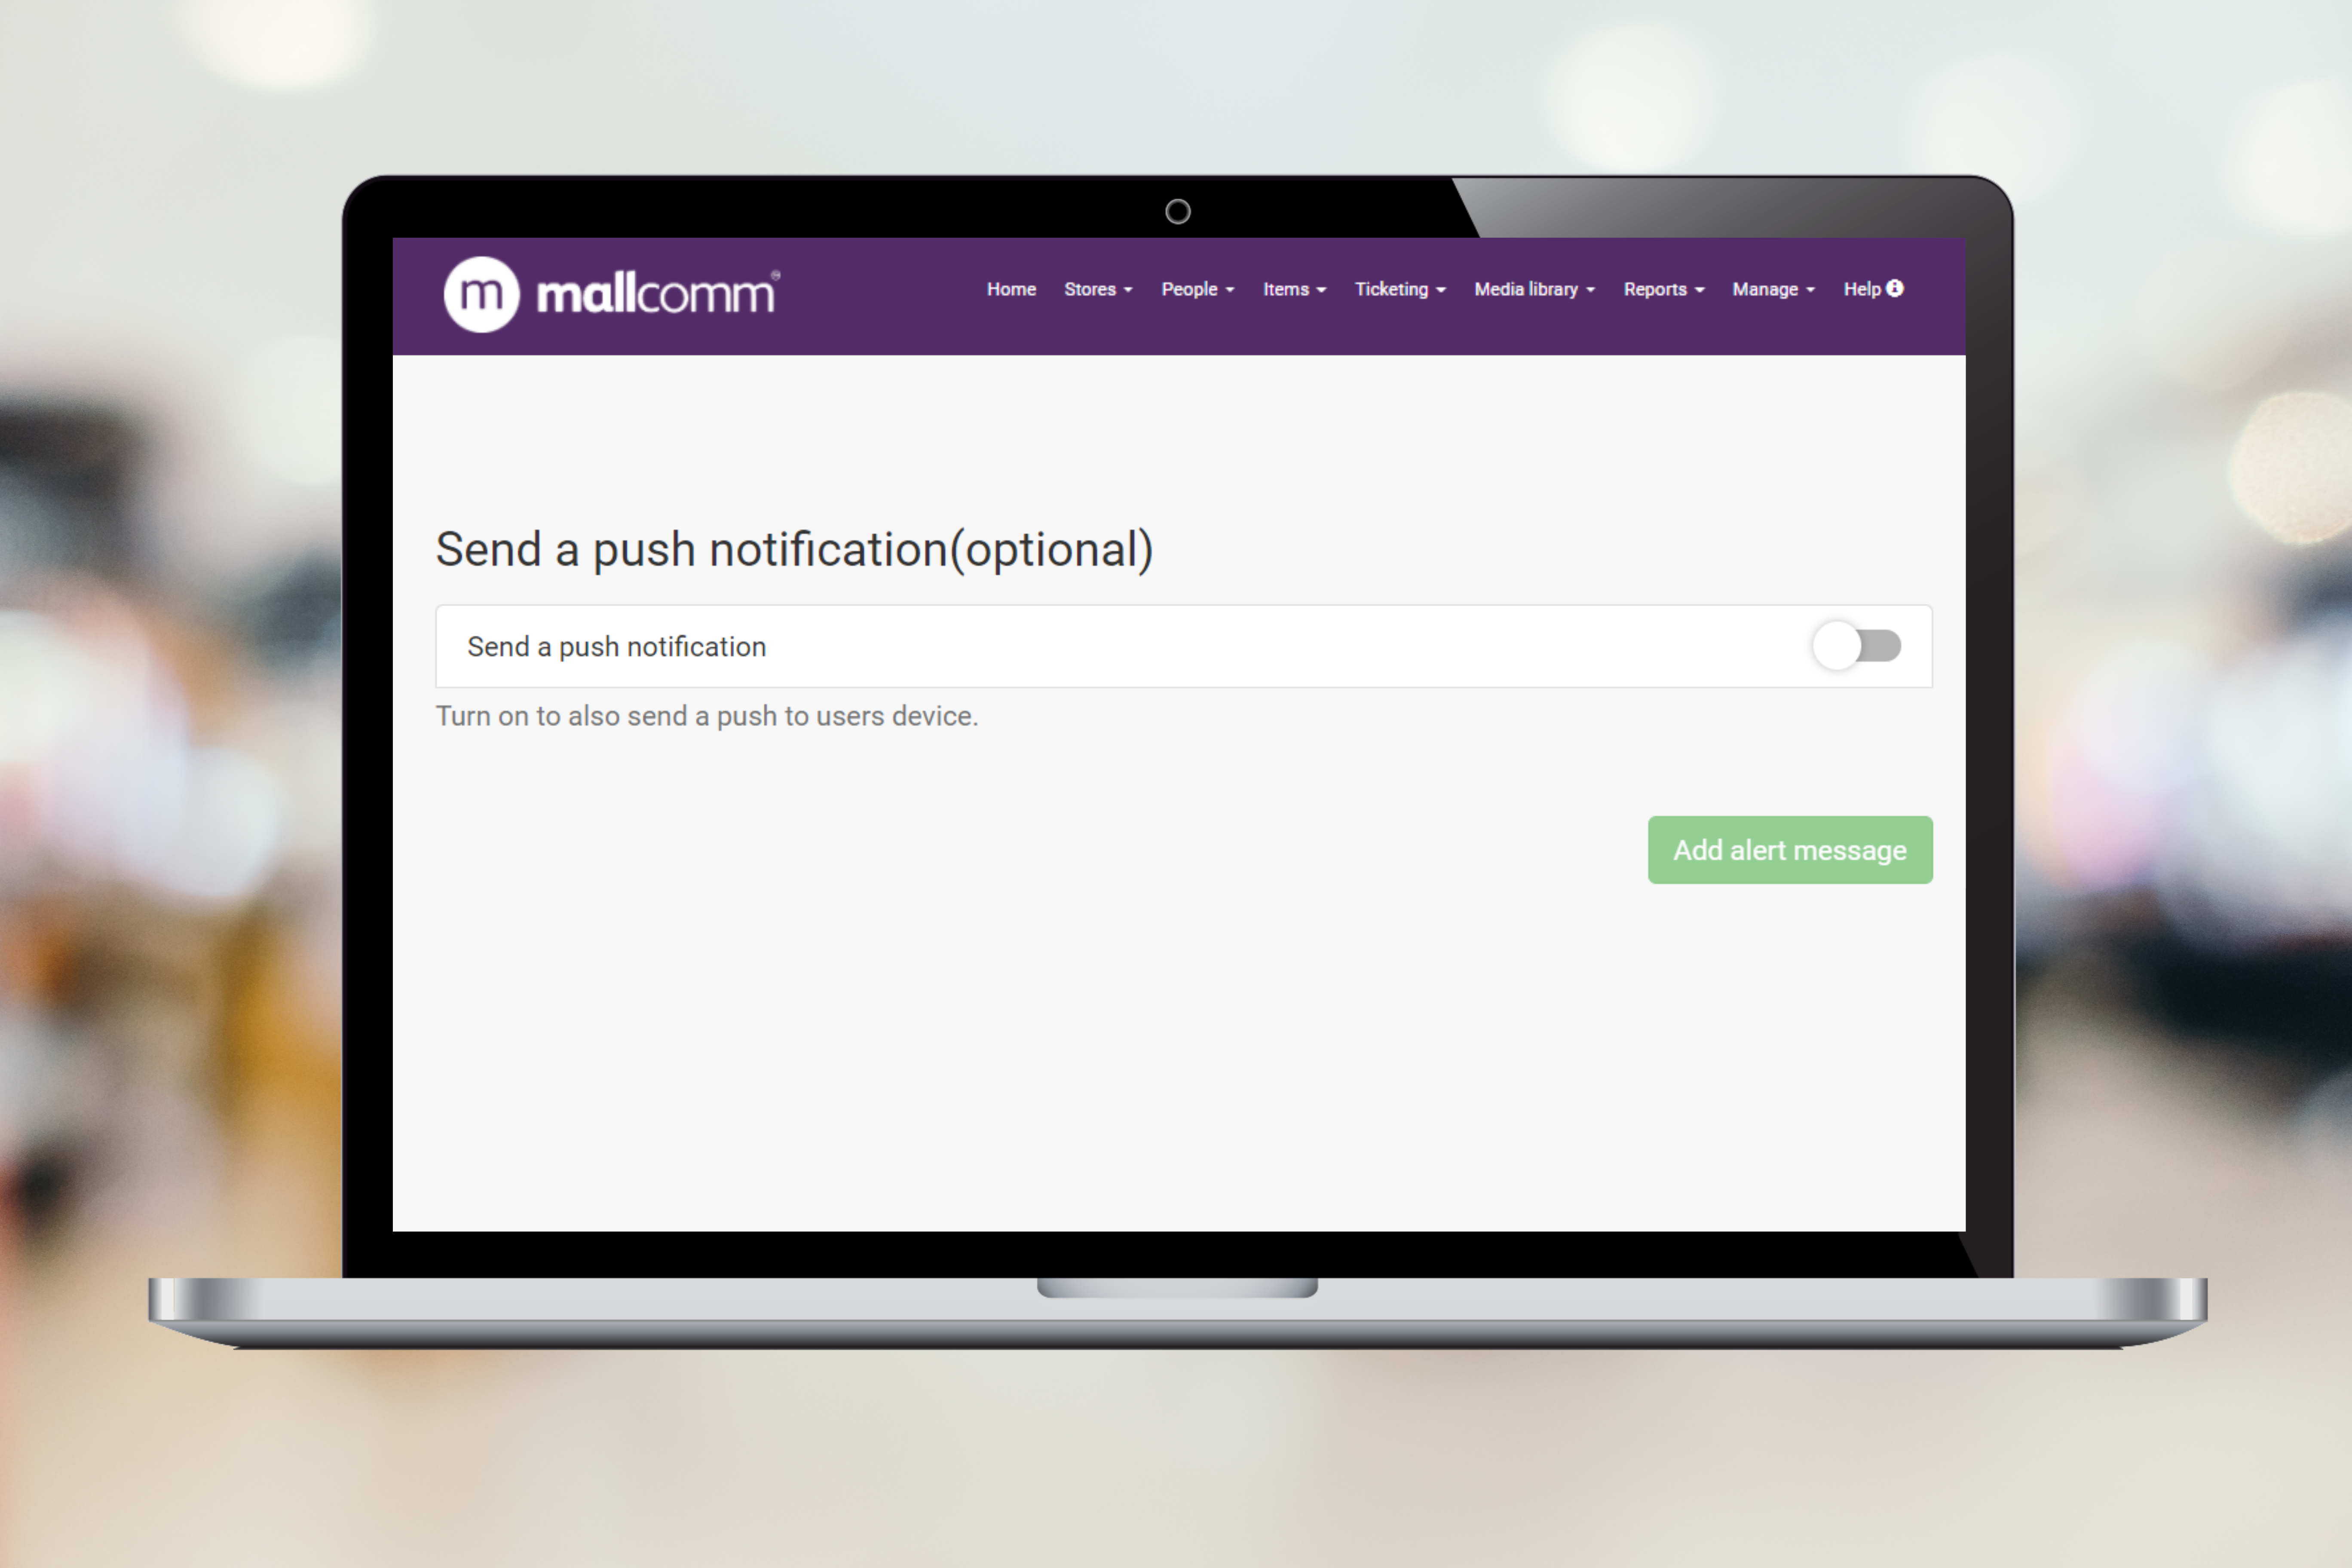
- If you like, turn this slider on and you will also send a push notification to a users phone.
Once you have filled in all the fields, press 'Add alert message' and it will be sent. However, if you would like this alert to reoccur on a regular basis, follow the next 2 steps before pressing add alert message.
Reoccurring app alerts
Reoccurring alerts provide you with the option of allowing your alert to reoccur on a daily basis or even a weekly basis. This can be used for reminding users to vote for the retailer of the month, or for ensuring regular tasks are completed such as checking the store fire alarms.
- Daily reoccurring alert - One key thing to mention is that your reoccurring time must match the schedule alert start time you wish for the alert to be sent out. For example, if the alert is scheduled to start at 11:00 am, the reoccurring time must also be 11:00 am. For the reoccurring increment, you will need to choose Daily and next set the duration hours which refers to how long your alert will be live for each day. For daily alerts, this cannot extend past 23 hours. This is so it does not interfere with the alerts for the next day.
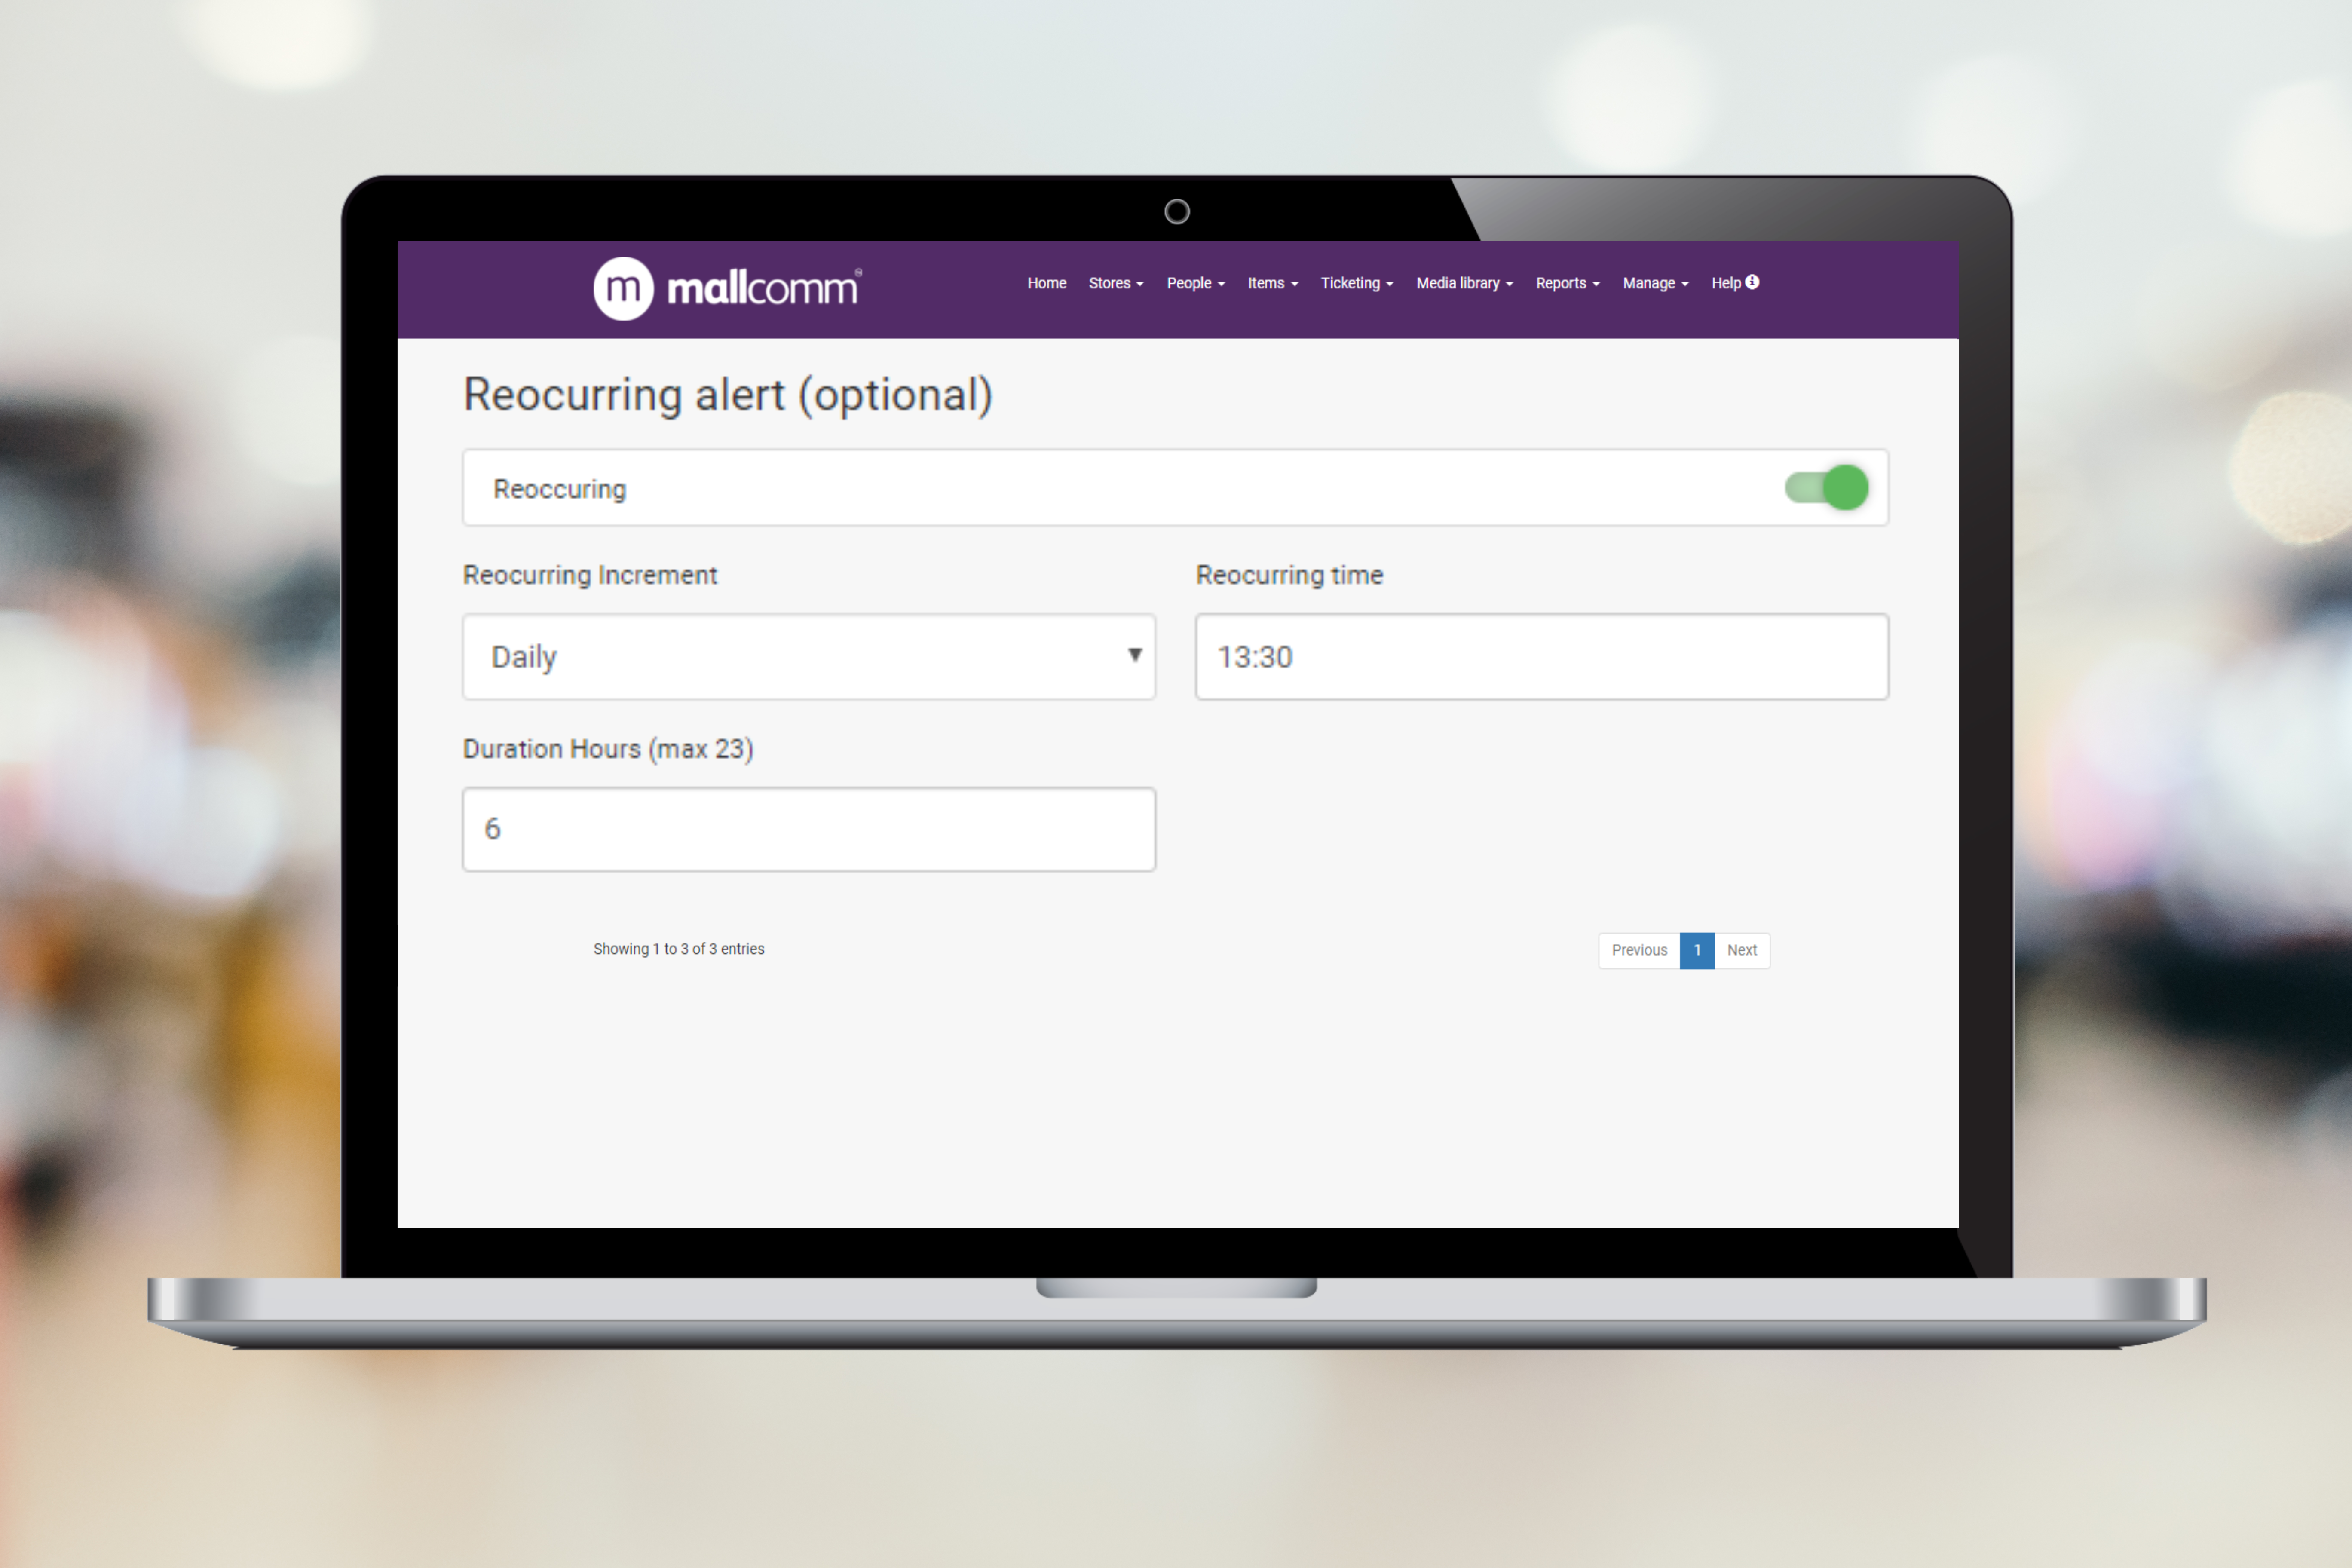
- Weekly reoccurring alert - One key thing to mention is that your reoccurring time must match the schedule alert start time you wish for the alert to be sent out. For example, if the alert is scheduled to start at 11:00 am, the reoccurring time must also be 11:00 am. For the reoccurring increment, you will need to choose Weekly and next set the duration days and duration hours which refers to how long your alert will be live. This cannot extend past 6 days and 23 hours. This is so it does not interfere with the next week.

Once you have filled in all the fields, press 'Add alert message' and it will be scheduled.
If you can’t add the app alert because the button is a faded green colour, this means that there is some essential information missing. The most common missing fields are the message box, ensure you have a title and a message or the title for the buttons.
When you would use them
App alerts are perfect for when you require your users to do something in the app, such as input sales data or respond to an item.
With the Go to Category option, you can send out an alert and take people directly to the sales input button. Alternatively, if you have a retailers meeting coming up and you want people to acknowledge and respond, letting you know if they can make it or not, create an item with response buttons and use the app alert to send people to the item where they can respond.
Also, you can have some fun with them, say you have a new Easter event planned, you could use the app alert to send an image of an Easter egg or a bunny then when the user presses on the alert, it takes them to the information about the event.