
The calendar list is a listing of events with response buttons that allows your users to mark themselves as interested in an event or RSVP with a message.
As well as displaying your centre events, store managers can also upload their own in-store events to the app that will display in the calendar either automatically or after your team has approved them.

The View
The Events list button is where you will see the calendar. When you access the button you will see a list of all of the upcoming events. The events happening on that day will be at the top with the remaining below in date order.
If there are multiple events on the same day, users will be able to sideways scroll through all of the events.

Clicking on an event will bring up the event details. It is also possible for a user to mark themselves as Interested, RSVP with a message and also add to their phone's calendar if they would like.
How can I add an event?
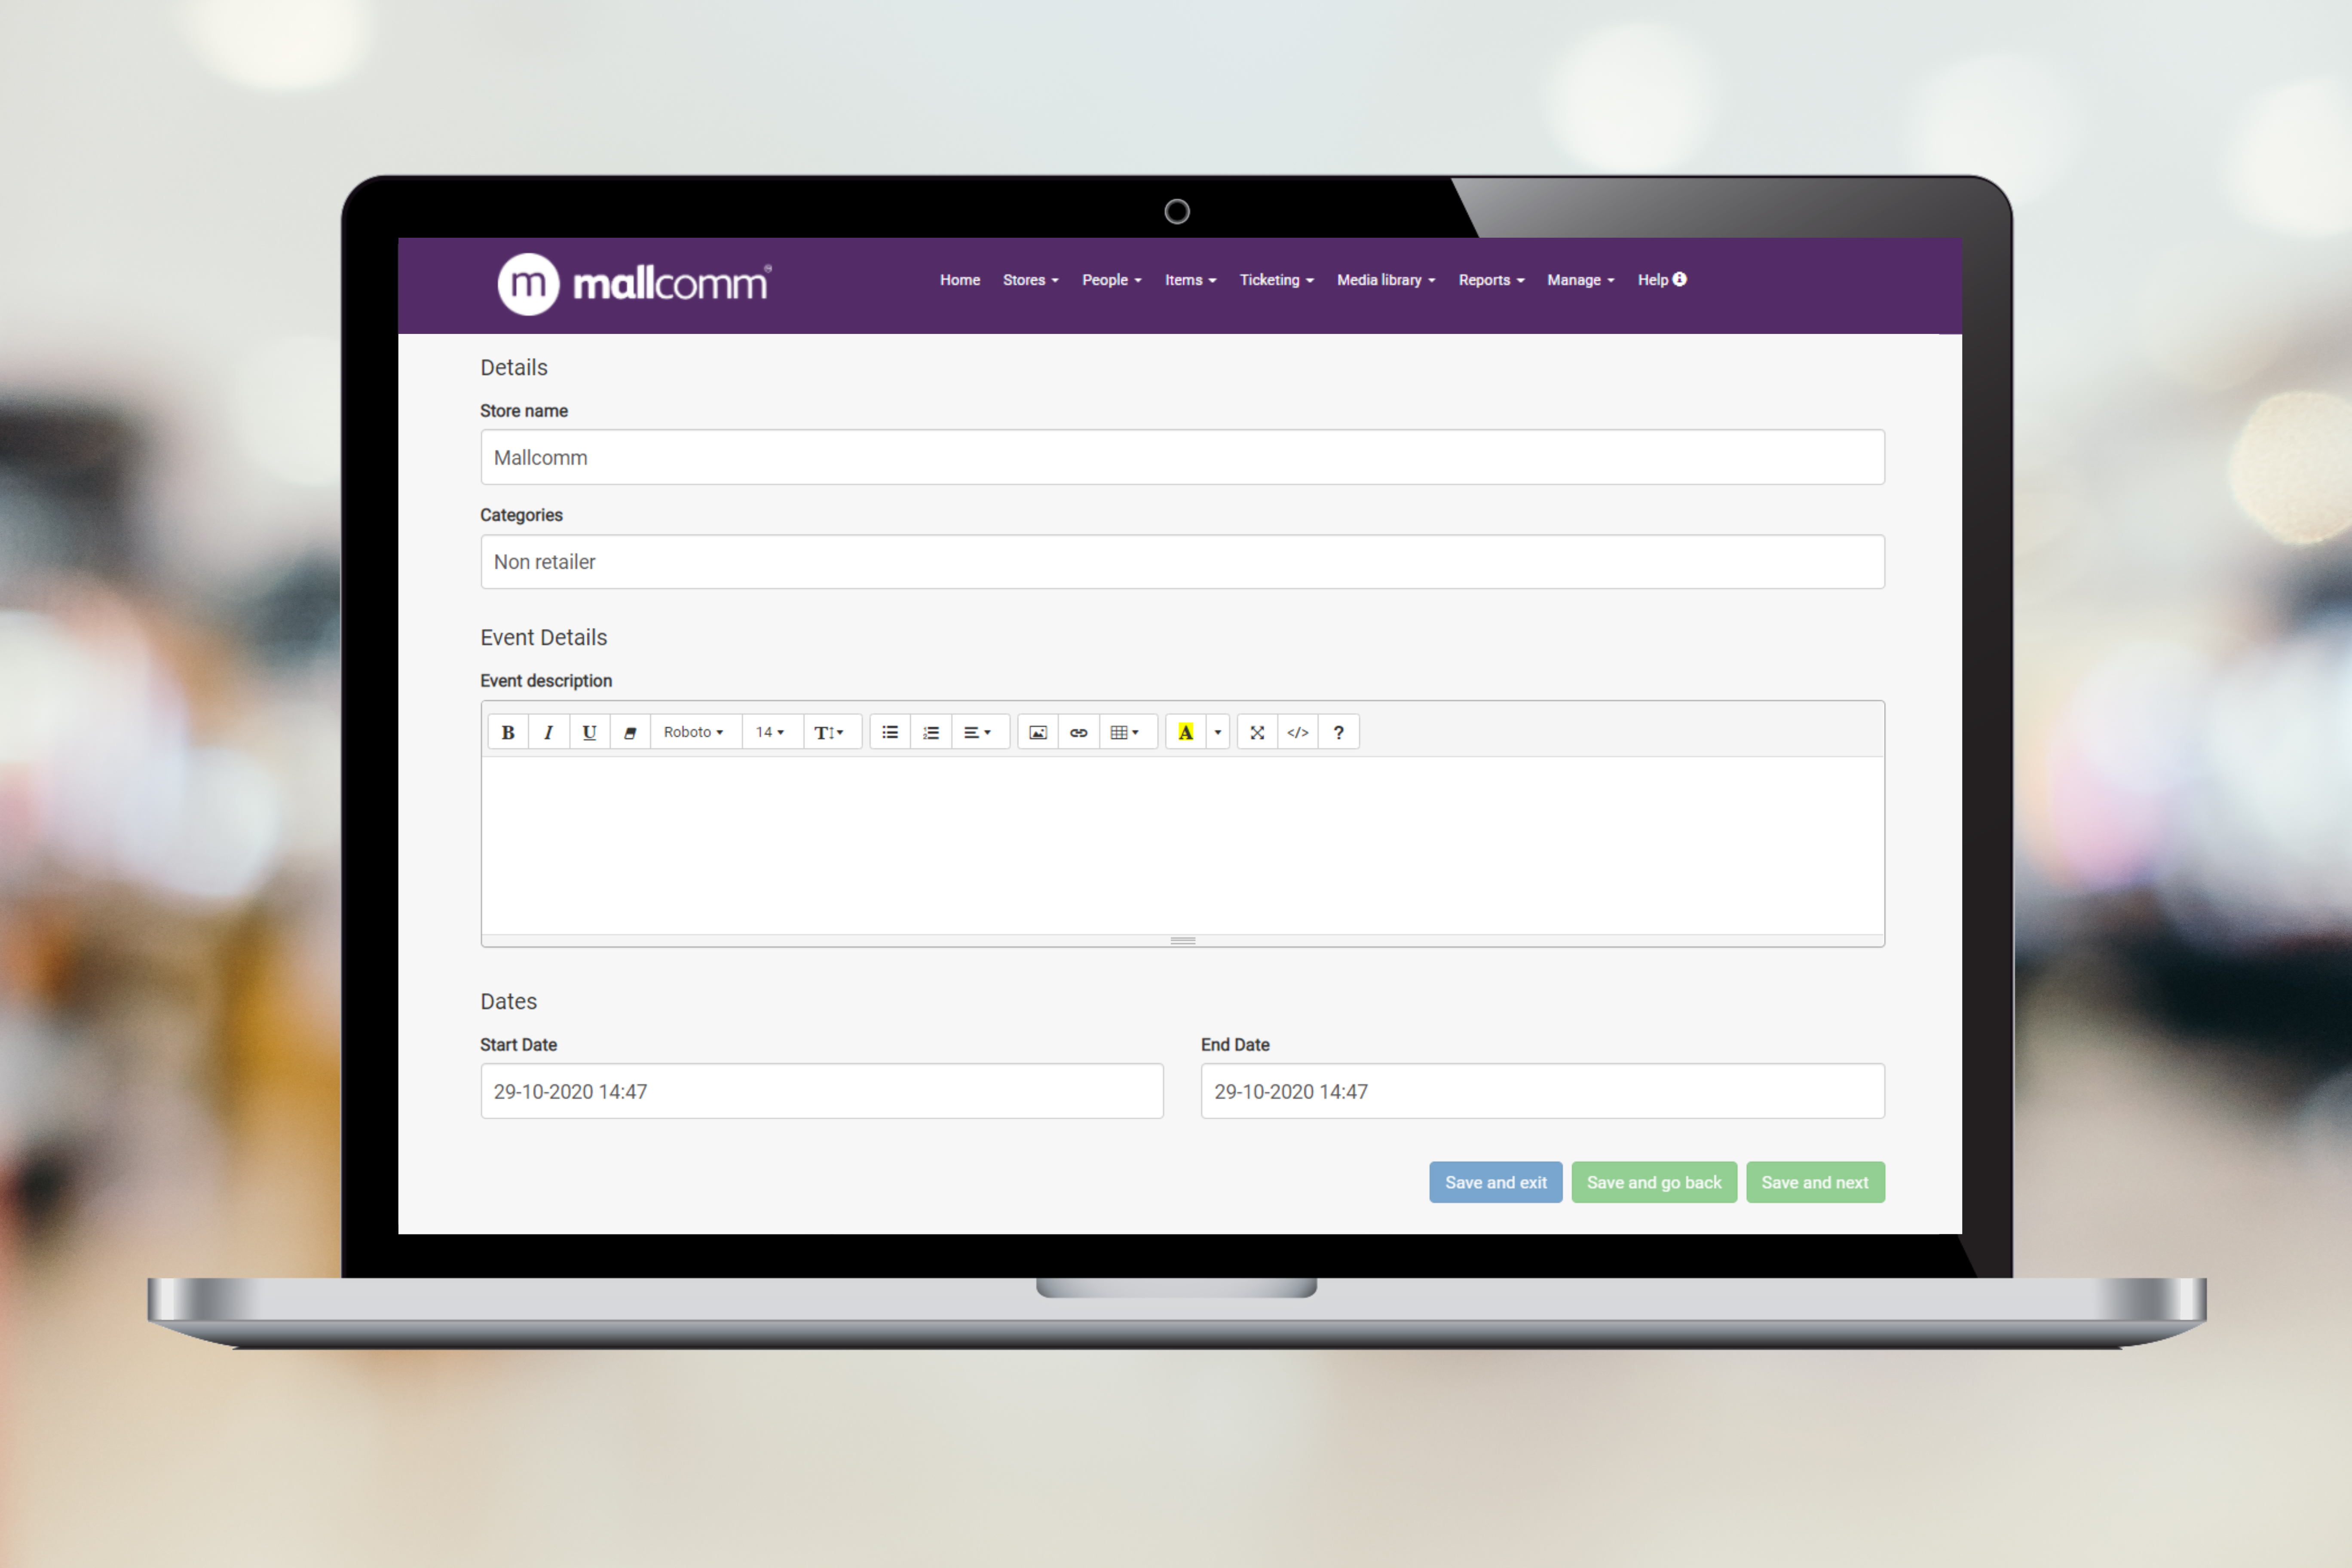
In the CMS you can create an event much like creating any other item. From the All Items drop down, select Add new item.
On the first page select event, select your store and add a title. If it is a centre organised event then you can select Centre Management as your store.

Once you press Save and Next you will reach the content creations screen. If you have selected the Event option on the first page you will have the ability to add dates. These will be the dates of the event.
In the case of a multi-day event, we'd recommend setting them as beginning when the first day starts and ending when the final day finishes, you can then use the item content to explain more about the exact schedule of events on each day.
Next step is assigning to your button Calendar or Events Button and selecting your access level.

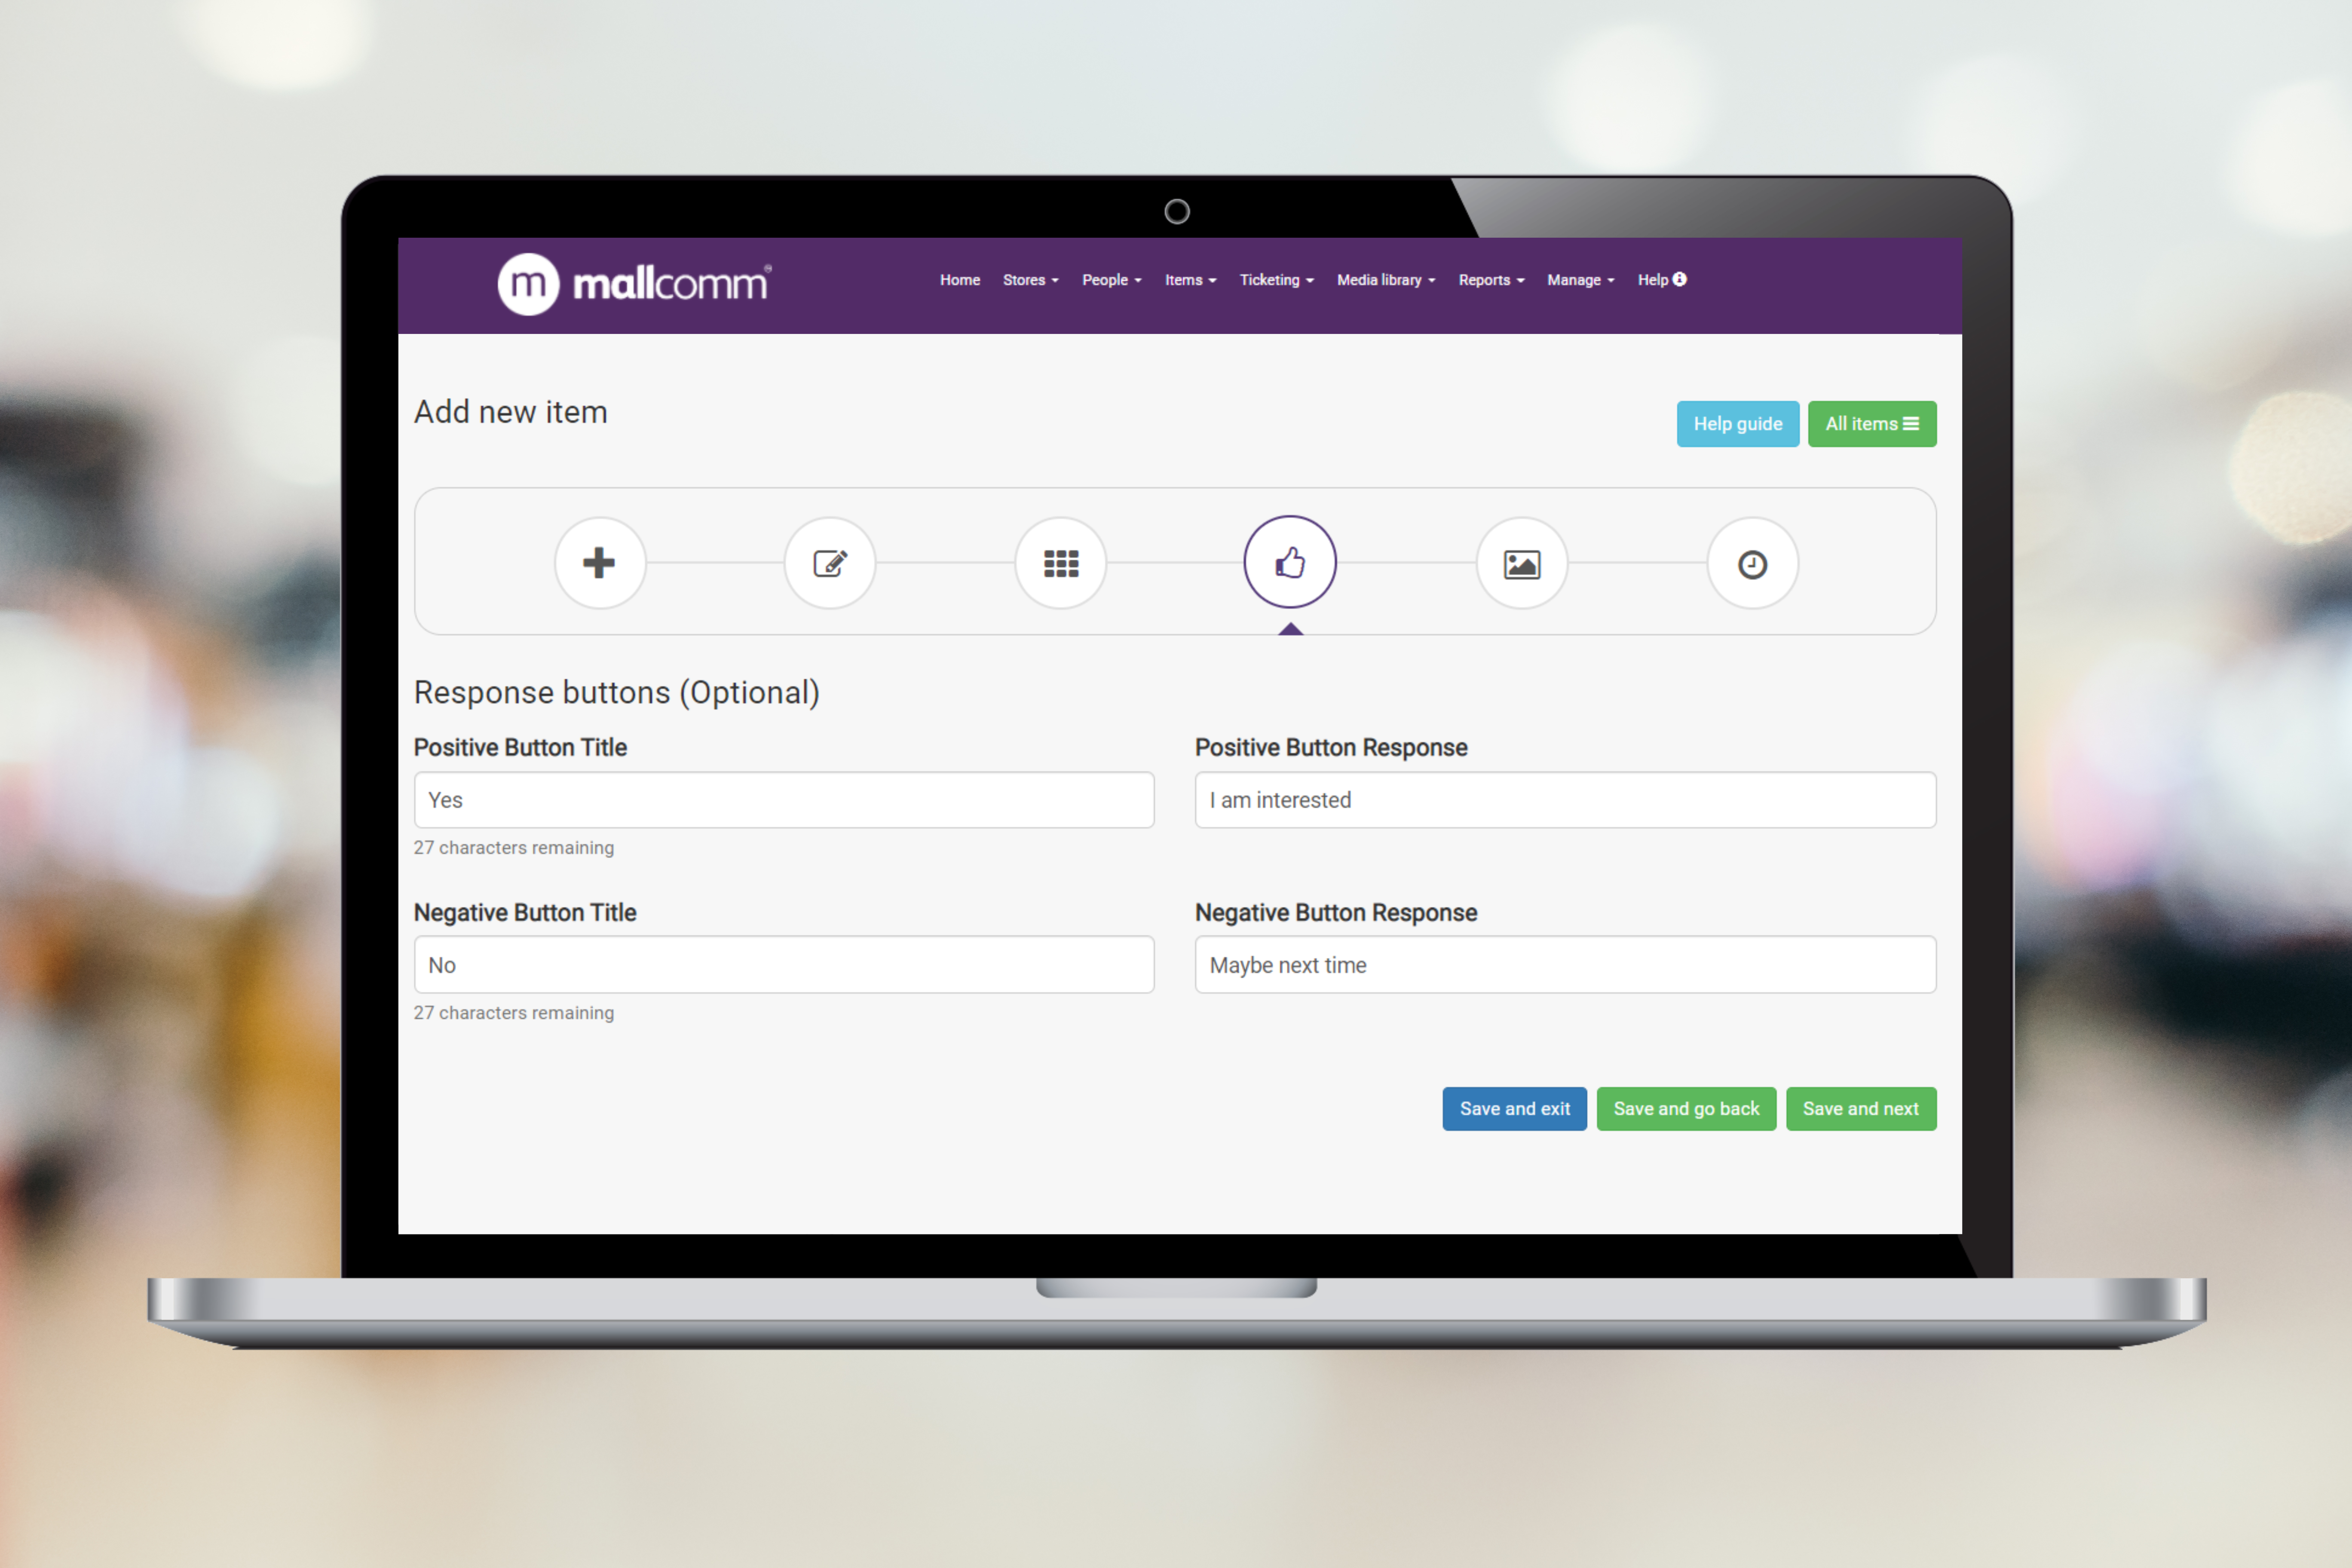
When you press Update and next you will be at the response button. Now, this is where it is slightly different from adding a normal item.
If you leave the buttons empty, the item will add in the default response buttons which are "Interested" and "Not interested" as displayed in the image below. They will not appear at the bottom of your item content like they would if you were adding a news item.
If you decide to change these, you can do so by writing your own text into the response buttons. The positive response will be on the left and negative on the right.
Finally scheduling. This page is disabled as the dates are scheduled when you add the event details in. The listing will appear in the calendar right away and will be in date order. It will be removed automatically when the event is over.
How do retailers submit events?
Retailers can submit their own events for the events calendar through the Add an in-store event button.

There are 2 ways this can work and it depends on how your centre was set up for launch.
1. Create - When a user submits an event, the designated approval team will get a notification and email alerting them that there is an event pending approval. This event can then be checked and either approved to go into the calendar or rejected. When rejecting, it is possible to add a comment and the user can resubmit to start the process again.
2. Instant approve - When a retailer submits an event it appears in the calendar right away.
If you would like to change the way your centre is set up, or feel that it is not currently working, please open a support ticket and we will get back to you.
How do I approve a retailer submitted event?
If you receive a notification that an event needs approval you can either do this in the app or the CMS.
In-app - Go to the Add an event button and you will see a list of tickets that require approval. press on it to open and use the buttons at the bottom to approve or reject.
In CMS - From the Items drop-down menu in the navigation bar, you can go to Approve Items. Here you can see a list of all of the items that are currently pending approval. By clicking on the item you can see the details and you can choose to approve or reject. If you reject you will be given the option to add a comment on why.
Further help
If you have any further questions or would like more information about this module, either get in touch with your account manager or send an email to support@mallcomm.co.uk and we can tell you how you can activate the Social Network.