
The buttons within your app are fully customisable to fit your requirements. It is easy to move them around, rename them, change the icon or even the colour.
Rearranging your buttons
If you would like to rearrange your buttons you will need to go to Manage your buttons from the Manage drop-down in the top navigation bar.
Here you will see a list of all the buttons in your app.
You can move them around using a simple drag and drop process, just click and hold on the grey square and drag it to where you would like it to be.
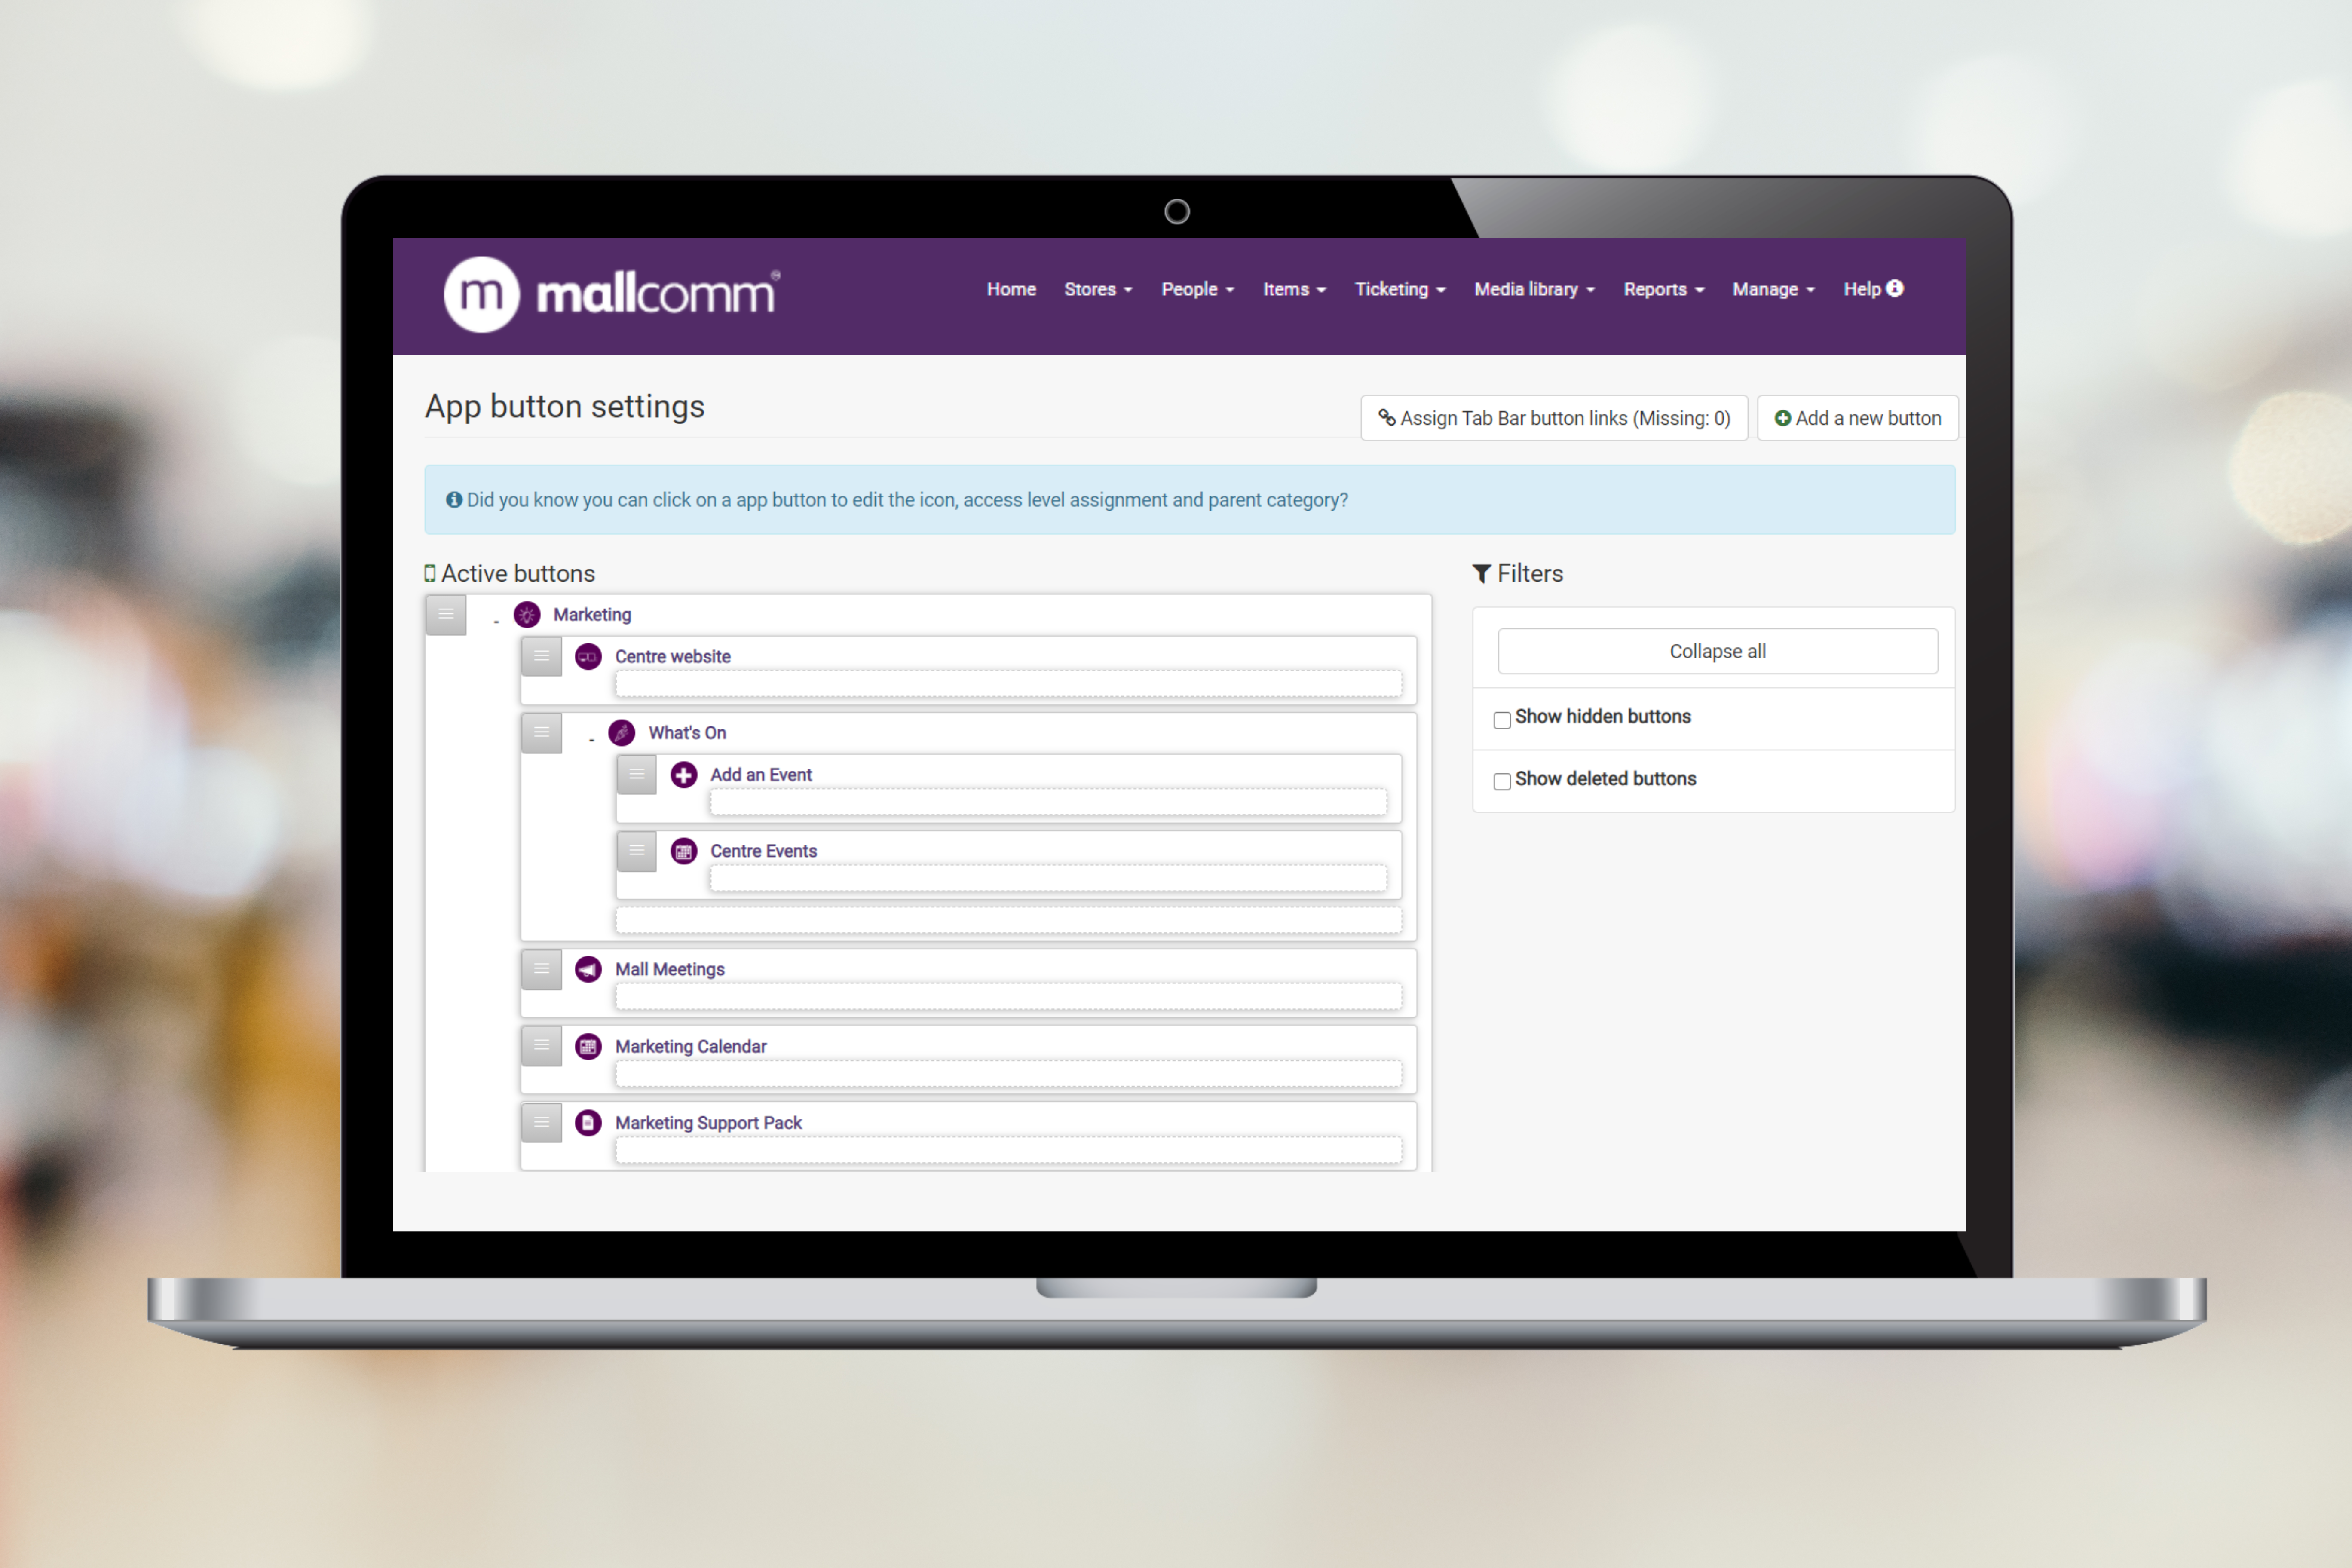
Parent Buttons
A parent button is one that holds other buttons, known as child buttons, inside of it. It is also possible to have parent buttons inside parent buttons.
In this example, you can see that Marketing is a Parent button with Centre Website, Mall Meetings and Marketing Calendar being child buttons. However, there is also What’s On, this is another parent which has two more child buttons inside it.

Creating a new button
At the top of the Manage your buttons screen you will see 'Add a new button', just click there, and you’ll be taken to the add button screen.
The first step is naming your button, choosing an icon and setting the colour.
There is a large library of icons to choose from for your button image, clicking on the plus symbol will open this.
It is possible to create new icons for your centre but there is a fee, please speak to your account manager if you would like to know more about bespoke icons.

To set the colour you can either use the colour selection tool or paste an HTML colour code in the field below button colour.
Adding a pop-up message
In this field, you can add a message that will be displayed when a user opens the button.
Set your button type
Setting the button type is how you control what the button does, You'll find explainations of the main button types below.
Contact Forms
There are 2 contact forms available, a standard one and a multiple contact form.
A standard contact form is a simple form that displays in the app and when a user submits it, the information will go to the email address you specify.
In the first field, you can enter the email address that will receive the form once filled in. If you would like it to go to multiple people then you can add more than one email address separated by a comma.
Next is the intro text. This is the copy that will appear above the form in the app, your opportunity to explain what the form is for and what will happen once a user has submitted.
Finally, you can choose a template. This affects what fields will be in the contact form for the user.
If you would like a bespoke template for your contact form we can build that for you. Please get in touch with your account manager who will be able to send you a quote.

Multiple Contact Form
The difference with a multiple contact form is that it lets a user decide who to send the form to.
You can set this by identifying who the form will go to in the label field, such as centre management or marketing and then adding the relevant email address.

List Buttons
Most buttons that contain items will be set up as a list button. There are four types of list to choose from:
Standard List - This is a list of standard items that appear in an order you can set. The items will display the content that has been created in the content creator and if it possible to attach a PDF that opens separately.
Document List - A list that will open a PDF directly.
Events List - A calendar list that shows items added in date order and highlights the day's events at the top.
Offers - A list specific for offers that will separate food and retail offers based on the settings of your stores.
Web Item
A web item is a button that displays a single item. First of all, you need to create your button and then create the item that you which to display in it and assign it during item creation.
RSS Feeds
In this button you can add a link to an RSS Feed and the app will display the headline.
Parent Category
A button that can contain other buttons as explained at the top of this article.
Web View
A button that will open a website specified in the field underneath.

Assigning your button to a parent button
Once you have set up your button, you can assign it to a parent or leave it blank if you would like it to appear on the home screen of your app.
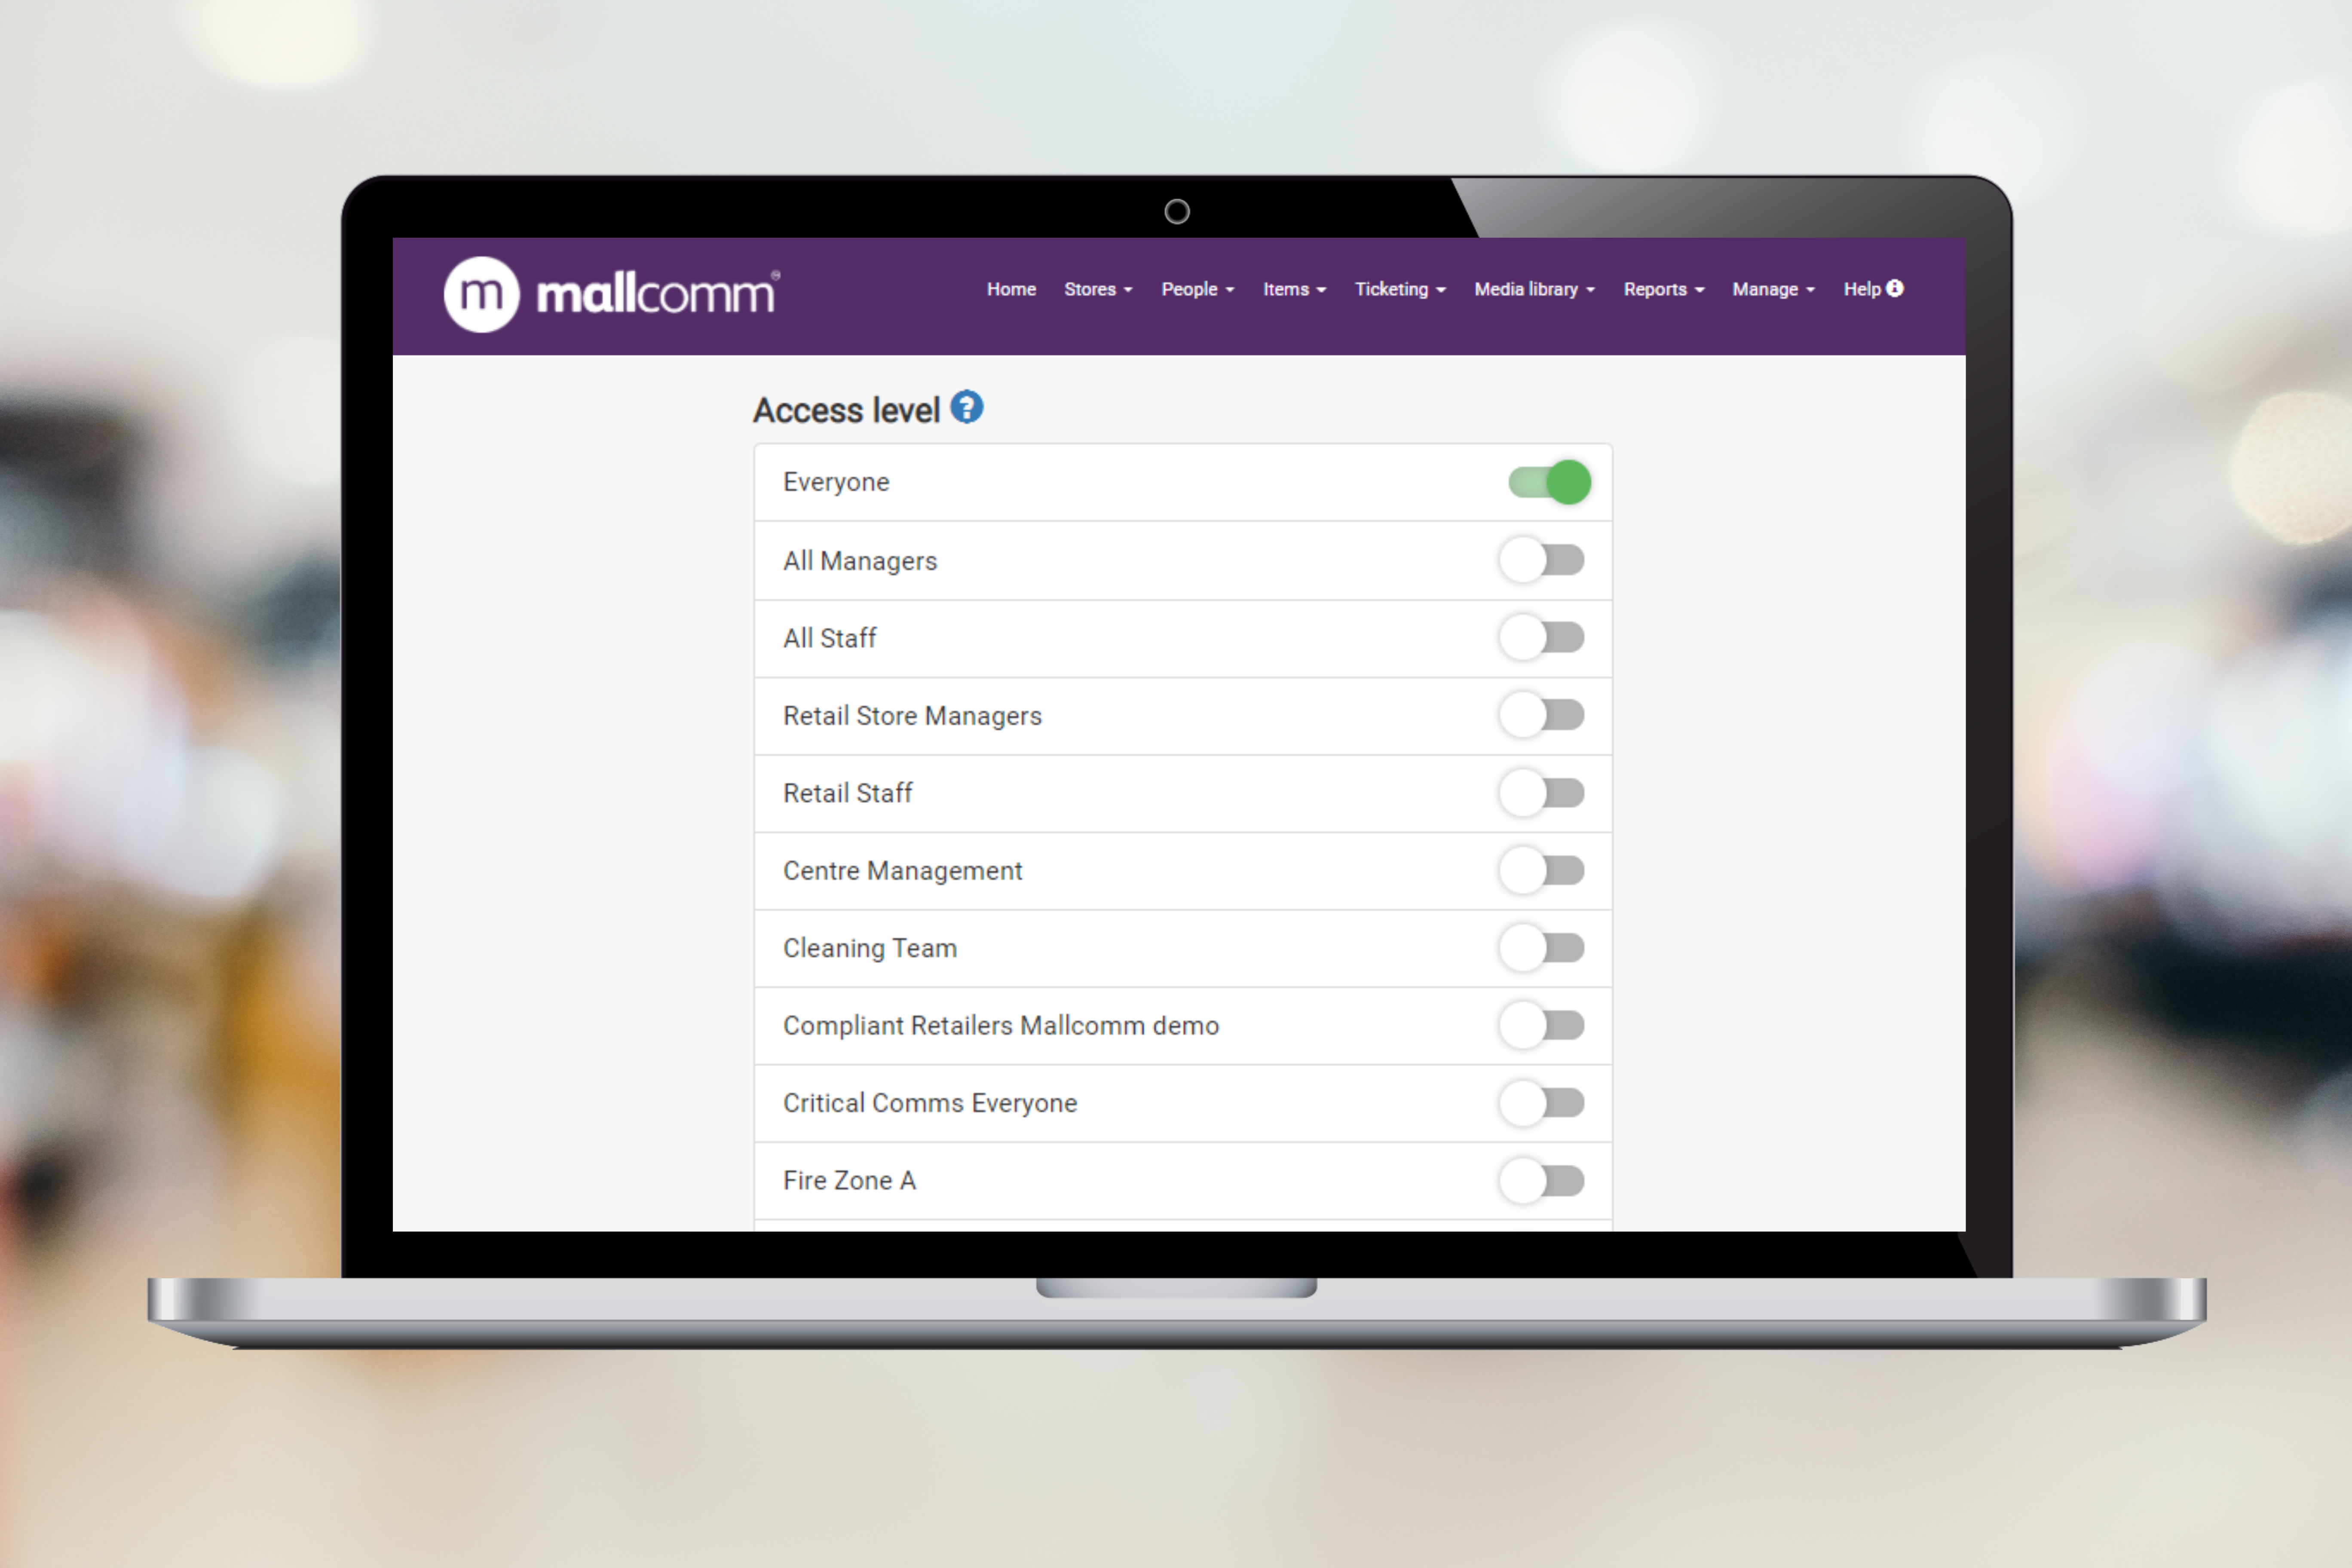
Setting access levels
Choosing access levels is how you keep control over who can view the content in a button. If you want everybody to be able to access the button you can leave the slider turned on, otherwise, toggle it off and a list of your available access levels will be available to select from.
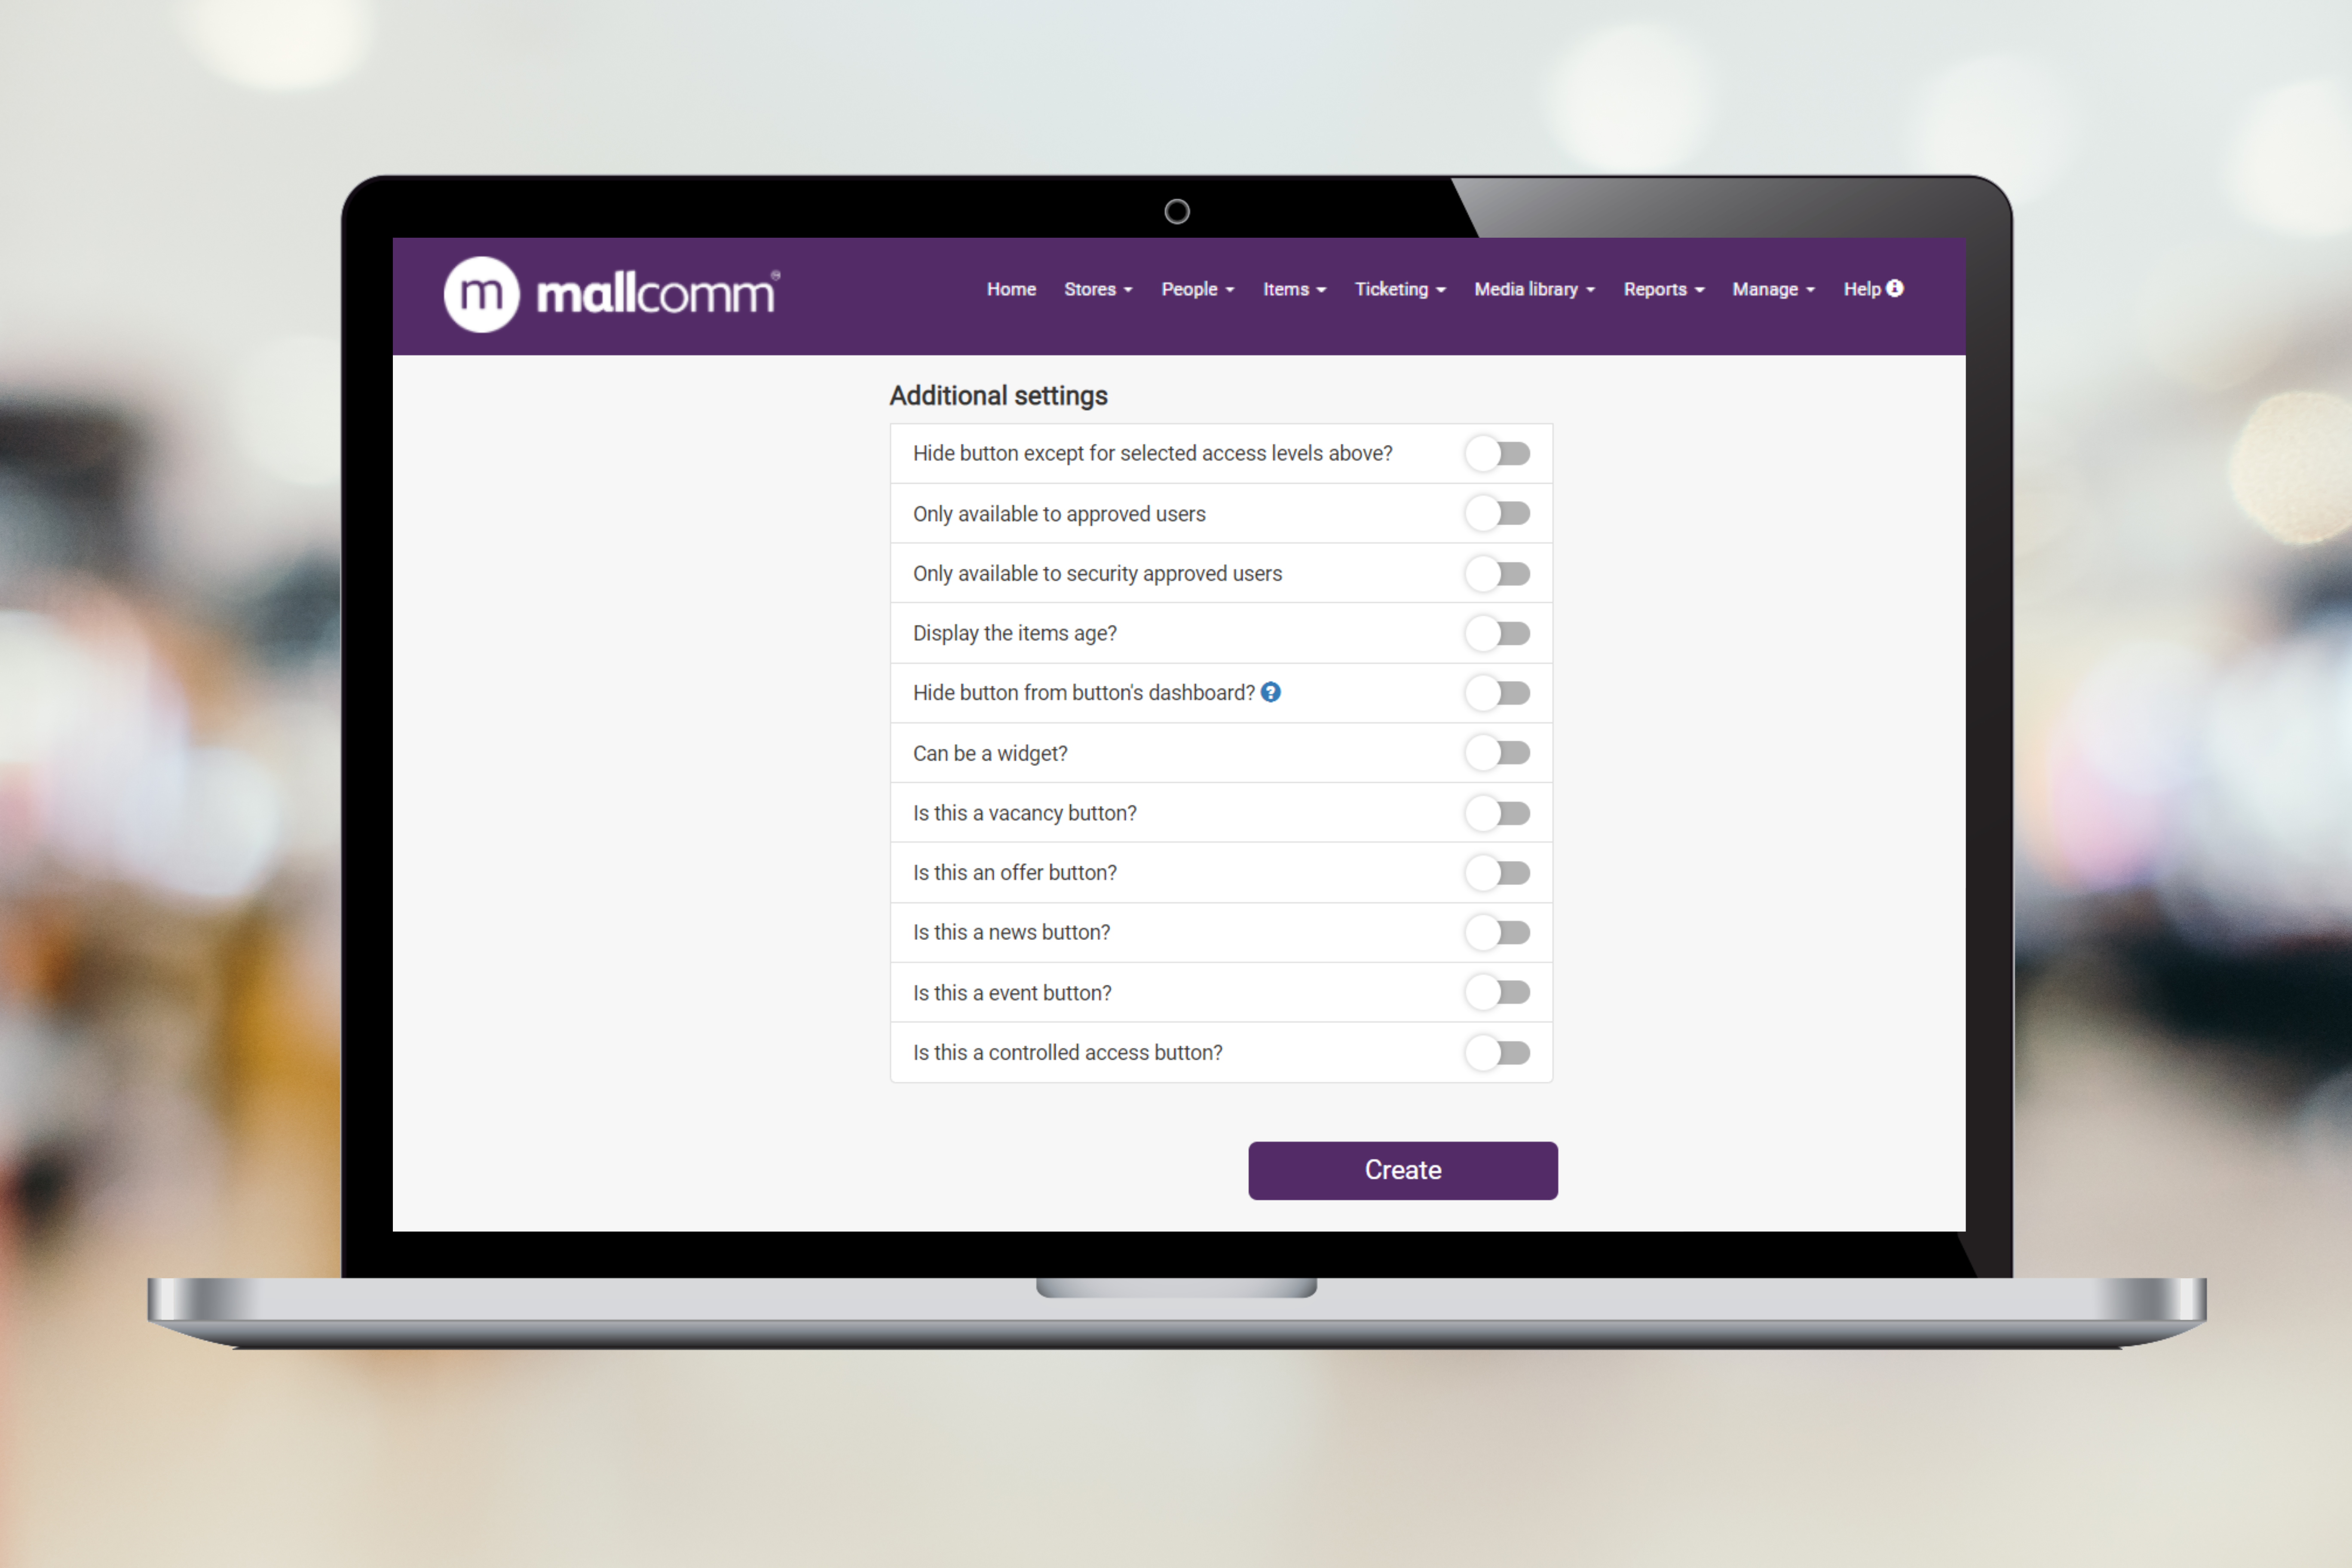
Additional settings
A few final setting to finish your button.
Hide button except for the access levels above: This will ensure that if a user is not in the access level, they won’t even see the button. For example, if you wanted a button for your centre management team only, you can set Centre Management in the access levels, turn on this slider in the additional settings and the retailers won’t even see it.
Only available to approved users: This will ensure that only users that have been approved by a store manager can access the button.
Only available to security approved users: Only users that are marked as security approved in the All Users overview.
Display the age of the item: This will show how many days ago an item was published. Best used for news feeds and lists that are updated regularly.
Hide button from app screen: Means the button cannot be seen, a good alternative to deleting the button if you want to keep the button analytics.
FAQs
How can I delete a button?
Click on the button you want to remove, scroll down to the bottom and you will see a delete button option. However, we would always recommend hiding a button rather than deleting.
Can I set up a new ticketing button?
Ticketing buttons need to be set up by our team. Please get in touch with our support team or your account manager and we will let you know what is needed.
Can I have a button for retailers to submit news stories?
Yes. You can either use a contact form and use the information to create items or we can set it up as a managed item. This would work the same way as Offers and Job Vacancies in that the retailer submits it, you can check it and if you approve it, it will automatically appear in the app.
How can I change who receives a contact form?
Go to 'Manage your buttons' from the manage dropdown. Find the button for the contact form you would like to update and click on the name. About half way down you will see the email field.
What's the difference between a Standard List and a Document List?
Both are list button types, which means you can assign multiple items to them that will appear in a list. The difference is in a Standard List you can create a full item using the text editor and attaching a document is optional. If you do, the item will show what you have added in the text editor and have a plus symbol or paperclip to then open the attached PDF.
With a document list, it will open the PDF directly, so there is no need to add anything in the content editor while creating an item as this will be skipped.
Why am I seeing the error message "Warning, no file to download".
This comes when a button is set as a document list and the item it is trying to open has no document attached. If you have recently updated the list then you may need to refresh your cache. You can do this either by logging out and back in or by following these steps:
iOS
- Open the list button
- Press the three dots in the top right
- Press Clear and reload
Android
- Open the list button
- Swipe down on the screen to refresh but hold until the circular arrow changes colour
- Release and the list will reload