
Reports, Store Contacts, Direct Messages. How to add/edit a Store. How to update Store Logos.
Locating your stores
In the all stores page, you will find a list of all of the stores in your centre broken up alphabetically.
If you click on the “Search all” button, with nothing written in the field, this will bring all of your stores in one list.
On this overview page, you can see the total number of users a store has as well as active users, a live view of users that are currently logged in. Use the arrows next to the titles to reorder this table.

Further information
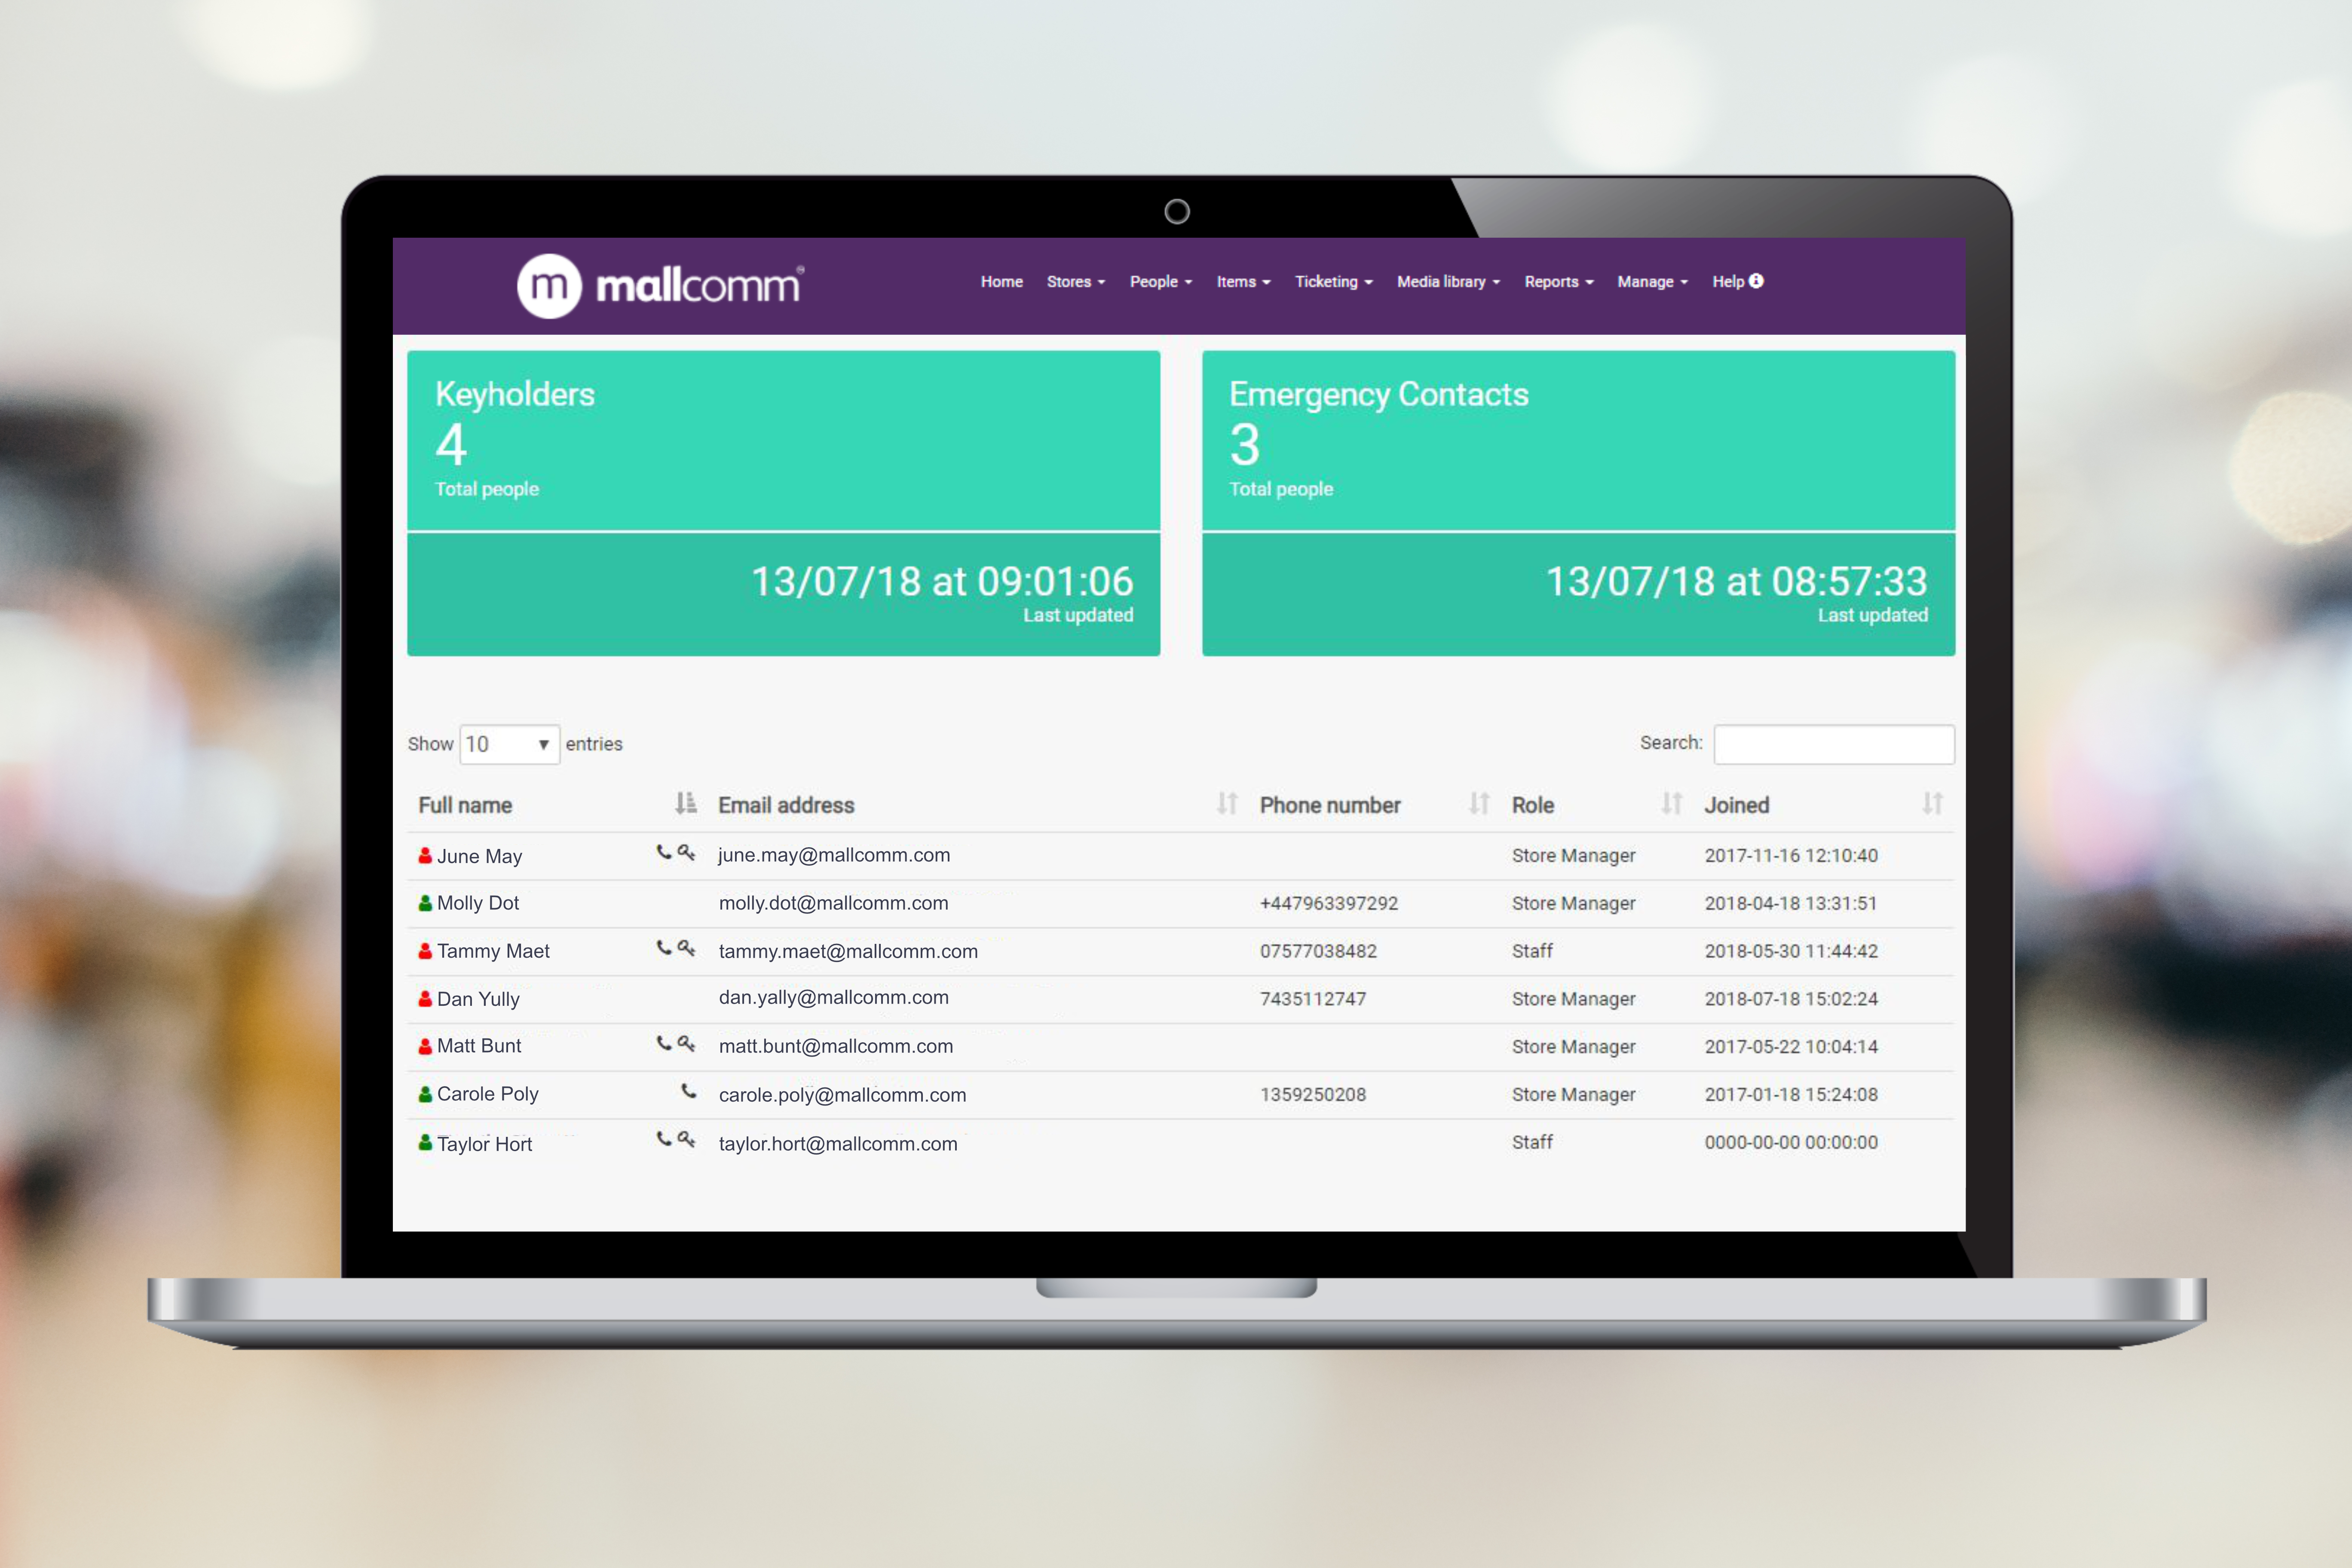
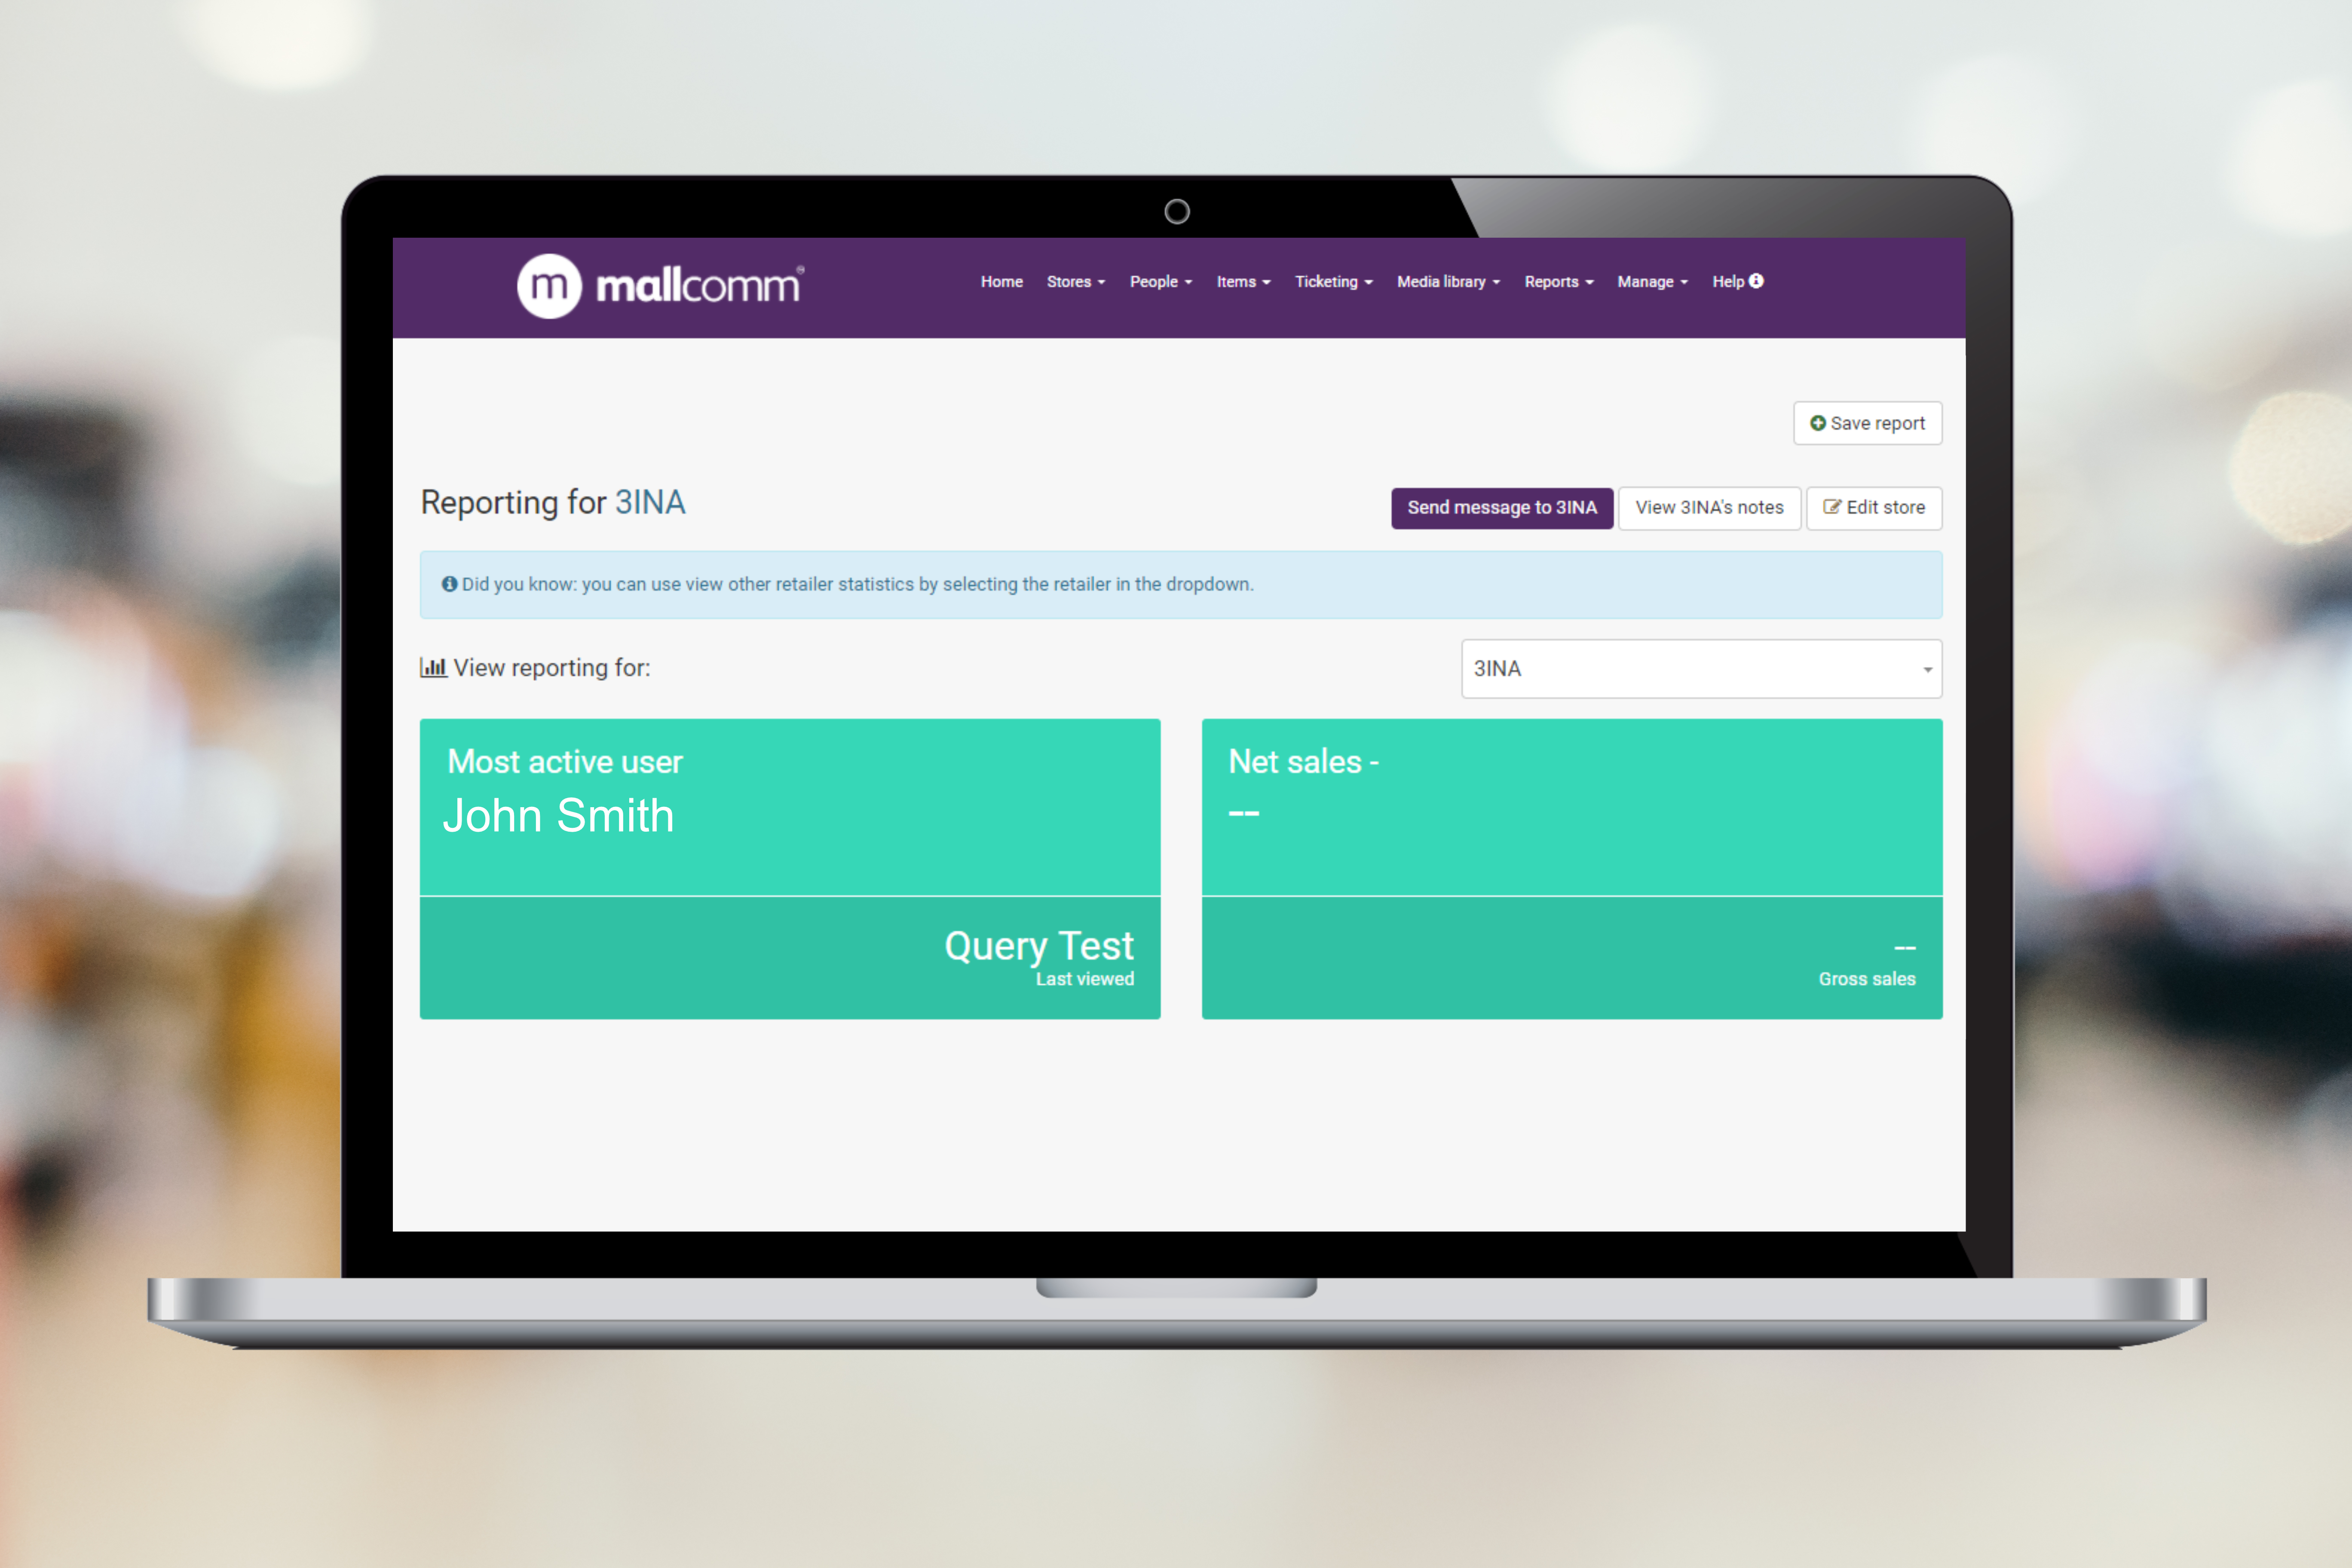
By clicking on a store name you can see further information about that store including keyholders, emergency contacts, staff contact details and further store analytics.
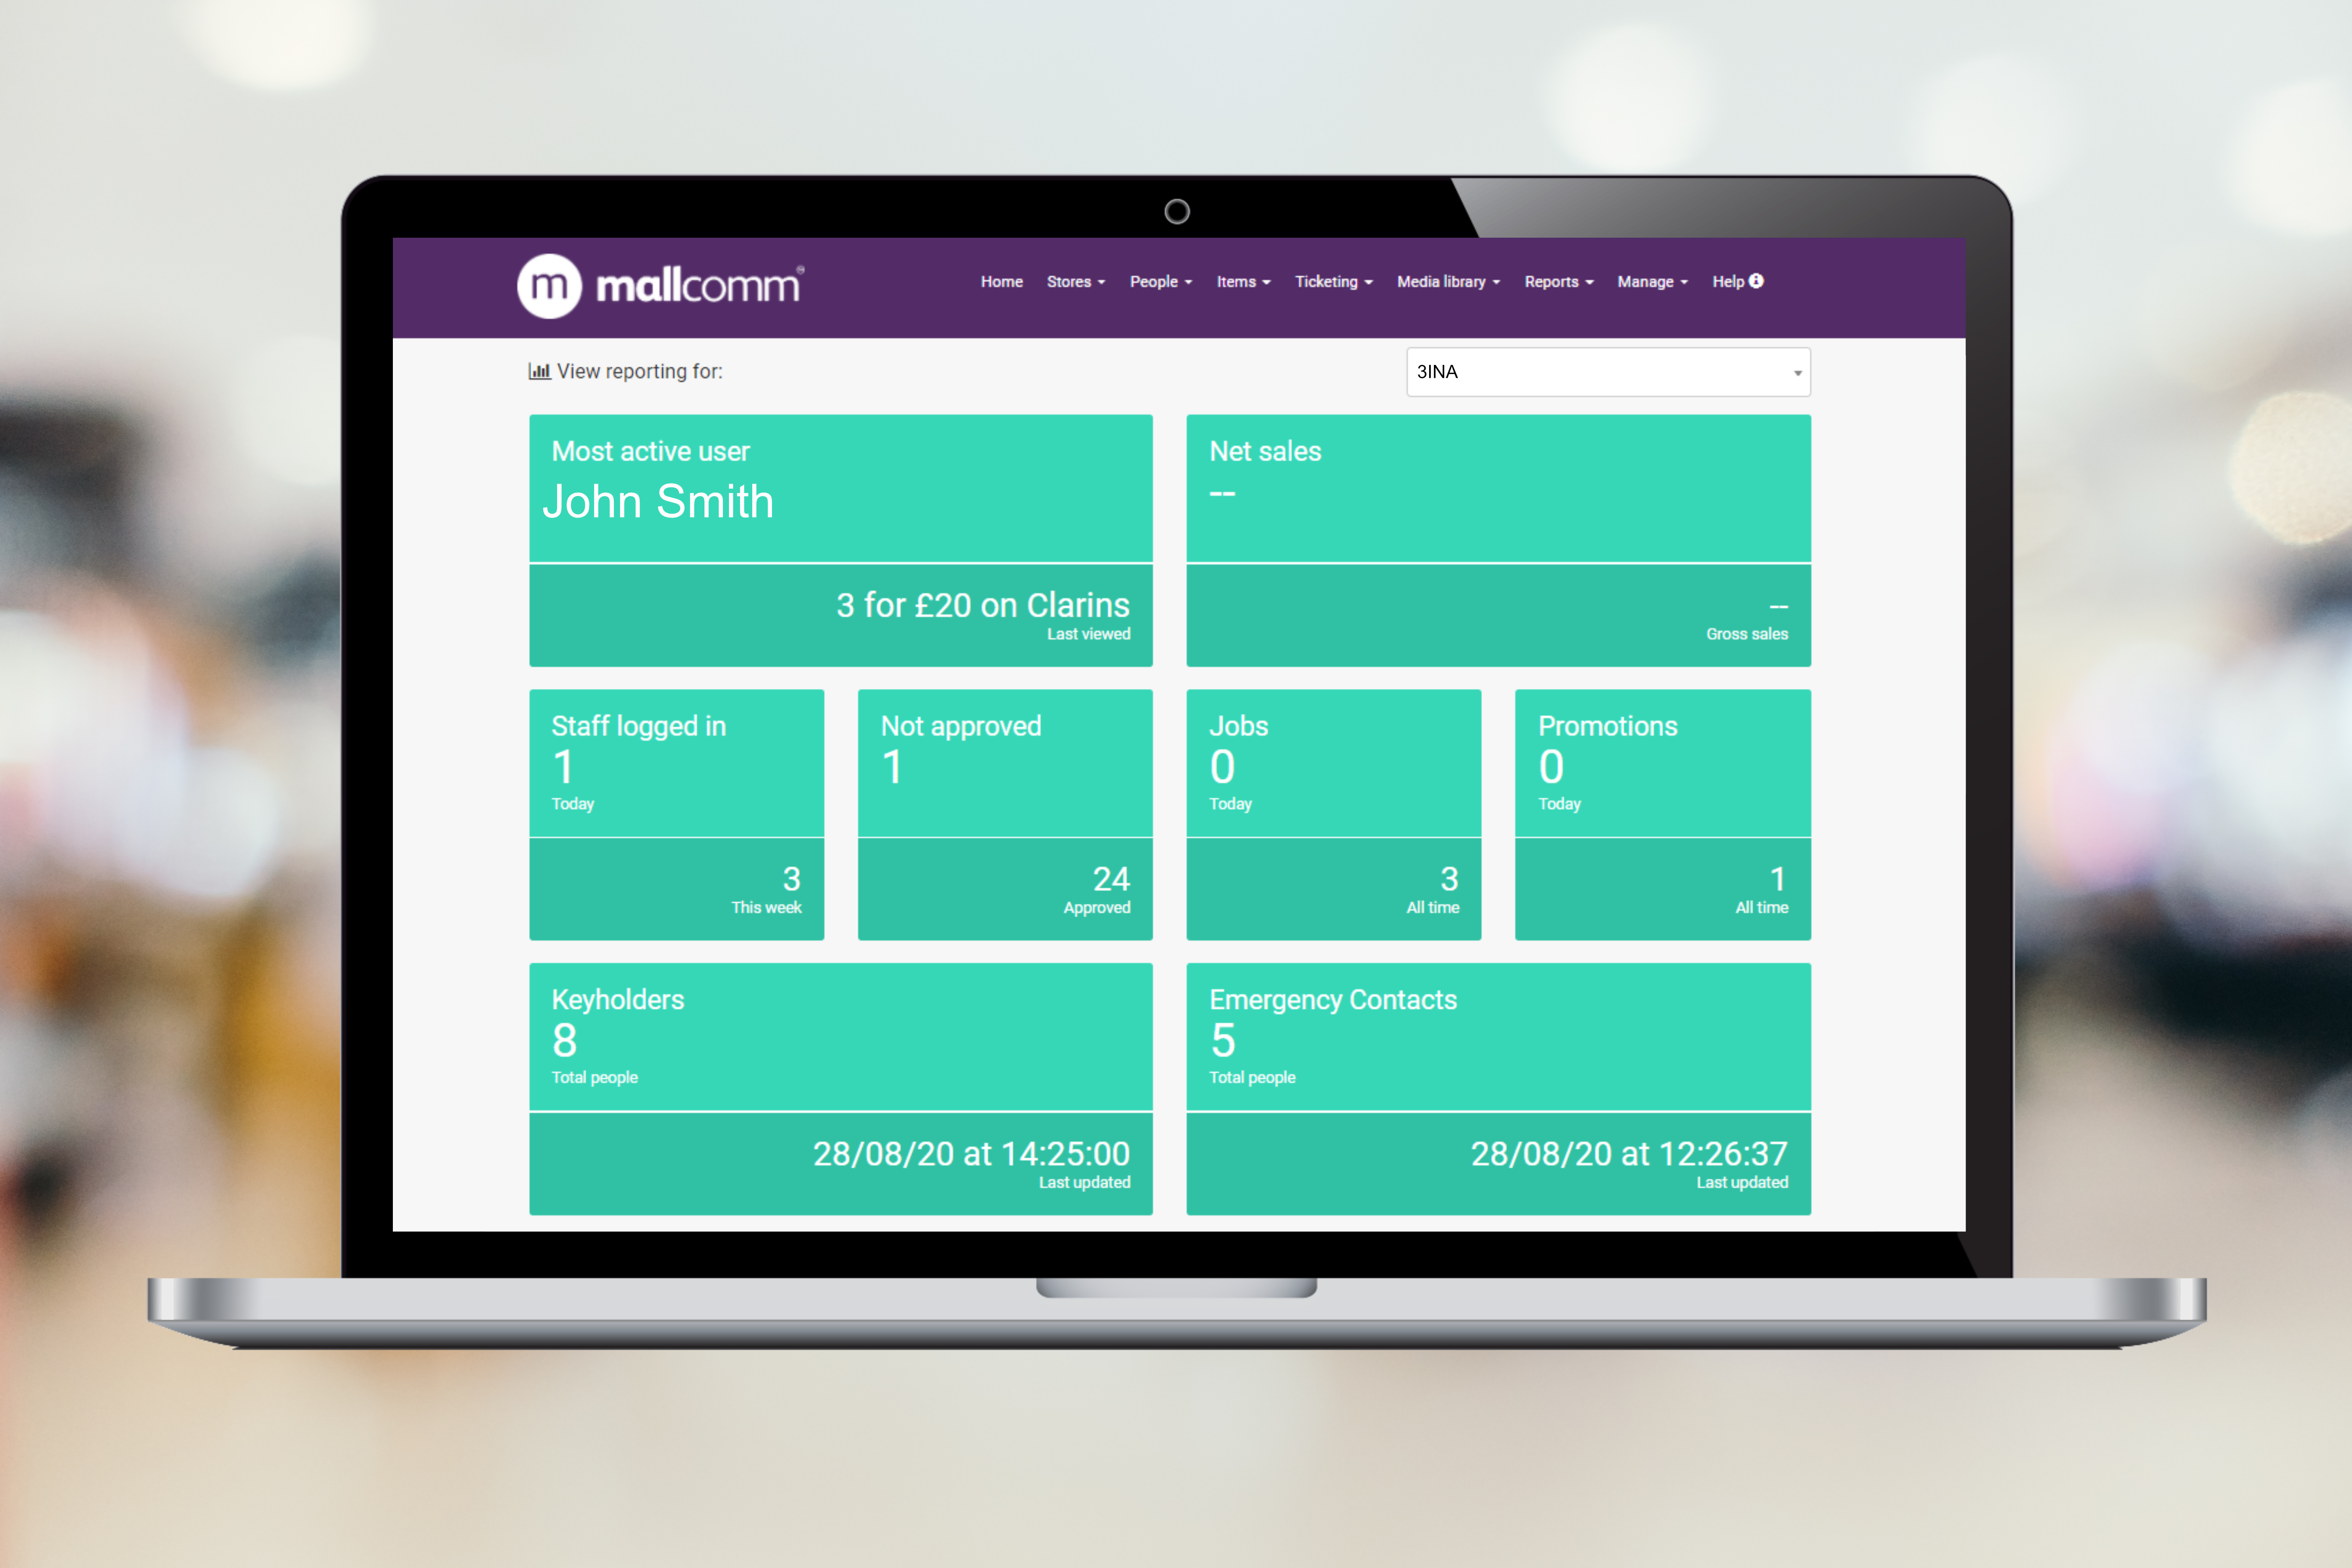
You can also send a direct message to a store using the Send message button or add notes directly to the CRM if you have access to the CRM module.
Adding a store
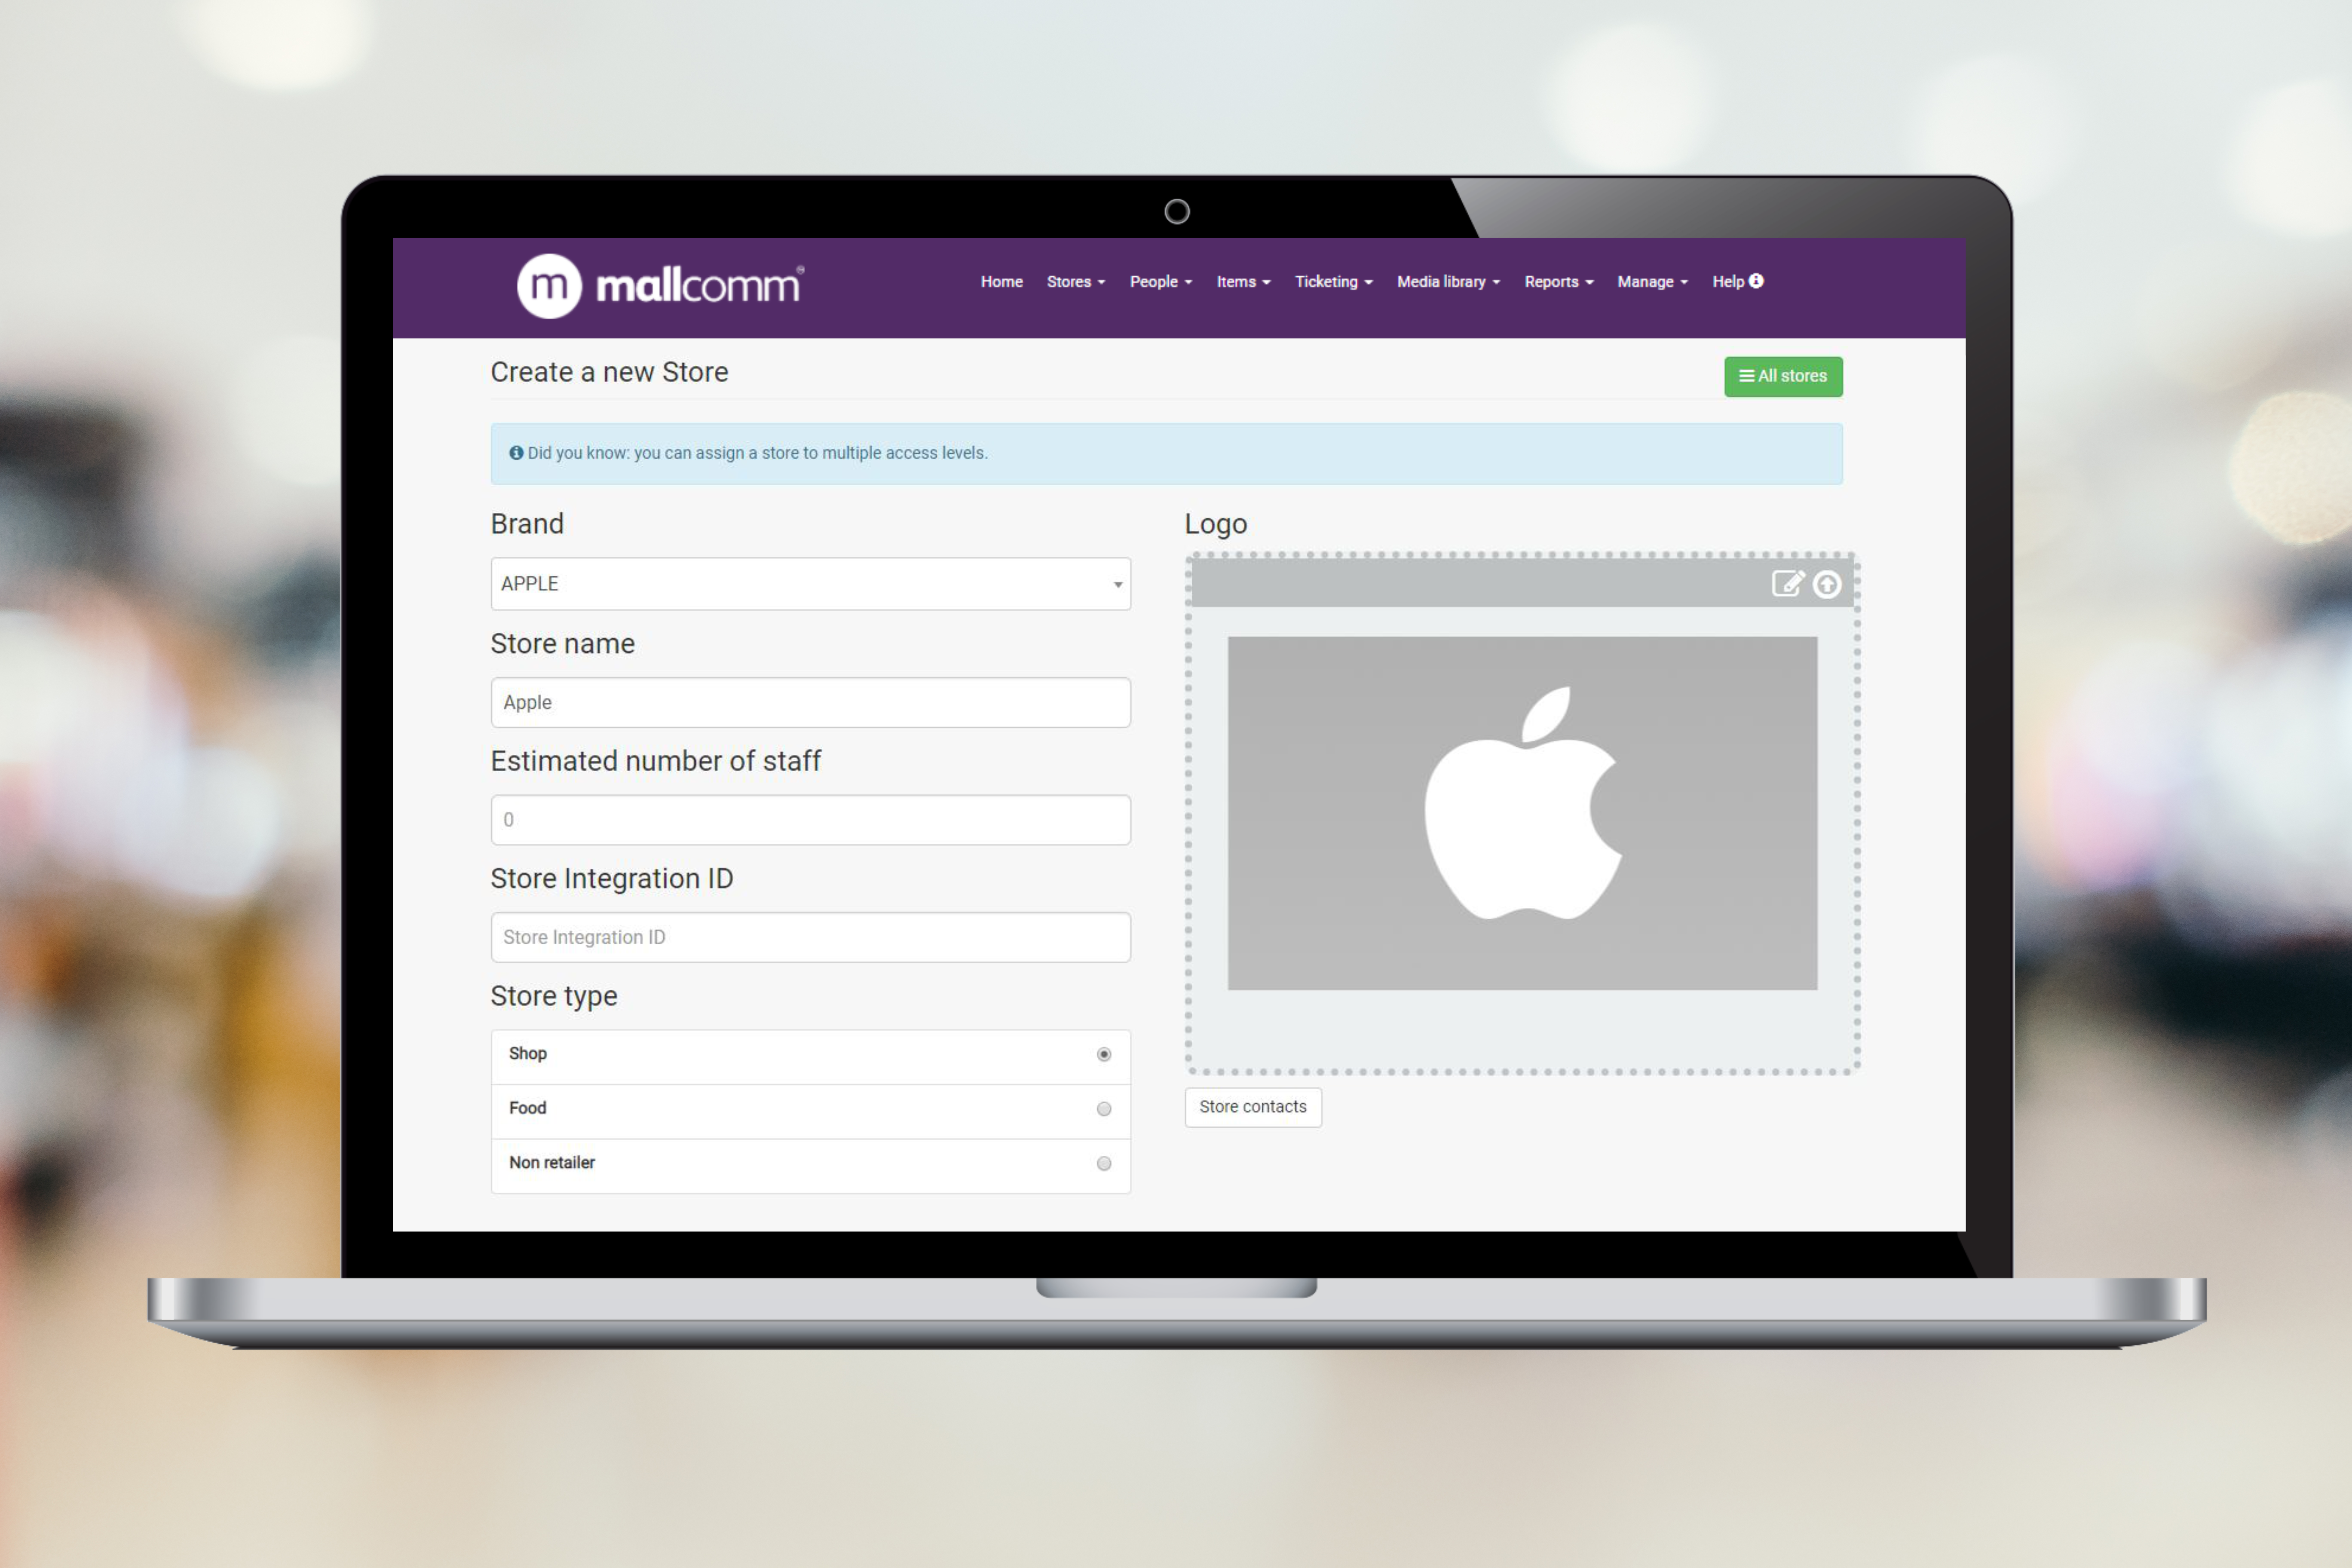
From the stores drop-down, select add store and fill in the information.
The first step is to check if the store already exists in our database from the Store name drop-down box. If it doesn’t, you can click on the Can’t find your store slider. You will then be able to create a store name.
The only other key part on this screen to point out is the "Is this store a retailer" slider. This will almost always be left on unless you are adding a department for your shopping centre such as maintenance or security.
This ensures that the store gets included in the Retail Store Staff and Retail Store Managers access levels. If you turn it off, the store will only go into the All Staff and All Store Managers access level.
The rest of the information on this screen is optional and will change depending on which elements of Mallcomm your centre uses.
Fill in as much as you can.
Editing a store
Once you have located your store you can make changes by pressing the edit icon on the left-hand side.
Updating a store logo
Changing a logo can be done in the edit store page, but before you navigate there, the logo will need to be updated to your media library. To do this go to Media Library in the top navigation bar and add new.
Click on the media upload box, select your file and press upload.
Now when you go back to the edit store page, click the arrow icon to the top right of the current logo and you will open your media library and be able to adjust the logo to the one just uploaded to your media library.
Store logo size
Ideal store logo size is 600px by 360px, this ensures the image is big enough to be good quality while not so big that it impacts load times.
A great tool to get your logos that size is https://Pixlr.com/editor.
We also have a tool to help you built into Mallcomm. If you have uploaded a logo of the incorrect ratio, you can always crop it in the edit store page image editor.
The image crop is next to the upload arrow. Clicking on this will open the tool enabling you to crop the image to the correct ratio.

If you have any questions, feel free to get in touch, support@mallcomm.co.uk.