
The Surveys module is a flexible module that allows you to create surveys for your tenants and easily collect responses then download as CSV or PDF files.
This module has been used in many circumstances including collecting event participation and feedback, employee of the month nominations, applying for parking permits and much more.
Launching a survey is a two-step process. First, you need to create and schedule your survey and then create and assign it to a button for it to appear in your app.
How do I create a survey?
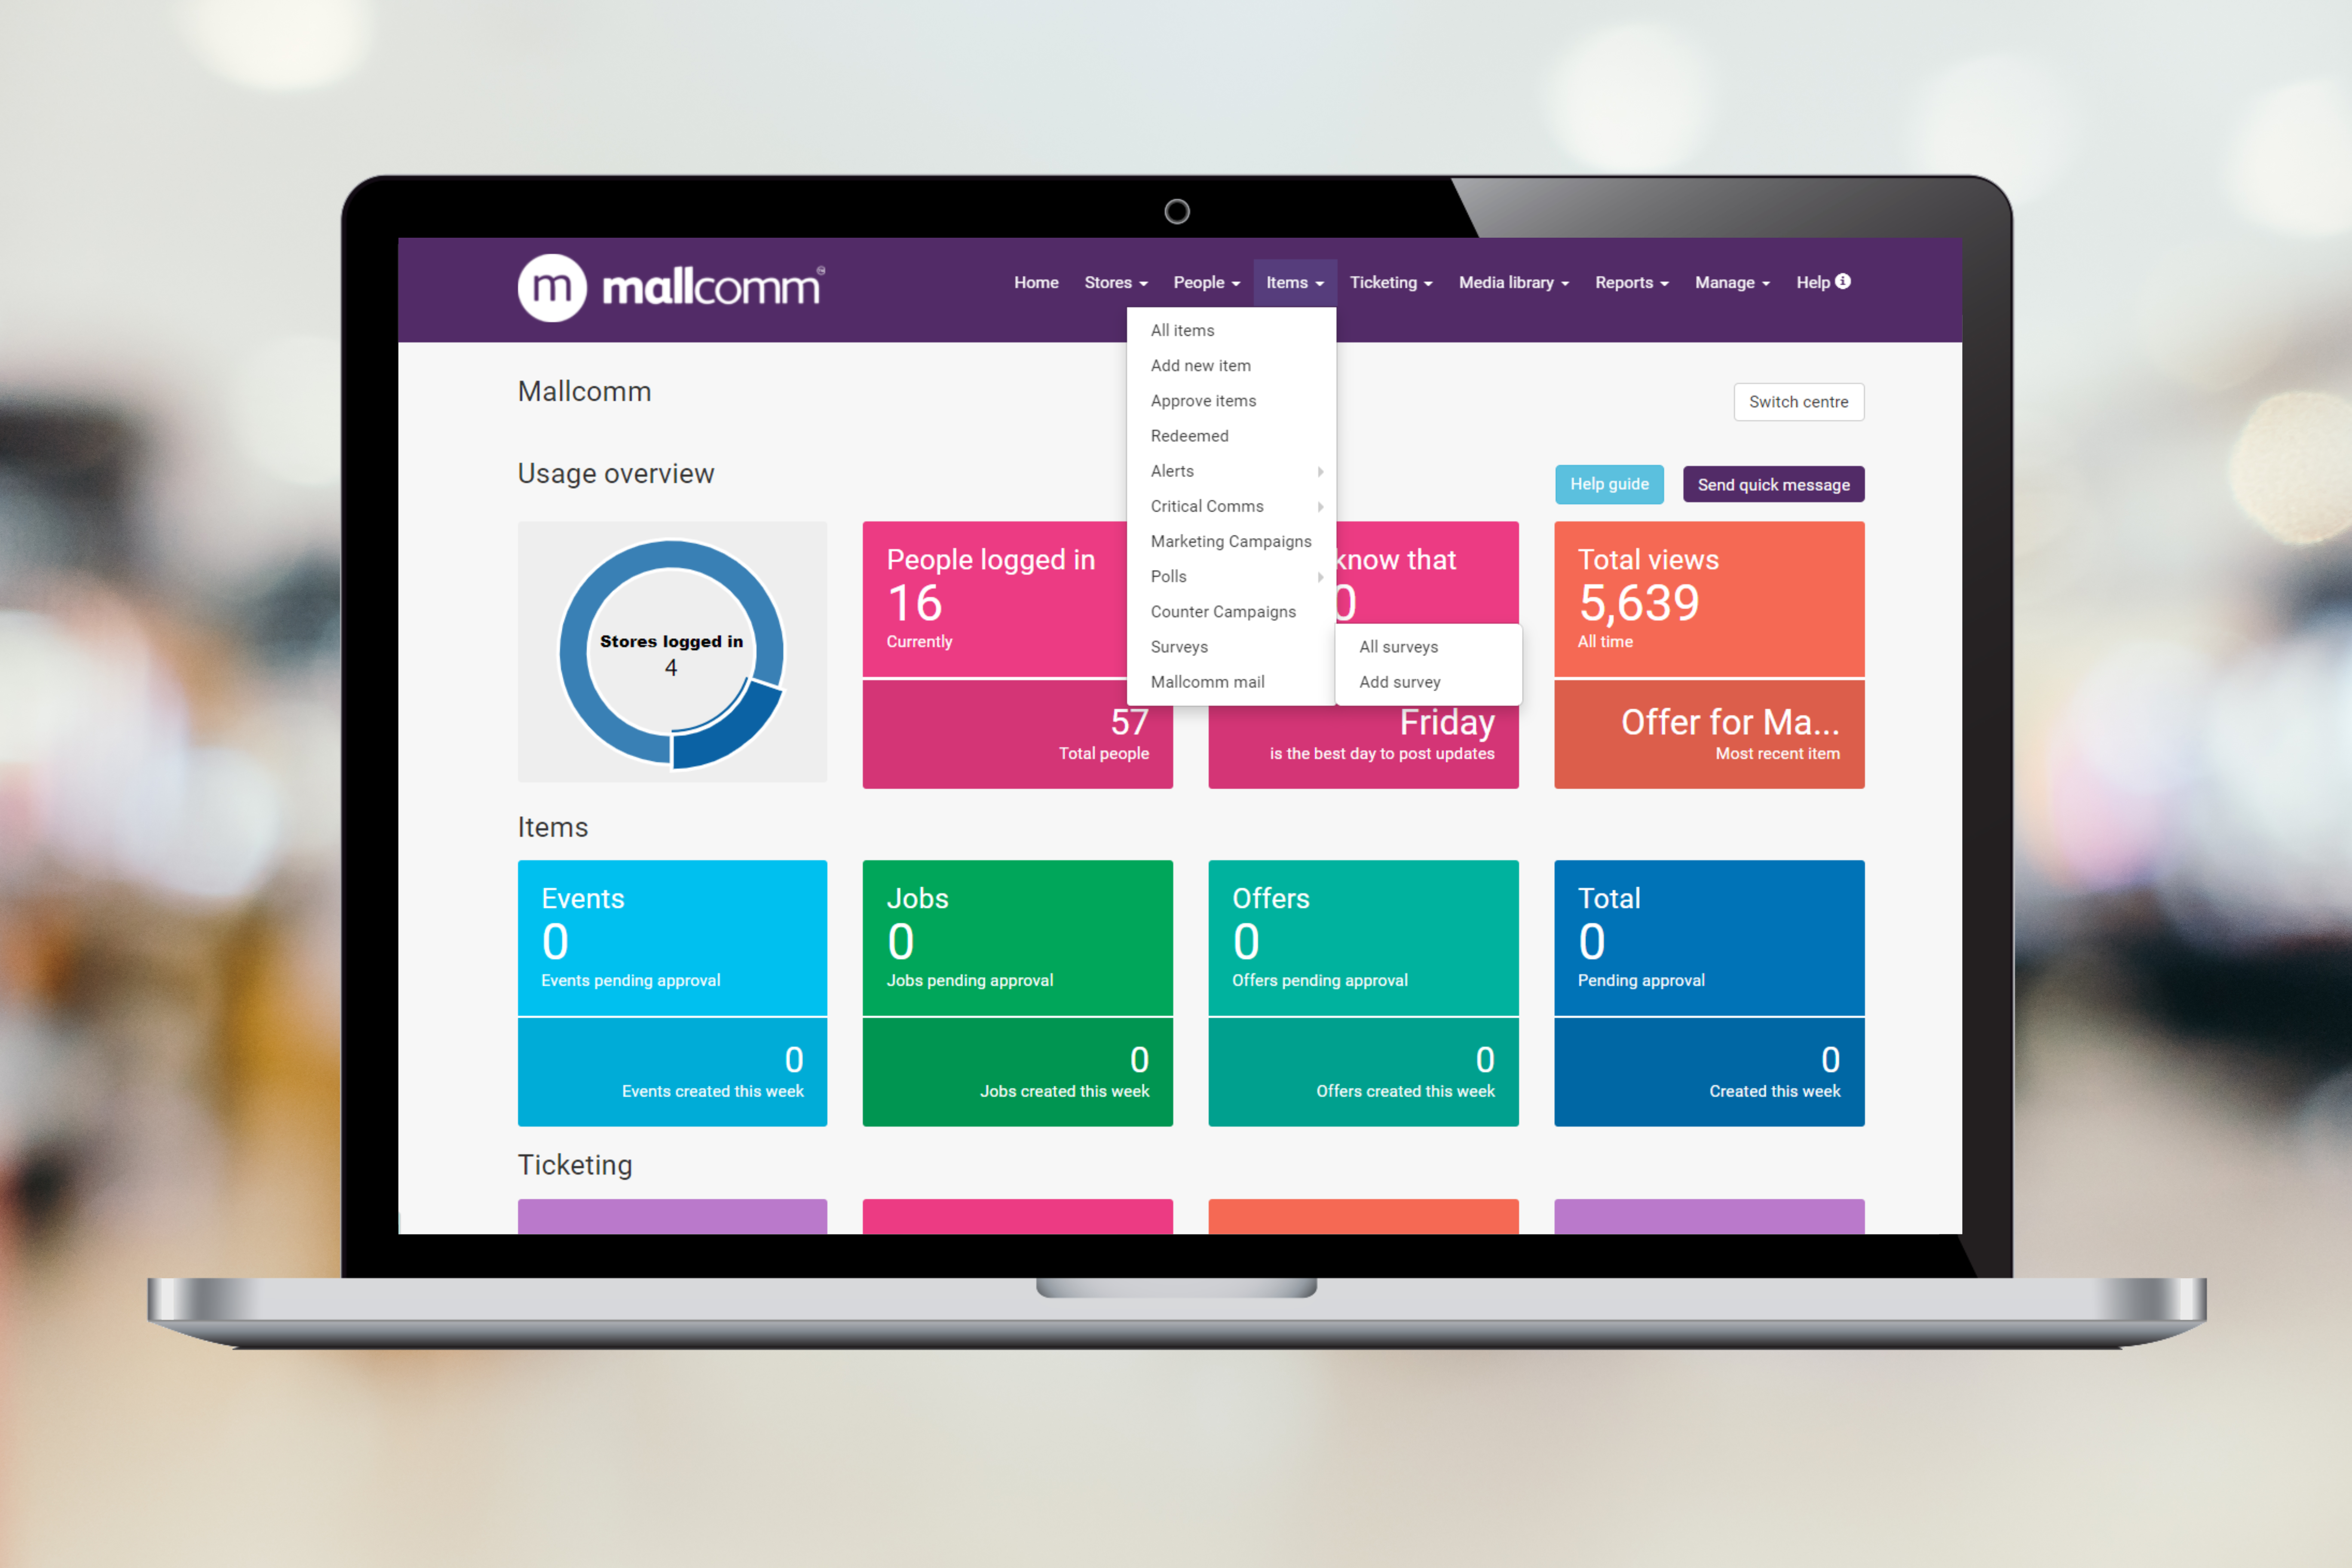
To create your survey select “Add Survey” from the items drop-down menu in the top navigation bar and you will be taken to the 3-stage surveys walkthrough page.
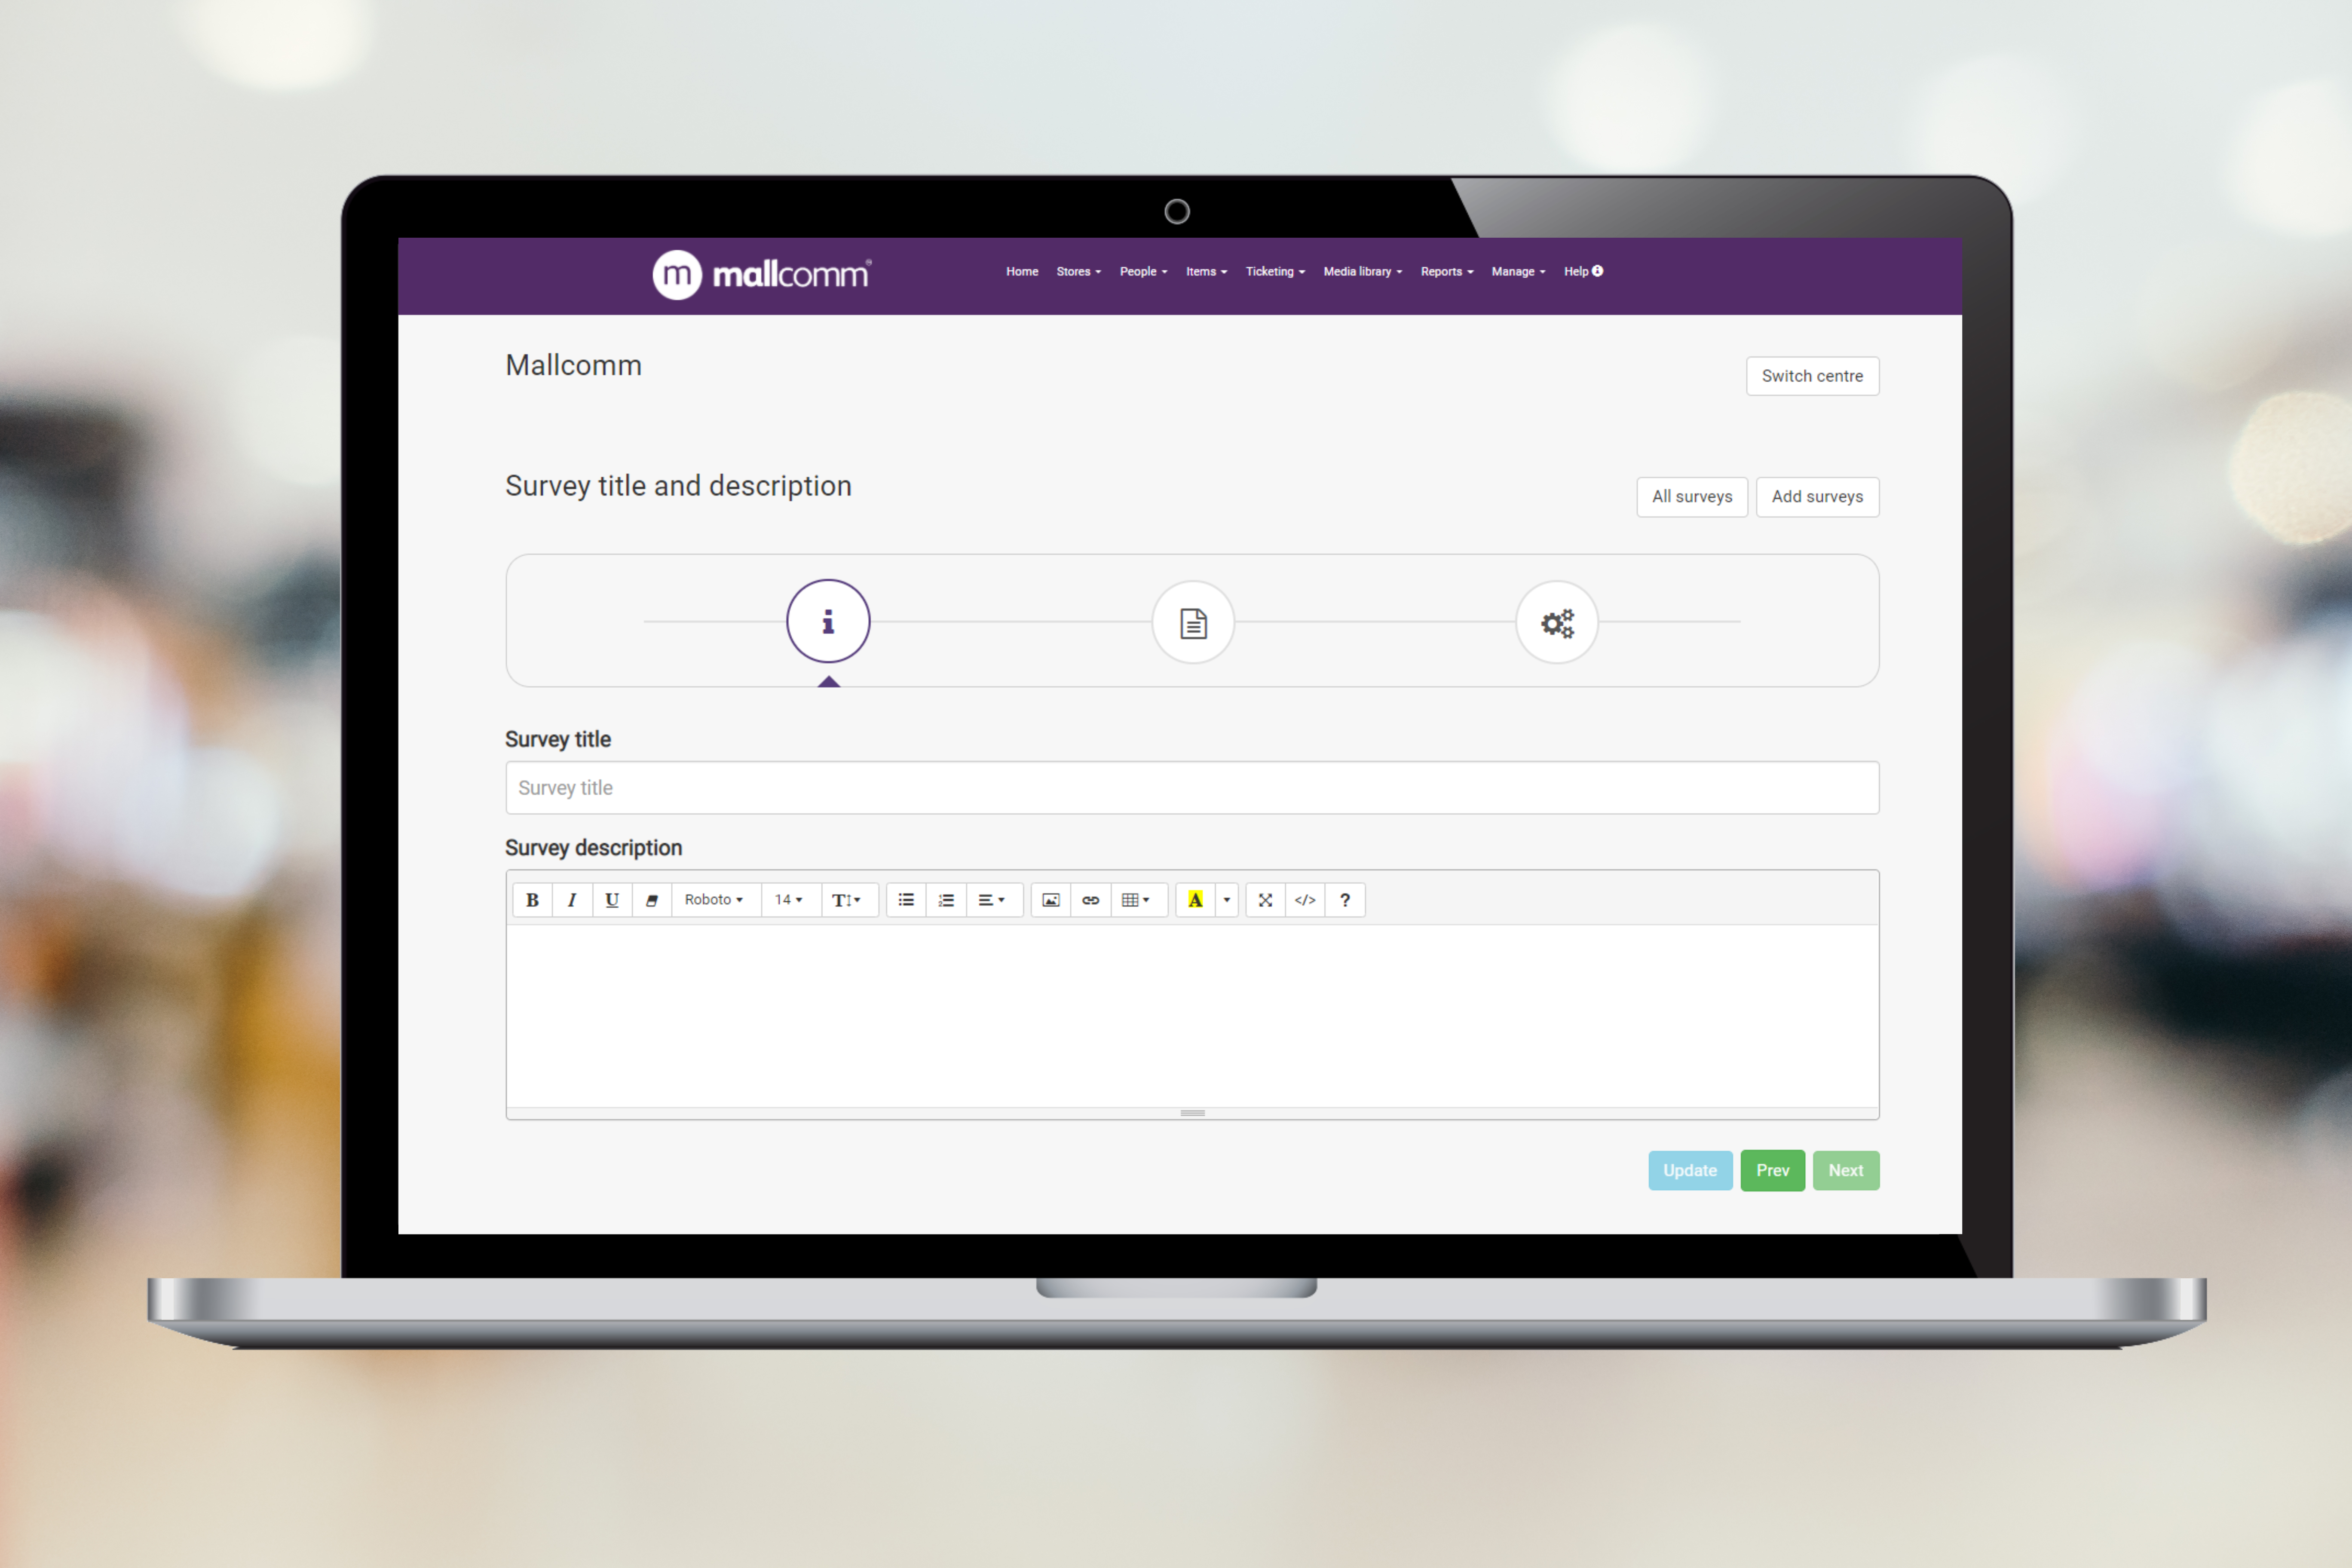
Survey information
Your first stage is adding a title and a description of your survey and then press next.
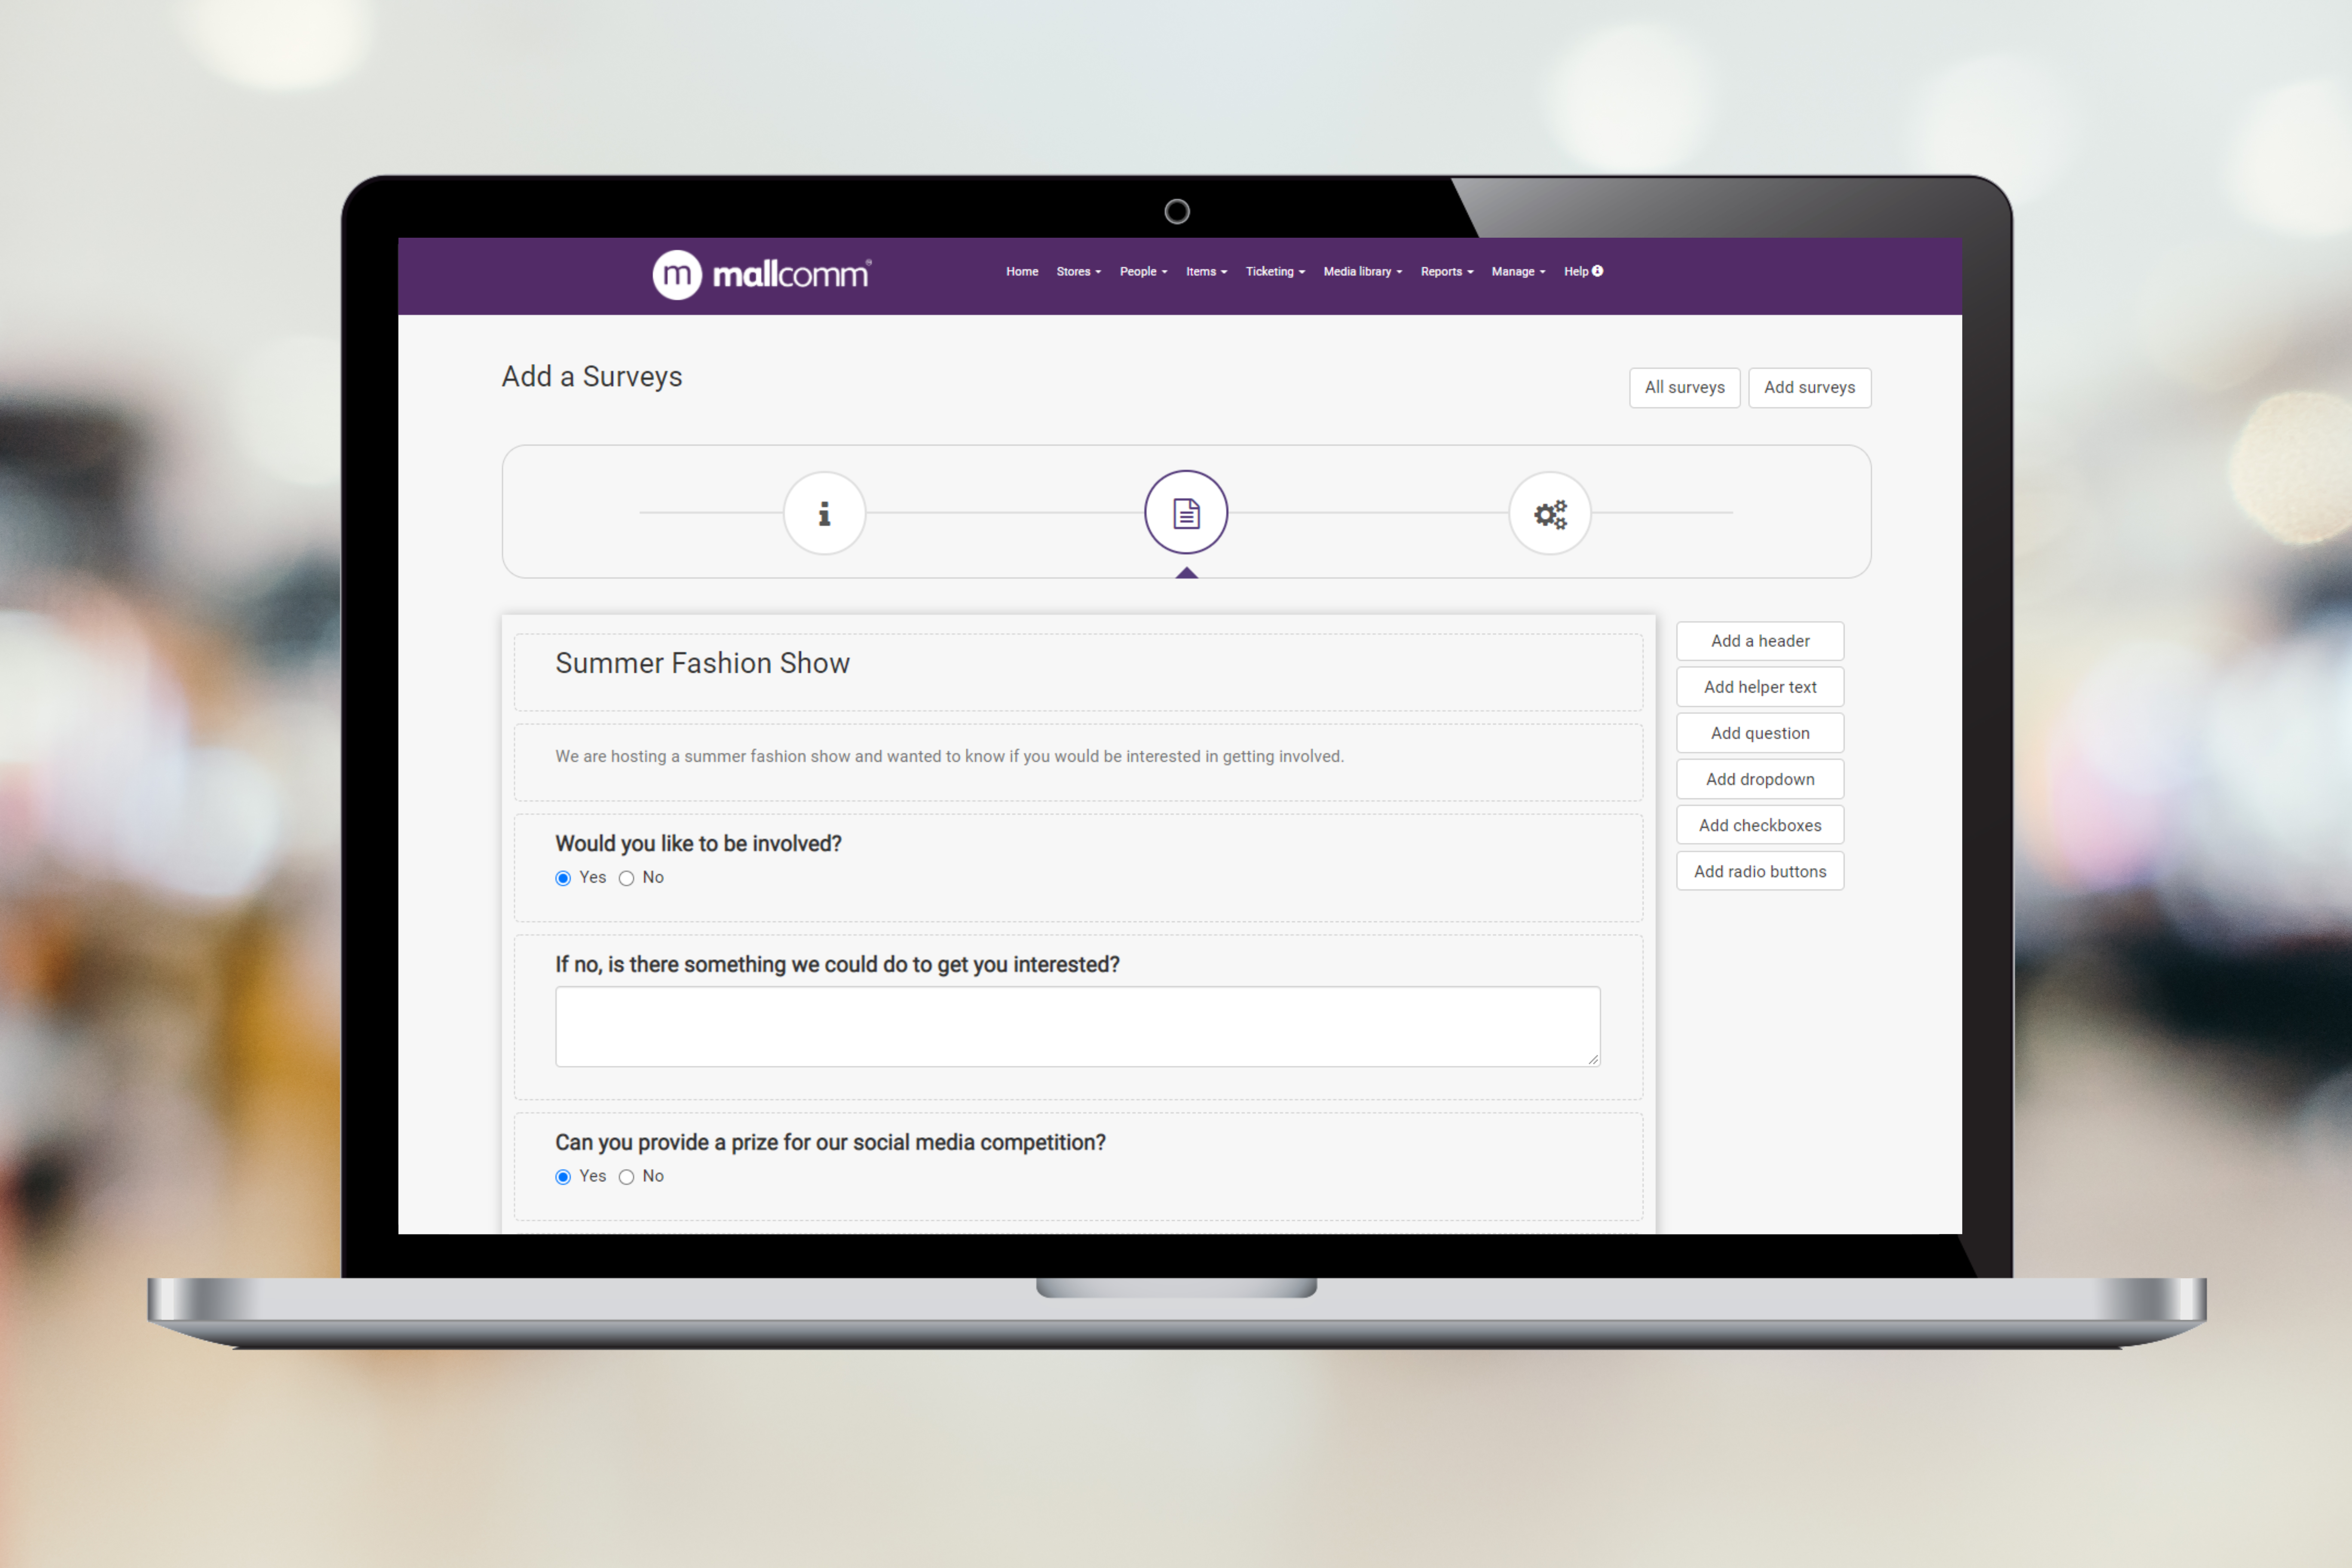
Survey Form
Now here is where you build your survey.
There are multiple question types to choose from and the ability to break it up with headers and helper text. Here is an explanation of each option:
Add a header
Adds header text to your survey, great for breaking it up into sections.
Add helper text
Helper text is smaller text that gives you the chance to explain things a little more depth.
Add Question
A standard question with a text input for the user.
Add a drop-down
Add a question and supply options for an answer that will appear as a drop-down selection.
Add checkboxes
Add a question and supply answers that can be selected by checking the box. Multiple answers can be selected.
Add radio button
As above, however, only one answer may be selected.
Once you have chosen the type of question you want to add, a pop up will give you some further options.
Adding a Question
In this pop up when adding a standard question, you can choose between a question type of text or large text. This refers to the size the input area will appear in the app. If you select Text it will appear as a single line, if you select large text, the area will be larger and the user can write much more.
Label is another name for the title of the question, this is where you will enter the question you are asking.
Full, half or quarter width relates to how wide the input field would look on a computer, we’d recommend leaving at full width, but you can change if you would like.
Finally, you have the option to add whether an answer is required, this means a user has to input something into the answer field or they will not be able to submit their survey.

Drop-downs, checkboxes and radio buttons
The pop up for drop-downs, checkboxes and radio buttons is slightly different. As with the above, you need to give the question a label and decide on the width but then you also need to supply the answer options.

You can add as many as you like by writing them in the field under options and pressing the green plus to add more choices.
You can easily reorder your questions using the up and down arrows.
Survey Options
This is where you can set messages and schedule.
At the bottom of this page you can set the dates that your survey will be active for entries, however, you can have your survey button appear in the app before entries are being accepted and have a message to let people know what is coming.
Pre-start message
This is where you can enter a pre-start message, a message that will appear if a user goes to the button before the survey has started.
Post entry message
Next is the post-entry message, here you can add the message you would like to be displayed when a user has completed and submitted the survey.
Survey ended message
Then the survey ended message, a message that will appear when the survey is no longer open for entries but the button still appears in the app.
Finally your dates. This is the time frame that the survey will be open for entries.
Once you have completed that, press next and you’re ready for part 2, adding your survey to the app.

How do I add a survey and get it to display in my app?
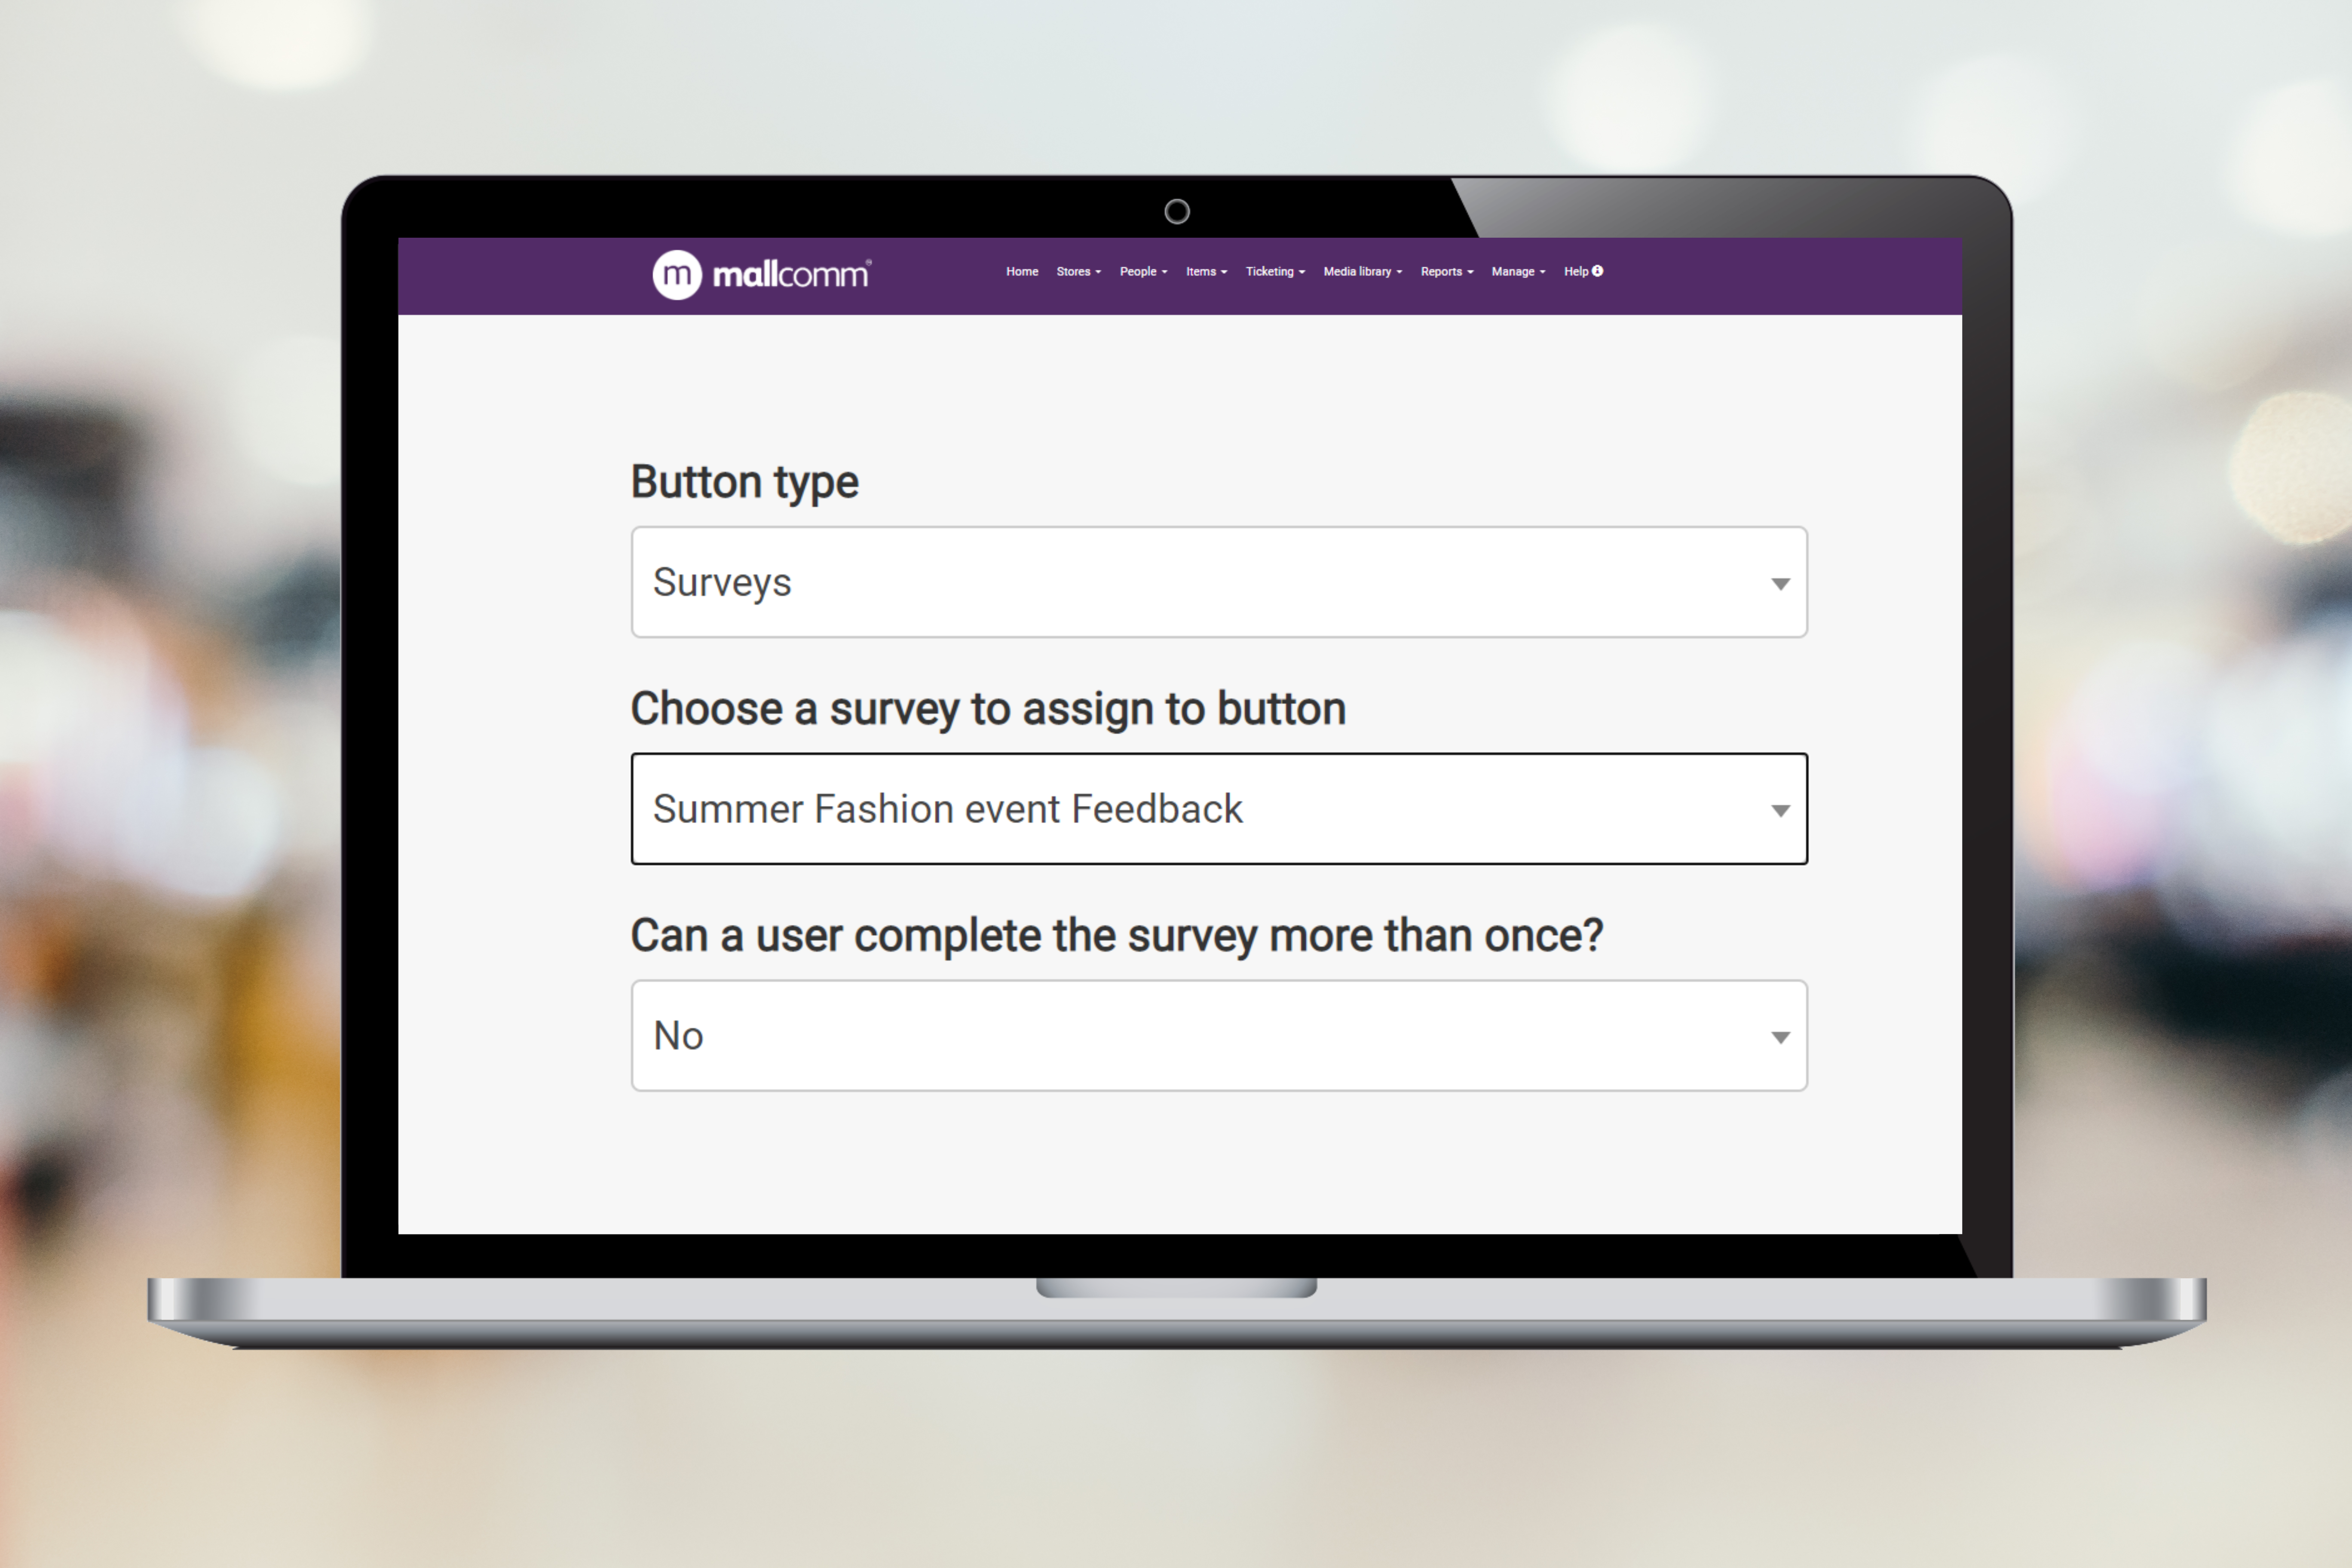
Once you have created your survey you need to display it in the app, to do this you will need to create a button.
In the top navigation menu go to Manage and “Manage your buttons” and add a new button.
Here you would follow the standard button creation process but for button type select Surveys.
You will notice that two new fields appear underneath.
First, you can select which survey you would like to display in the button, then you can set the option that allows users to complete a survey more than once.
Continue to finish the button by setting your permissions and access levels and press Create.
You will now see your survey in the All Buttons screen and you can drag and drop it to where you would like in the app.
Where do I see survey responses?
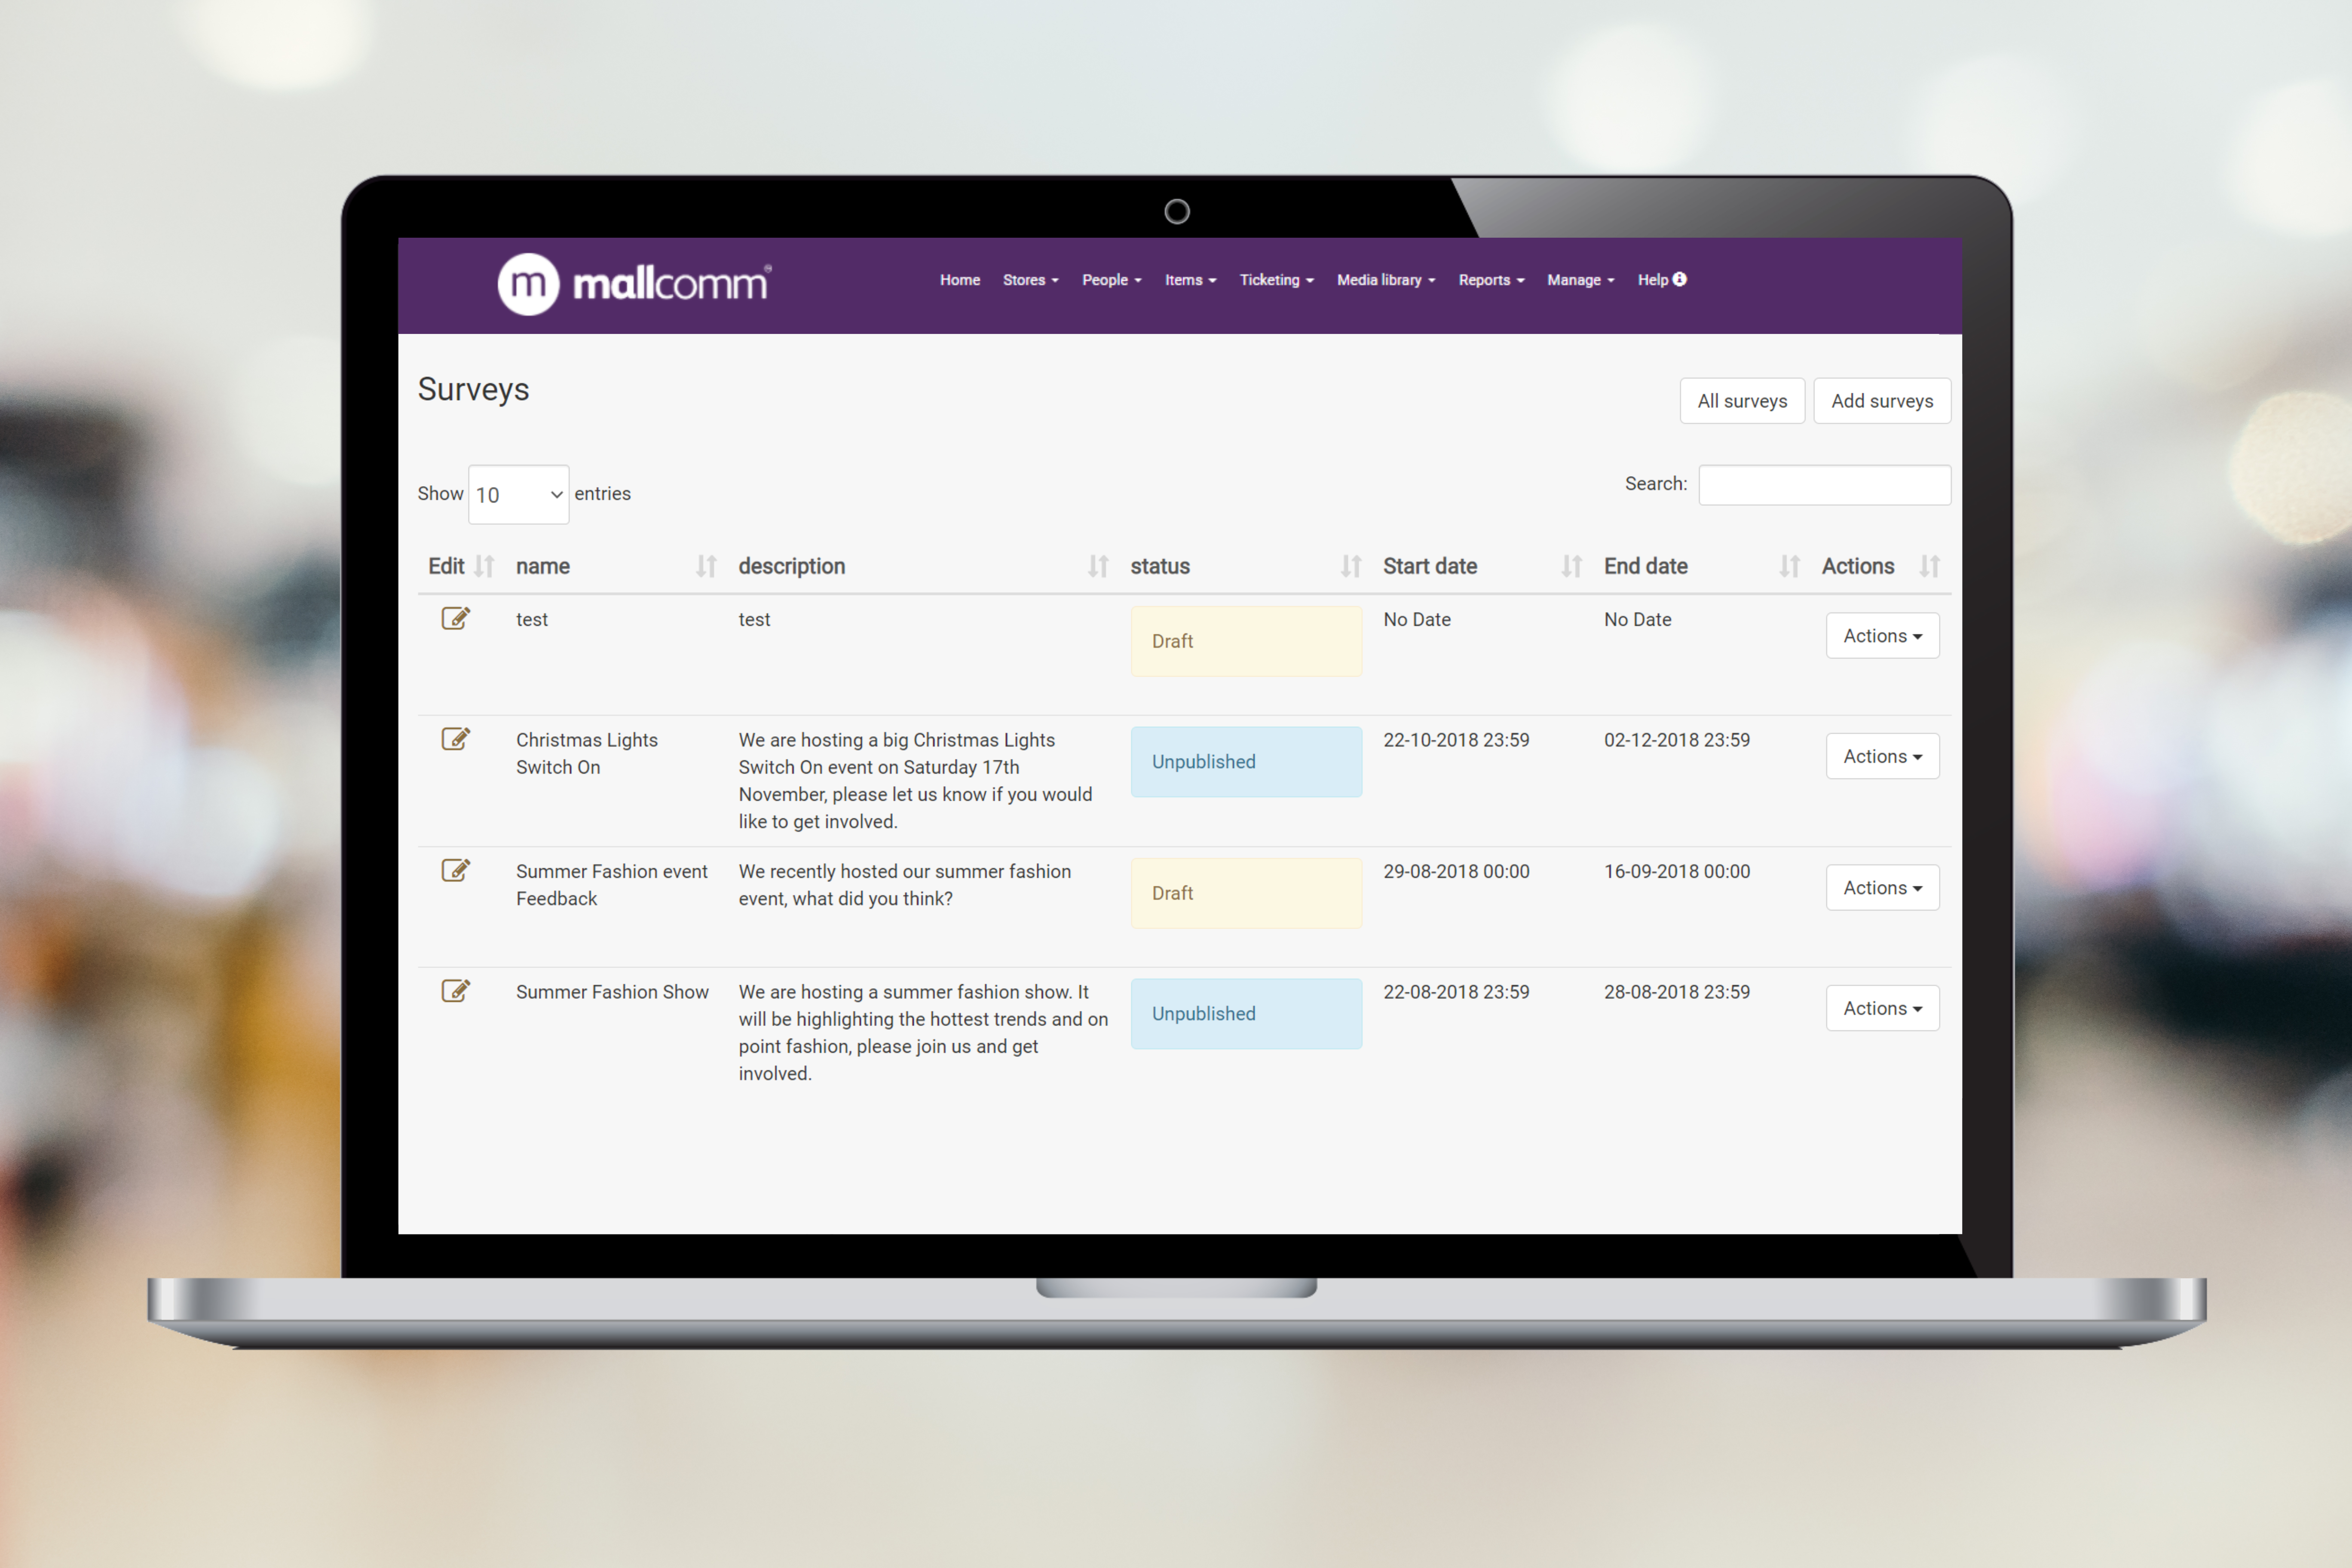
From the Items drop down you can go to Surveys -> All Surveys. Here you will see an overview of all of your surveys past and present.
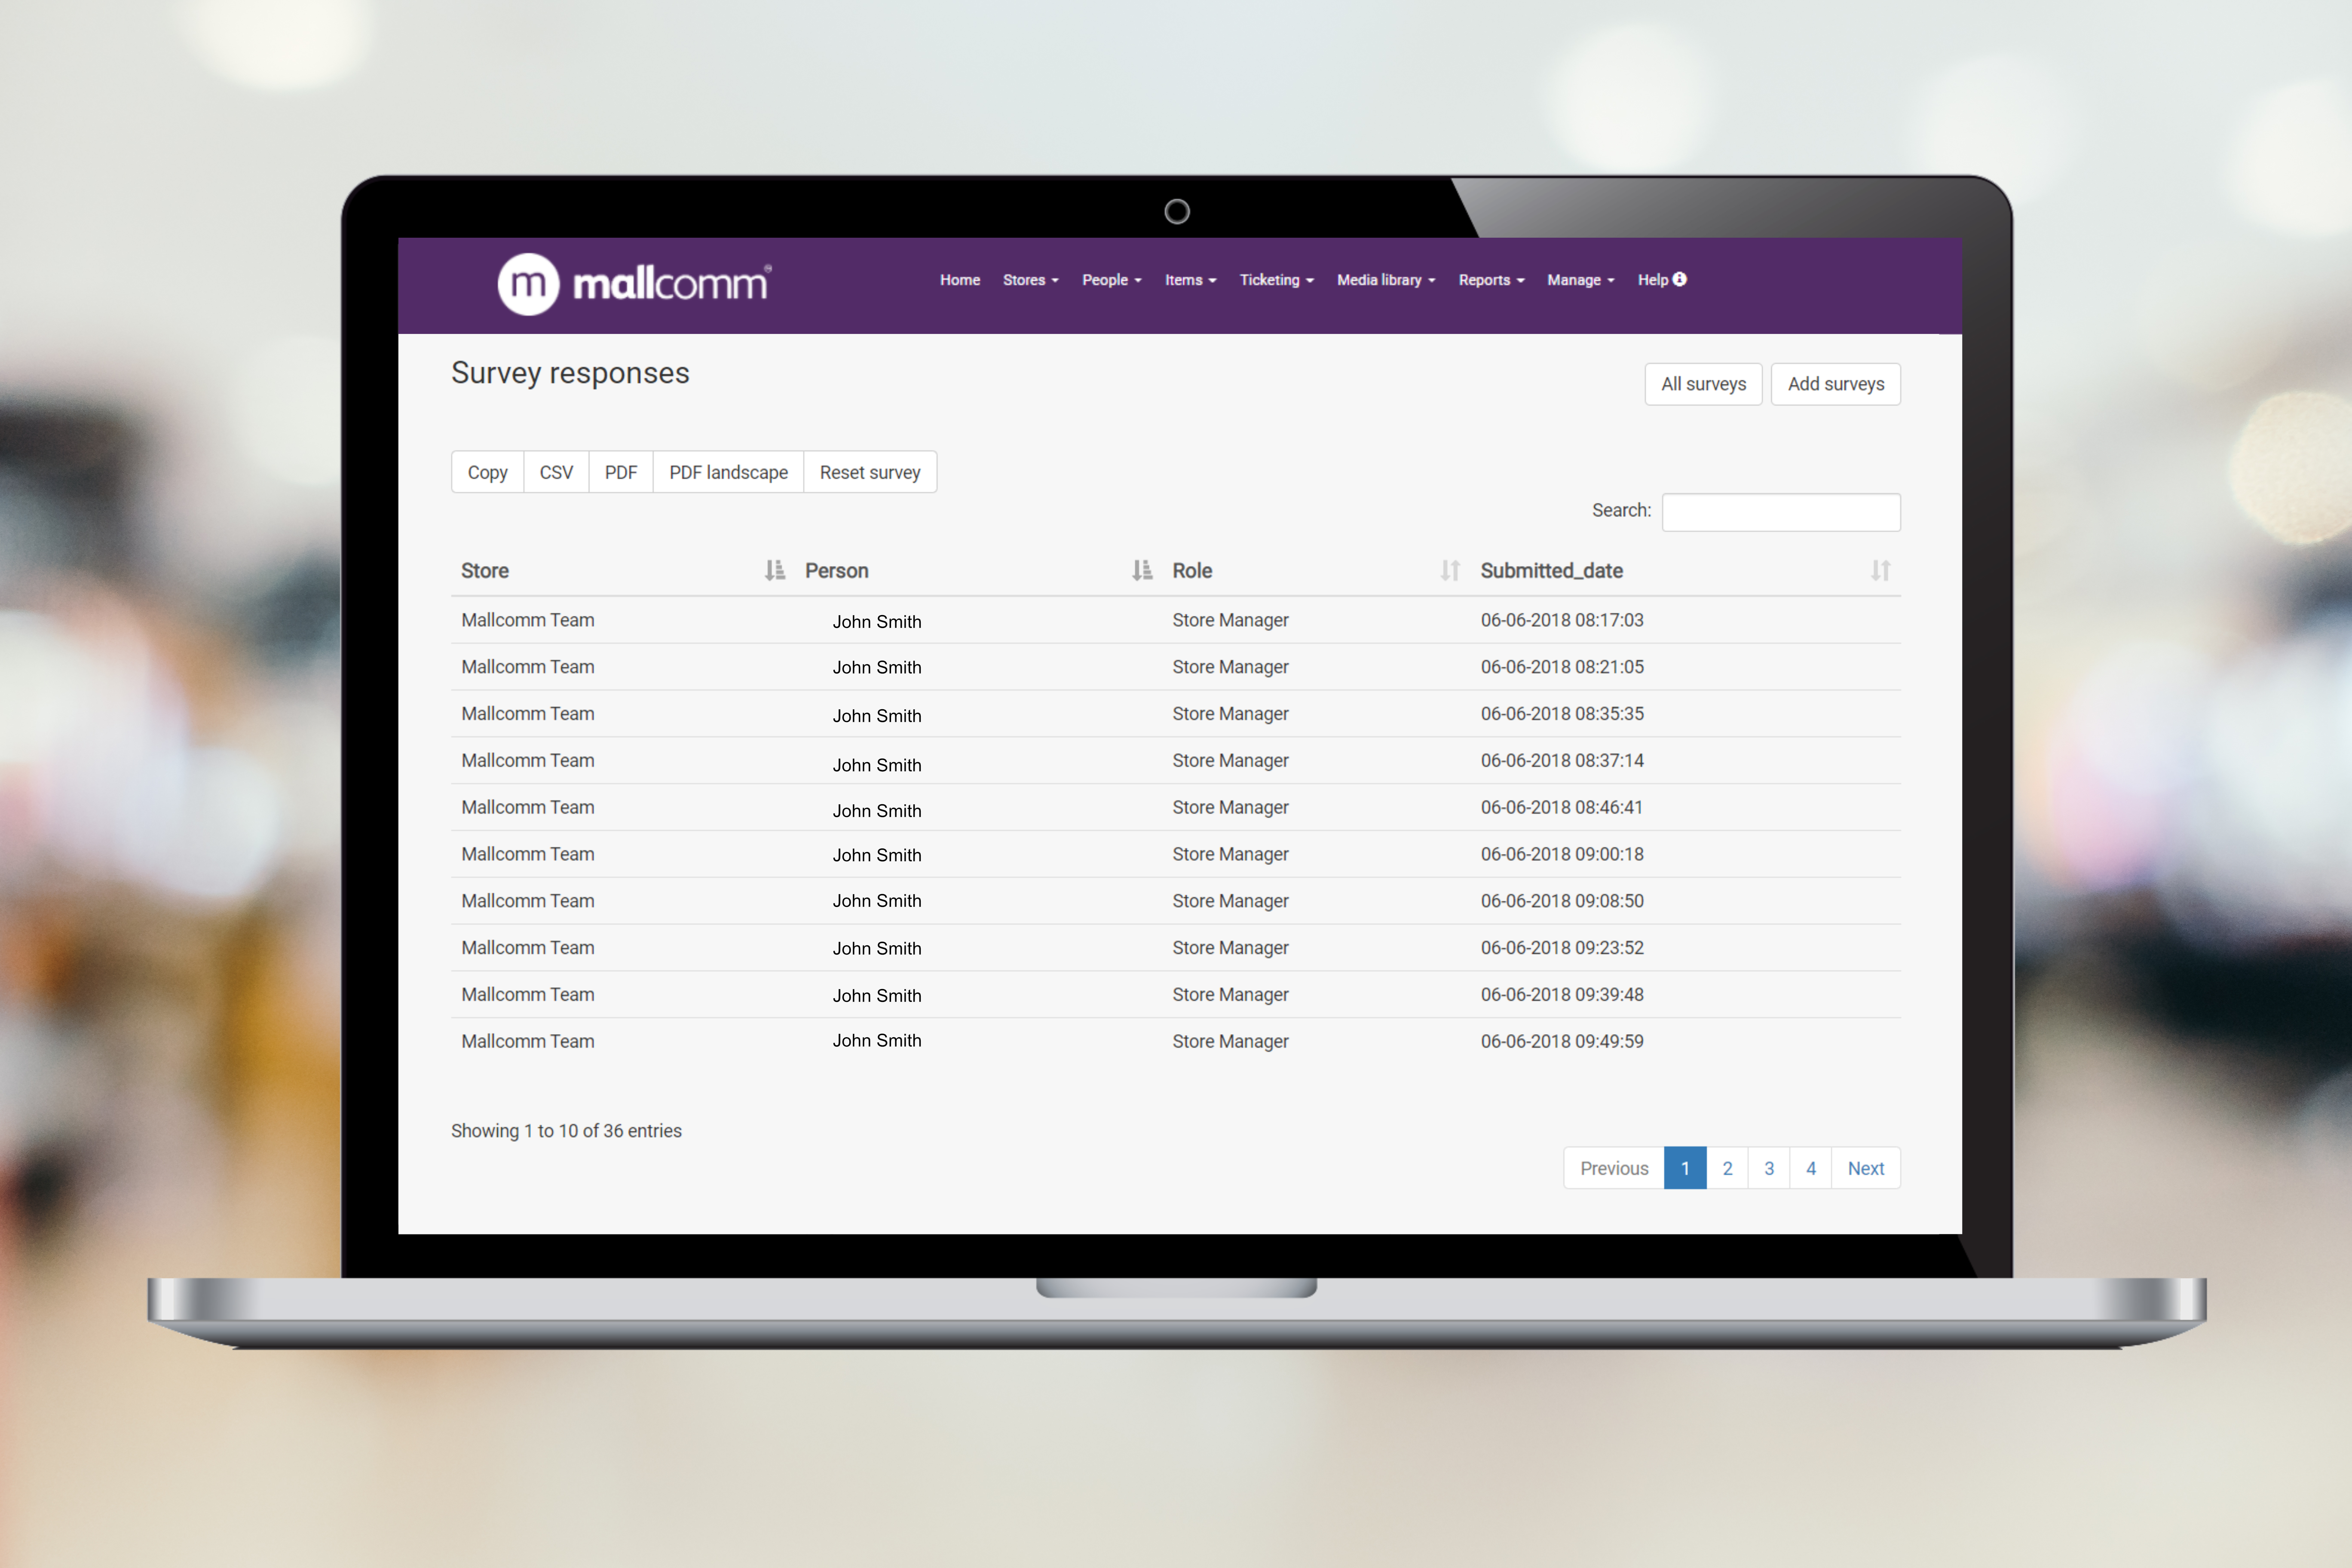
On the right-hand side, you will see the actions field. Here you can select responses and see a list of everyone who has filled in your survey.
From here you can also use the buttons above the responses to download a document containing their answers.
How can I edit a survey?
From the same page, on the left-hand side, is the edit icon. If a survey is live and has already had entries then you will not be able to edit the actual survey, but can still edit the messages.
If you need to edit a survey that has already started you will have to go to responses and press reset survey, this will delete all of the entries and enable to you edit the survey.
Please don’t forget to download the responses before doing this as once you have reset the entries, they cannot be recovered.
How can I tell people there is a new survey?
The best way is to create an item in your news feed with all the information and then also send an app alert that will take people to the item.
Once it’s live you can use the actions menu again to send a message. You can choose to send a message to everyone or split by people that have completed the survey or those that haven’t.
I have added a survey but it is not displaying
Please check your date settings first. If you go to All Surveys, Edit and in the third tab, Survey Settings, you will find the dates at the bottom.
If that looks fine, check your button permissions and access levels. Ensure that you are in a store that is in the access level set in the button permissions.
Further help
If you have any further questions or would like more information about this module, either get in touch with your account manager or send an email to support@mallcomm.co.uk and we can tell you how you can activate Surveys.